

Cutting a sheet of snowflake gift tags with the Sekka Zusetsu Snowflakes Gift Tag Generator
Difficulty: easy. Time: 5 minutes to set up, a few minutes to cut a sheet. Best methods: laser cut 3 mm plywood or acrylic, or a two colour 3D print.
Each snowflake sits over the end of its tag and is engraved whole. Where the arms reach past the edge, the tag follows them with a small margin, so nothing of the flake is cut away.
Every name you paste becomes its own tag, laid out on one sheet with a gap between them, so a whole family's presents come off the laser in one job.
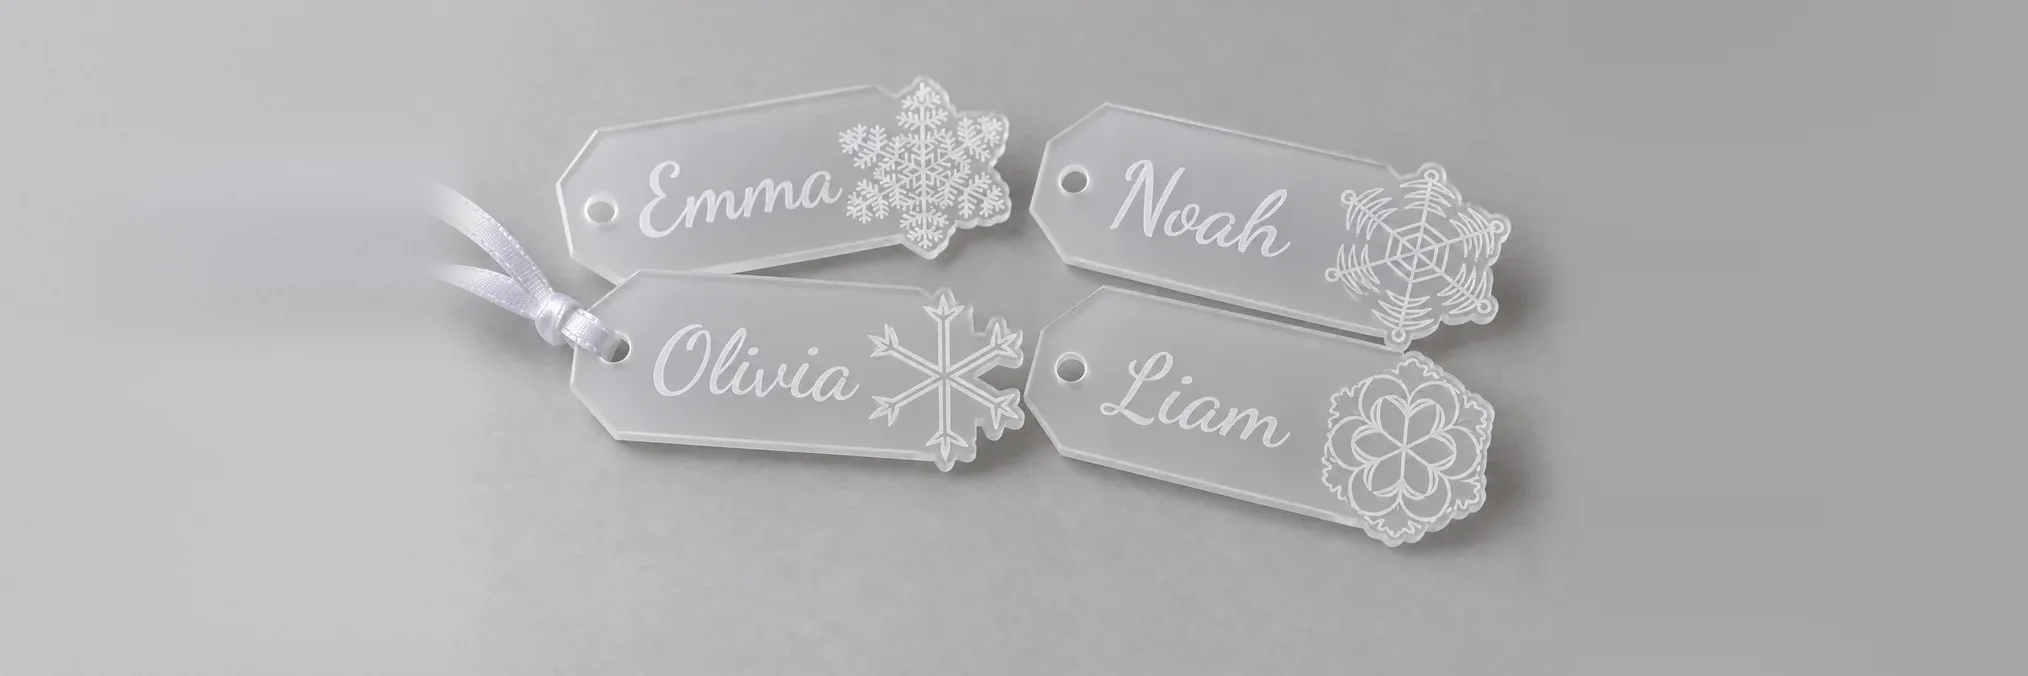
What you need
- 3 mm plywood or acrylic, or 1.5 mm for lighter tags
- Ribbon or twine
1. Paste the names
Type or paste the names under One name per line, up to 30. Pick a Font; script fonts suit gift tags. Each name shrinks to fit beside the snowflake, and a warning appears if one gets too small.
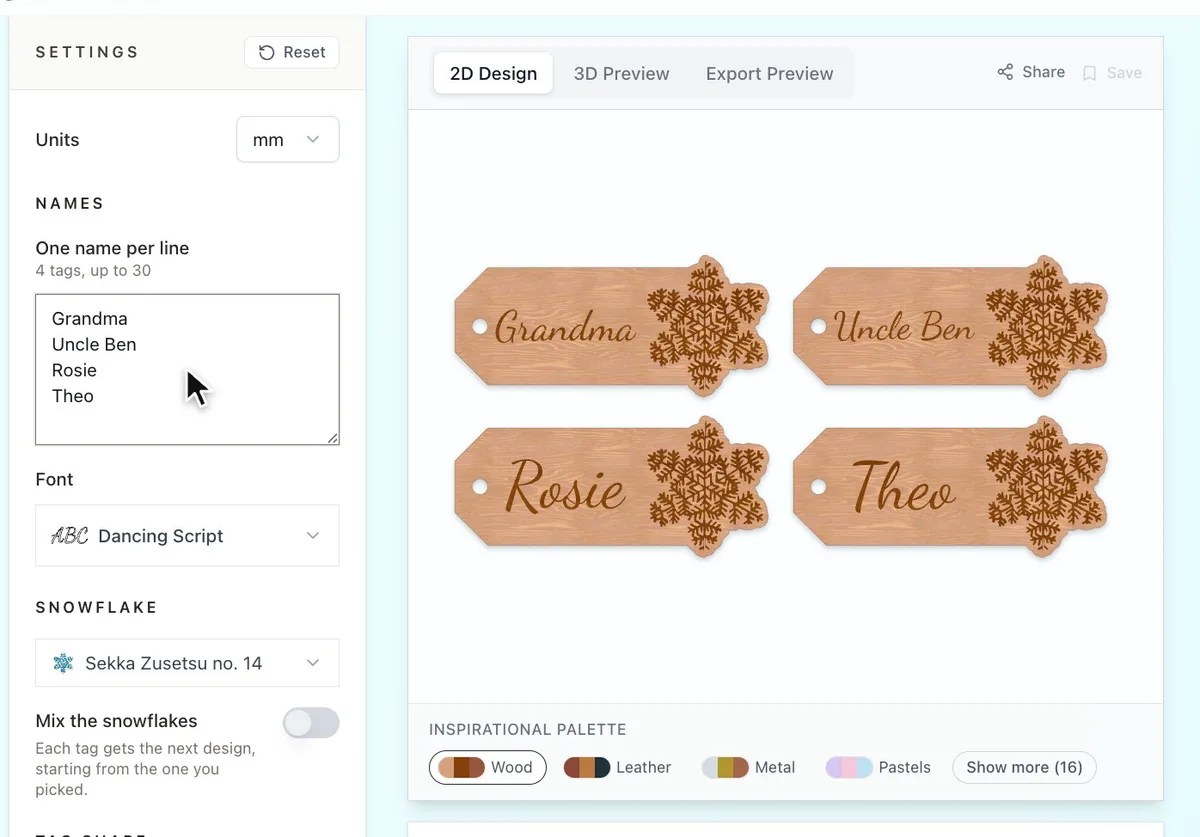
2. Pick the snowflake and the shape
- Choose a Snowflake from the picker: eight drawn designs or 77 crystals from Sekka Zusetsu, the 1832 Japanese book of snow crystals. Turn on Mix the snowflakes so each tag gets the next design from the same collection.
- Pick a Tag shape: a classic Gift tag, Rounded or Round. Round tags carry a smaller flake at the bottom with the name above it.
- Set the Snowflake size and Name height, and the Ribbon hole to suit your ribbon. Snowflake margin is how far the tag reaches past the snowflake: the whole flake is engraved and nothing of it is cut.
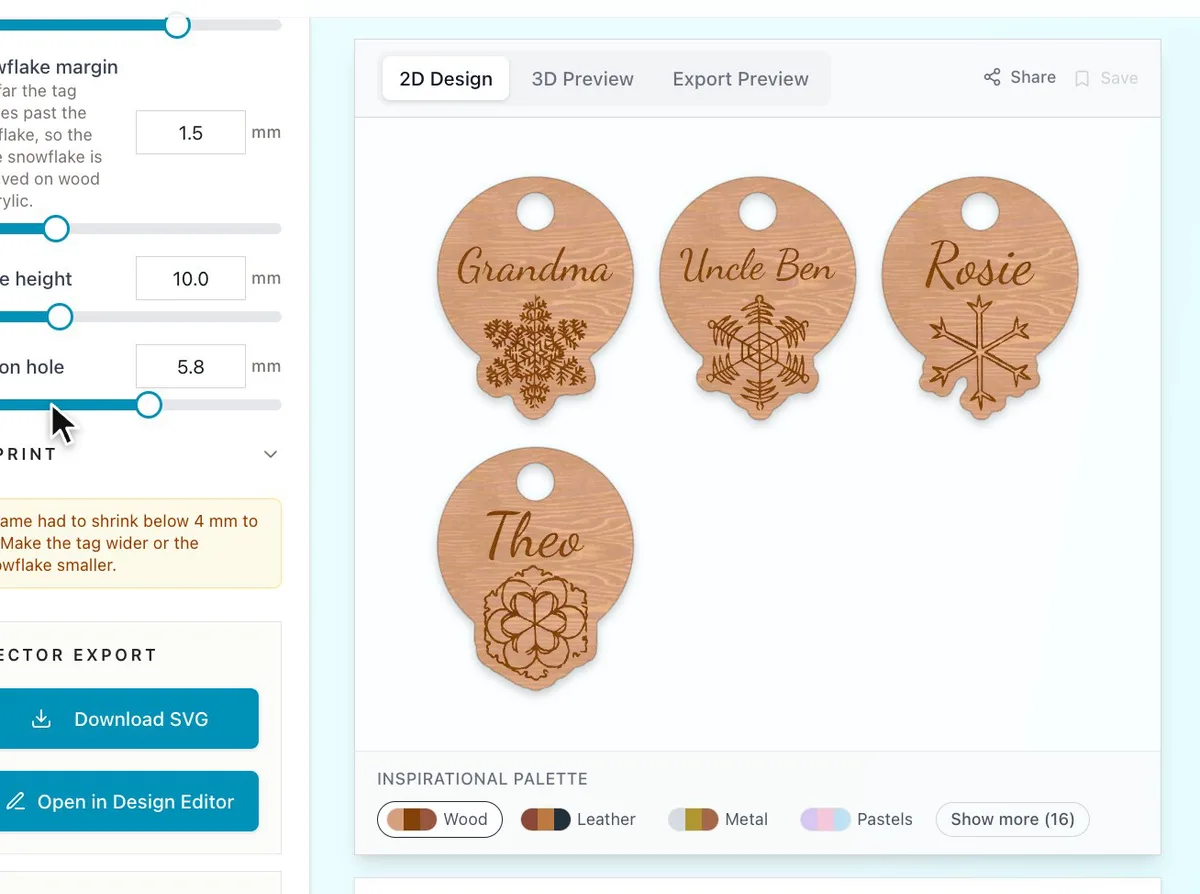
Choose your build method
Laser cutting
Engrave and cut
- Download the SVG. Engrave the blue layer first, then cut the red layer.
- On wood, mask the sheet first so the engraving smoke does not stain the tags.
- Thread a ribbon through each hole and tie it to the present.
3D printing
Print settings
- Use the 3MF to print the name and snowflake in a second colour, such as blue on white.
- Print flat with no supports. 2 mm thick is enough for a gift tag.
Next steps and project ideas
- Cut them from mirror acrylic and hang them on the tree after the presents are open.
- Add the year after each name for a keepsake.
- Make place cards for Christmas dinner by pasting every guest's name.
Take the design into your software
Was this guide helpful?
More in Workshop and crafts
Keep up with MyLaserTools.
Email me about new tools, product updates, tutorials, and occasional MyLaserTools offers. Unsubscribe at any time.
© 2026 MyLaserTools.com. All rights reserved.