

Import a cut-and-engrave design: a real software walkthrough
Reading time: 6 minutes. Download the example SVG to follow along in your own software.
The example is a floral keychain: blue filled artwork to engrave and a red outline, with the hanging hole, to cut. It is opened here in LightBurn, xTool Studio, Cricut Design Space, Silhouette Studio and Inkscape. Each program shows the same file a little differently, and two things catch people out: which colour does what, and what size the design really is.
A colour in the file does not set the operation by itself. Blue is not automatically engrave and red is not automatically cut. You assign the operation to each colour in your software, and you set speed and power for your own machine and material.
On this page (10)
- 1. Inspect the design before exporting
- 2. Compare object dimensions, not just page dimensions
- Finished keychains and ornament examples
- LightBurn: separate Line cutting from Fill engraving
- xTool Studio: check the selected size, then assign processing
- Cricut Design Space: Basic Cut is not a laser Fill operation
- Silhouette Studio Basic Edition: import the PNG and trace it
- Inkscape: inspect the actual objects and units
- Troubleshooting
- Software documentation
What you need
- Download the floral keychain SVG to follow the vector examples.
- LightBurn or xTool Studio for laser processing; Cricut Design Space or Silhouette Studio for their respective cutters; Inkscape for vector editing.
- Silhouette Studio Basic Edition cannot open SVG. Use the PNG and trace it, or upgrade to Designer Edition to open the SVG directly.
1. Inspect the design before exporting
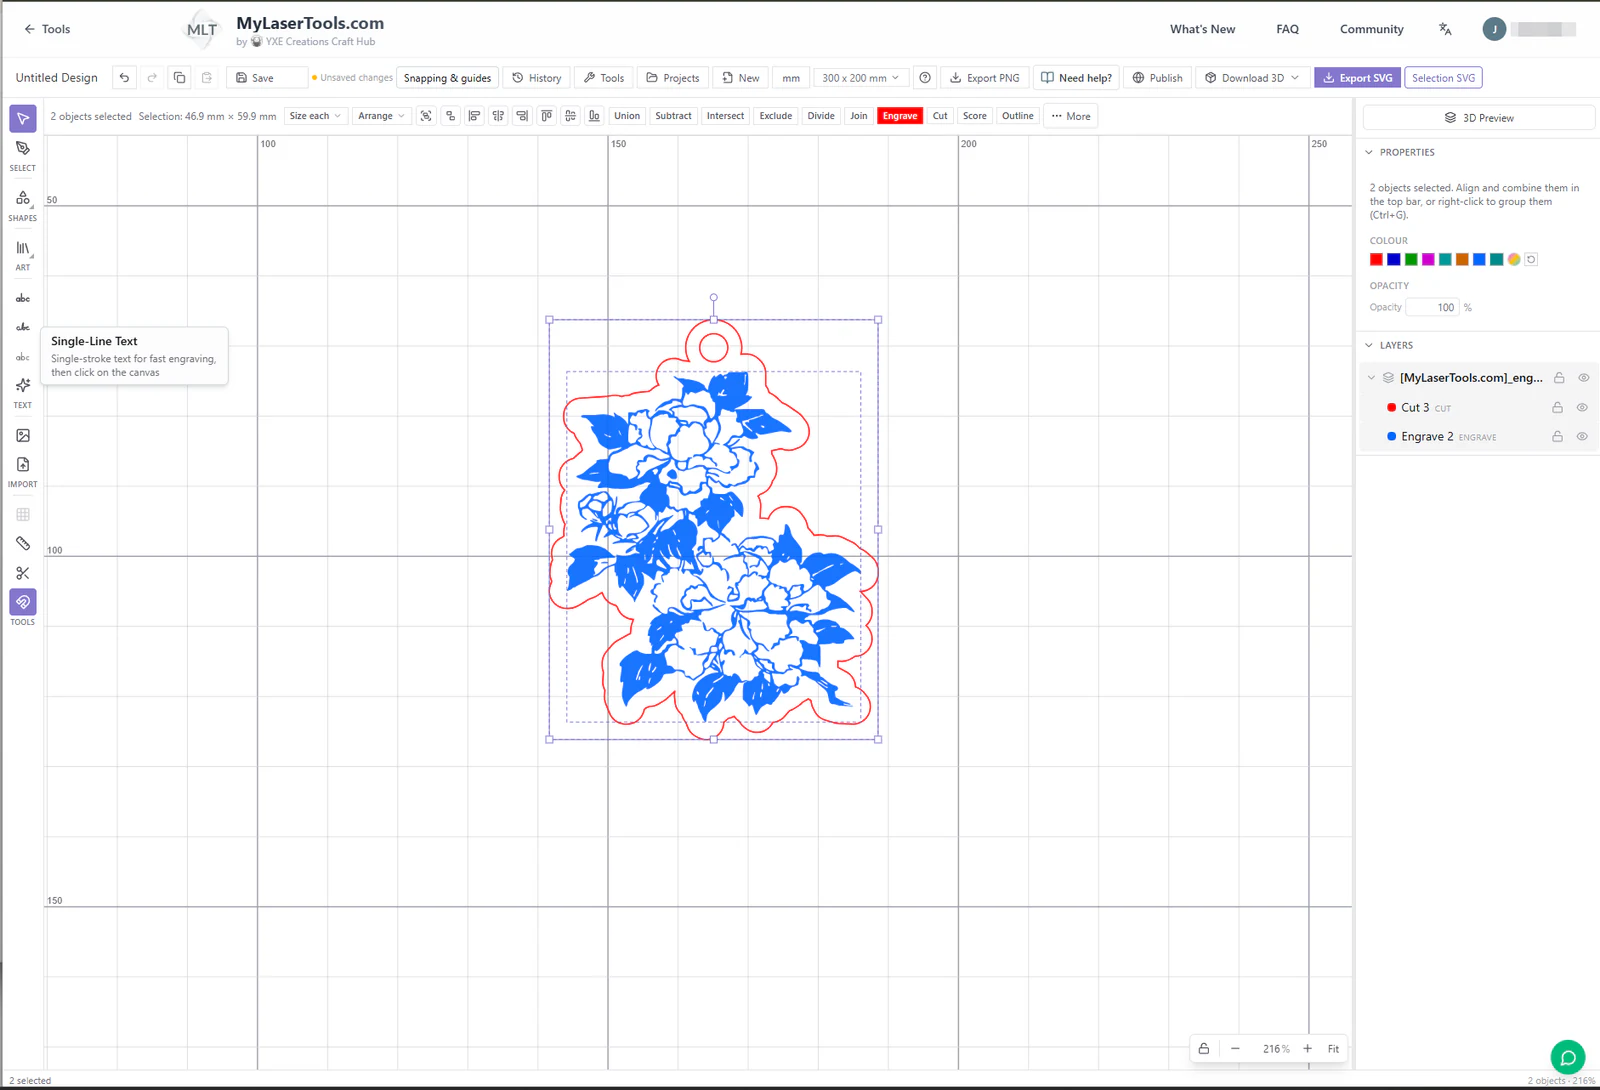
In the Design Editor the keychain is two objects: the engraving artwork, and the outer cut path with its hole. Selected together they measure 46.9 × 59.9 mm. Always resize both together, so the artwork stays inside the outline.
2. Compare object dimensions, not just page dimensions
The SVG page is 50.9 × 63.9 mm because it includes a small margin. The design itself is 46.9 × 59.9 mm, and that is the size LightBurn and xTool show when you select everything. Select only the flowers and you get a smaller number again. When you compare sizes between programs, select the whole design and use the same units.
In inches, 46.9 × 59.9 mm is about 1.85 × 2.36 in. If a program imports the design at a different size, select everything, lock proportions and type the correct width. Never resize the artwork and the outline separately.
Finished keychains and ornament examples
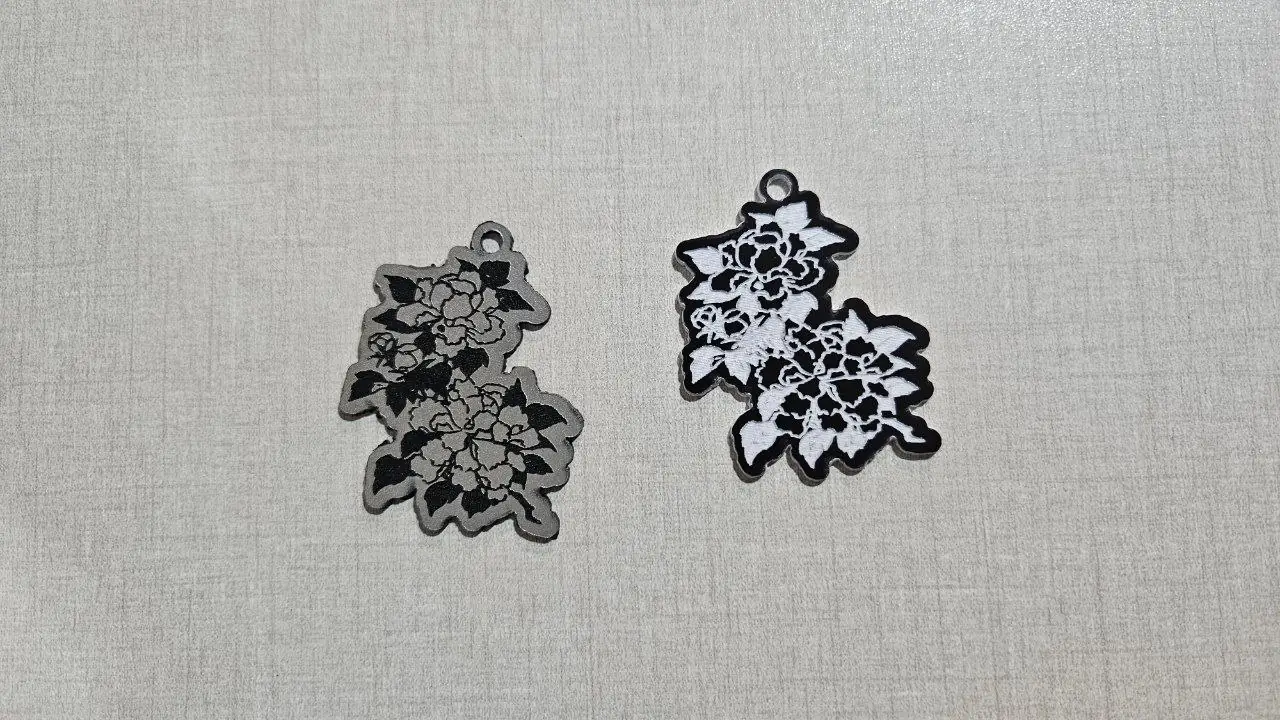
On the finished pieces, look at the hanging hole, the border and the smallest petals. Those are the parts that go wrong first: a hole set to engrave never opens, and petals that are too thin burn away.
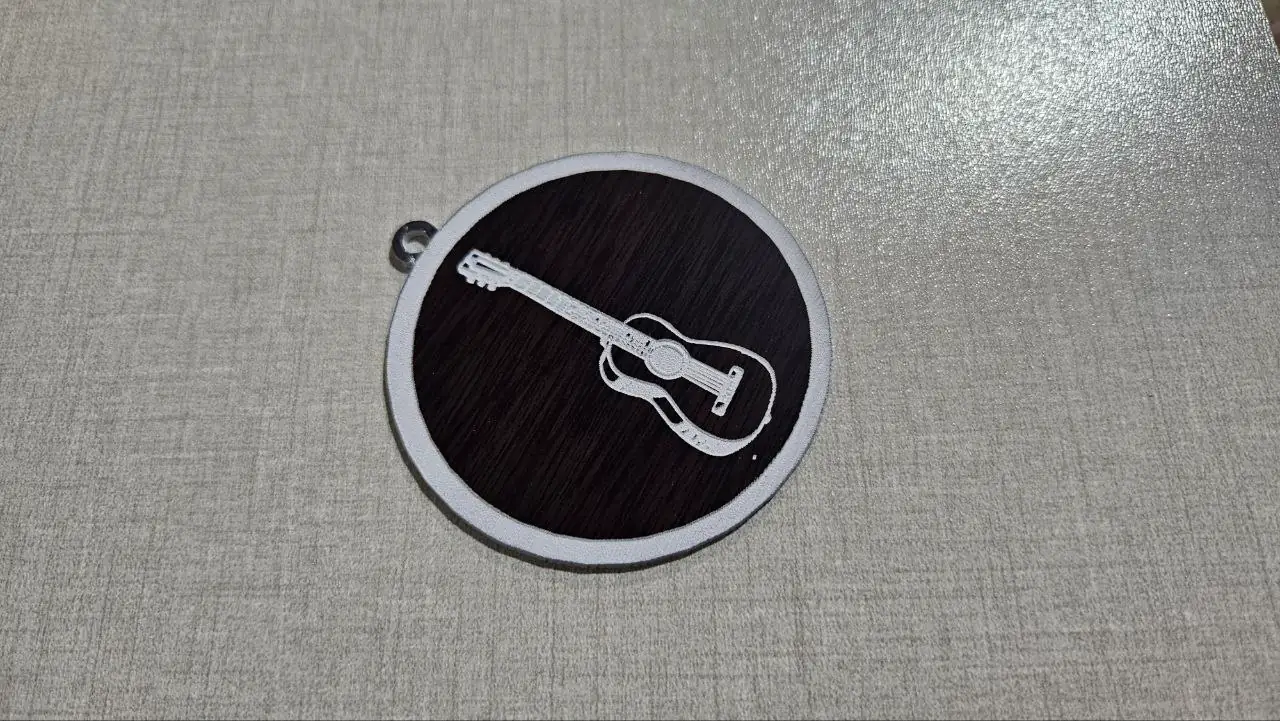
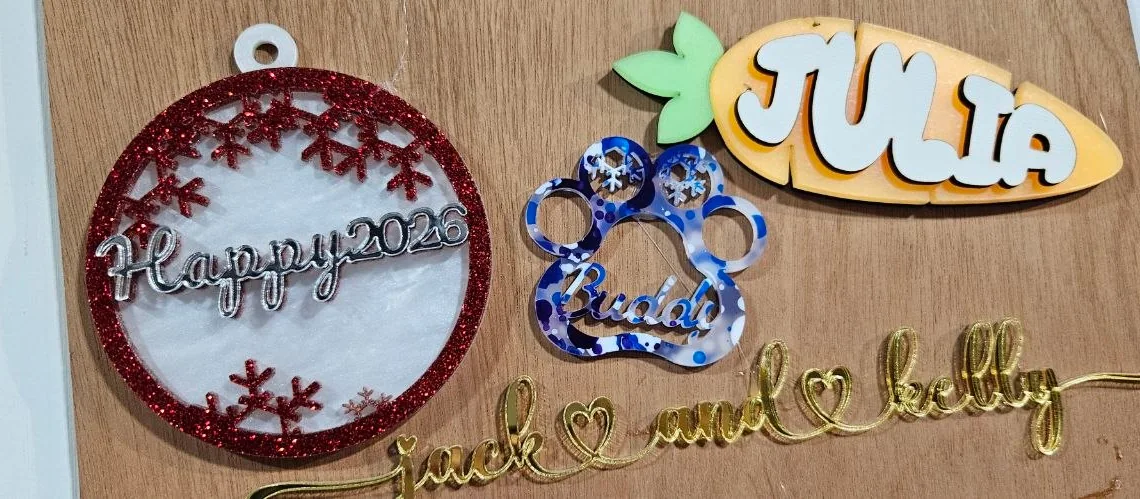
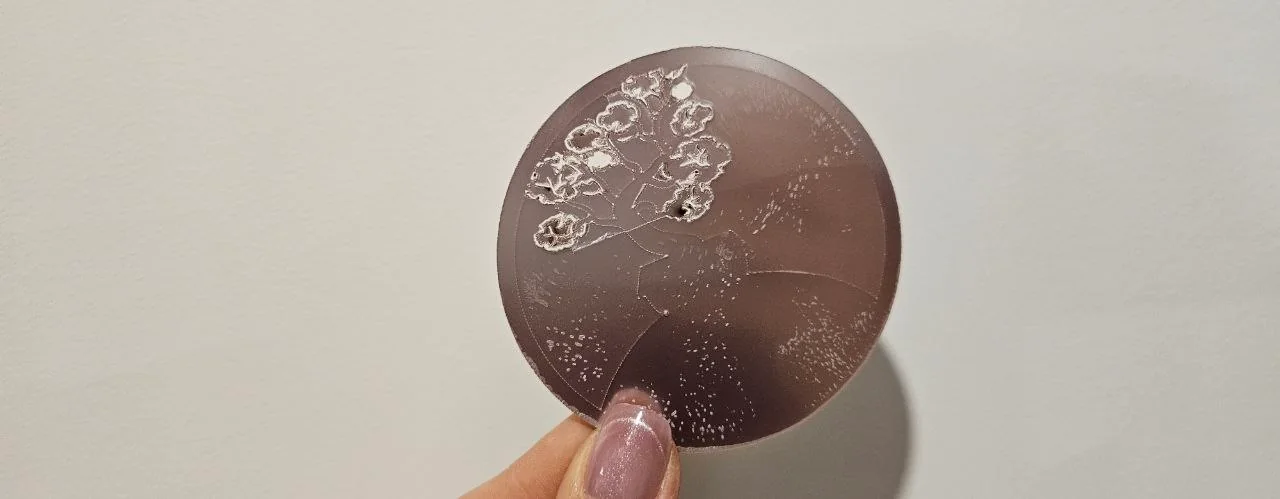
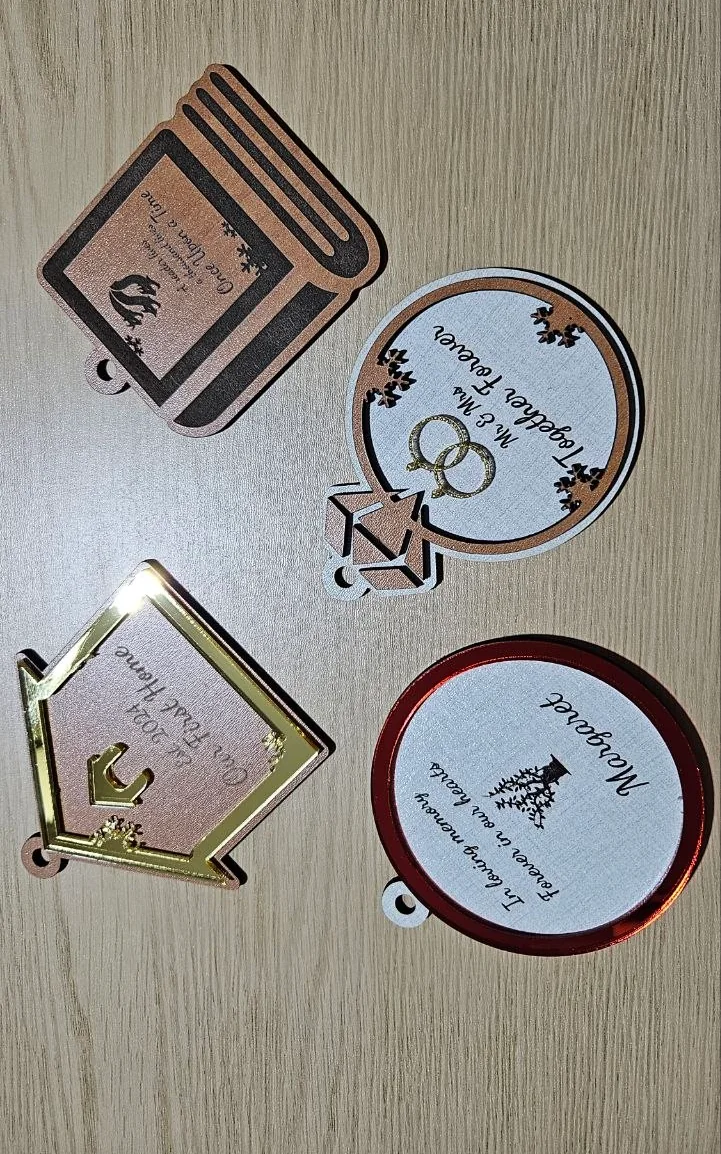
LightBurn: separate Line cutting from Fill engraving
LightBurn puts each colour on its own layer. Set the red layer (C02 here) to Line to cut, and the blue layer (C14) to Fill to engrave. The size reads 46.903 × 59.900 mm. LightBurn draws Fill layers as outlines on the canvas, so the flowers look like cut lines even when they will engrave. Open Preview to see what will really happen.
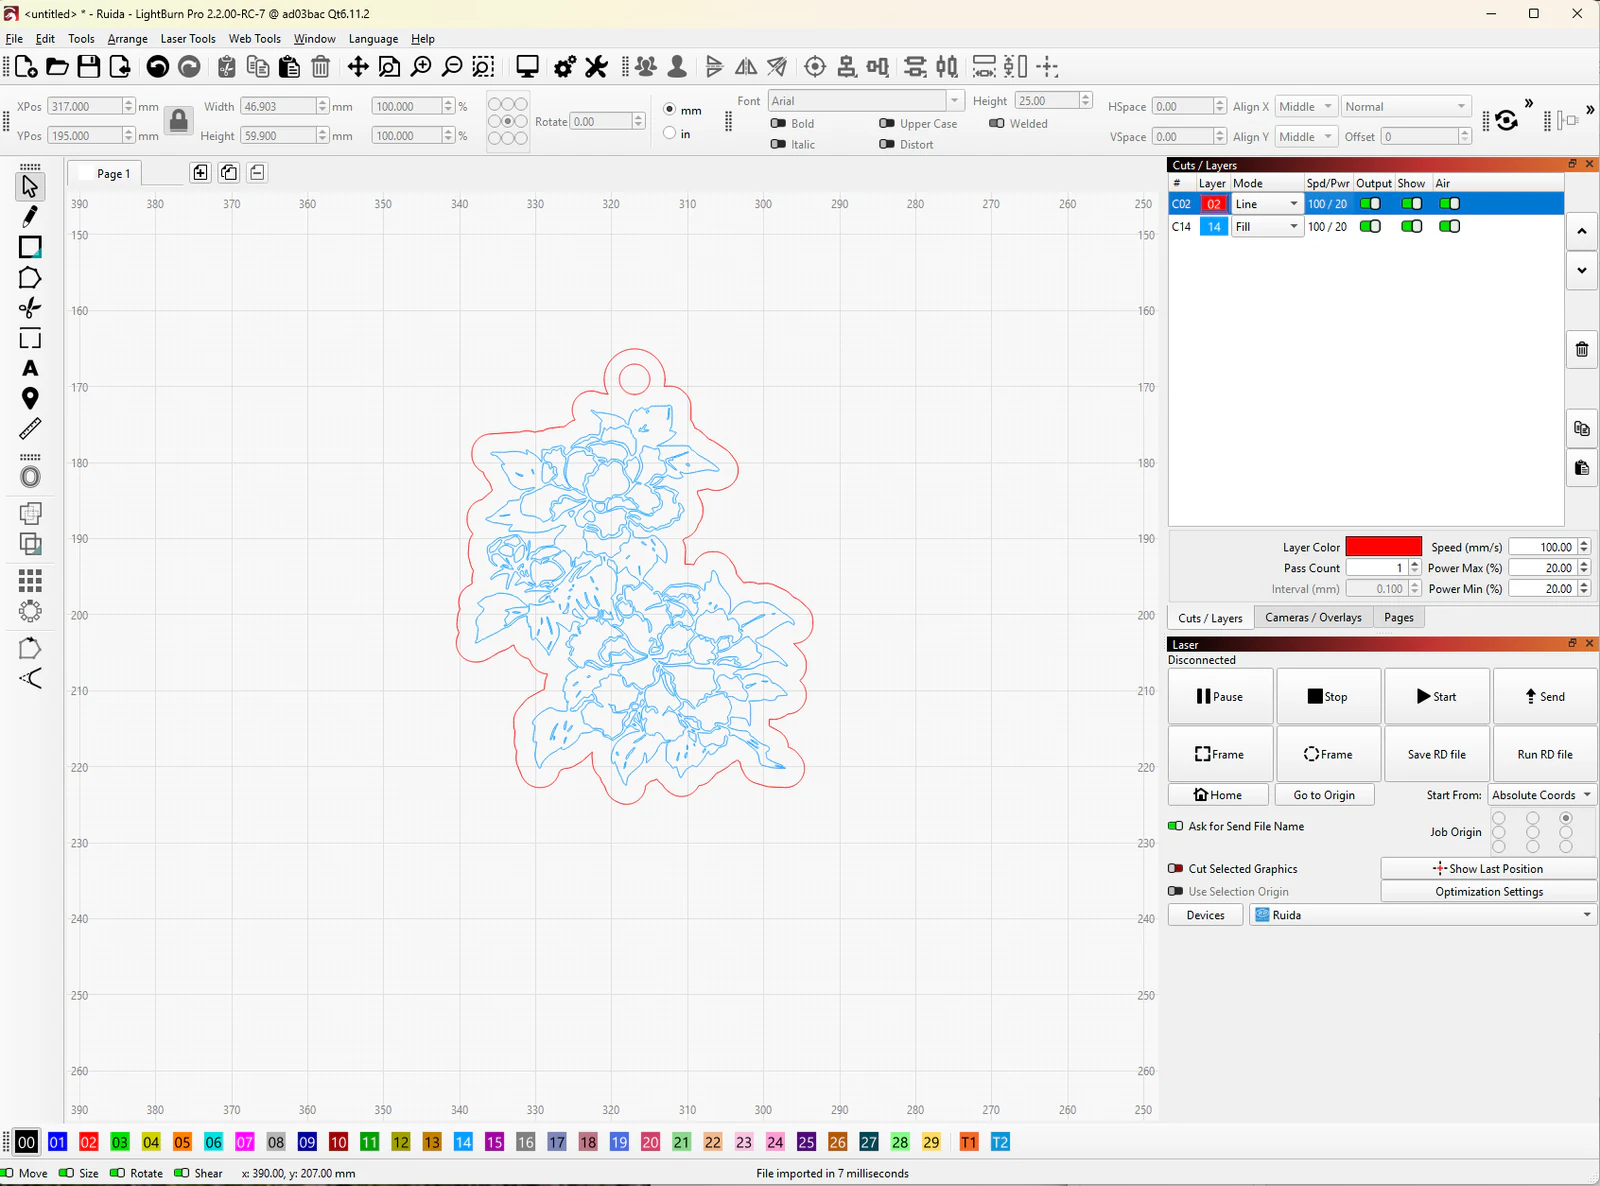
Continue with the LightBurn import guide. For aligning printed artwork to a laser cut, follow the separate Print and Cut workflow.
xTool Studio: check the selected size, then assign processing
Select the whole import and check W 46.9, H 59.9. The red outline and the blue artwork come in as separate objects. Then assign the processing: select the red outline and set it to cut, select the blue artwork and set it to engrave, each with settings for your material.
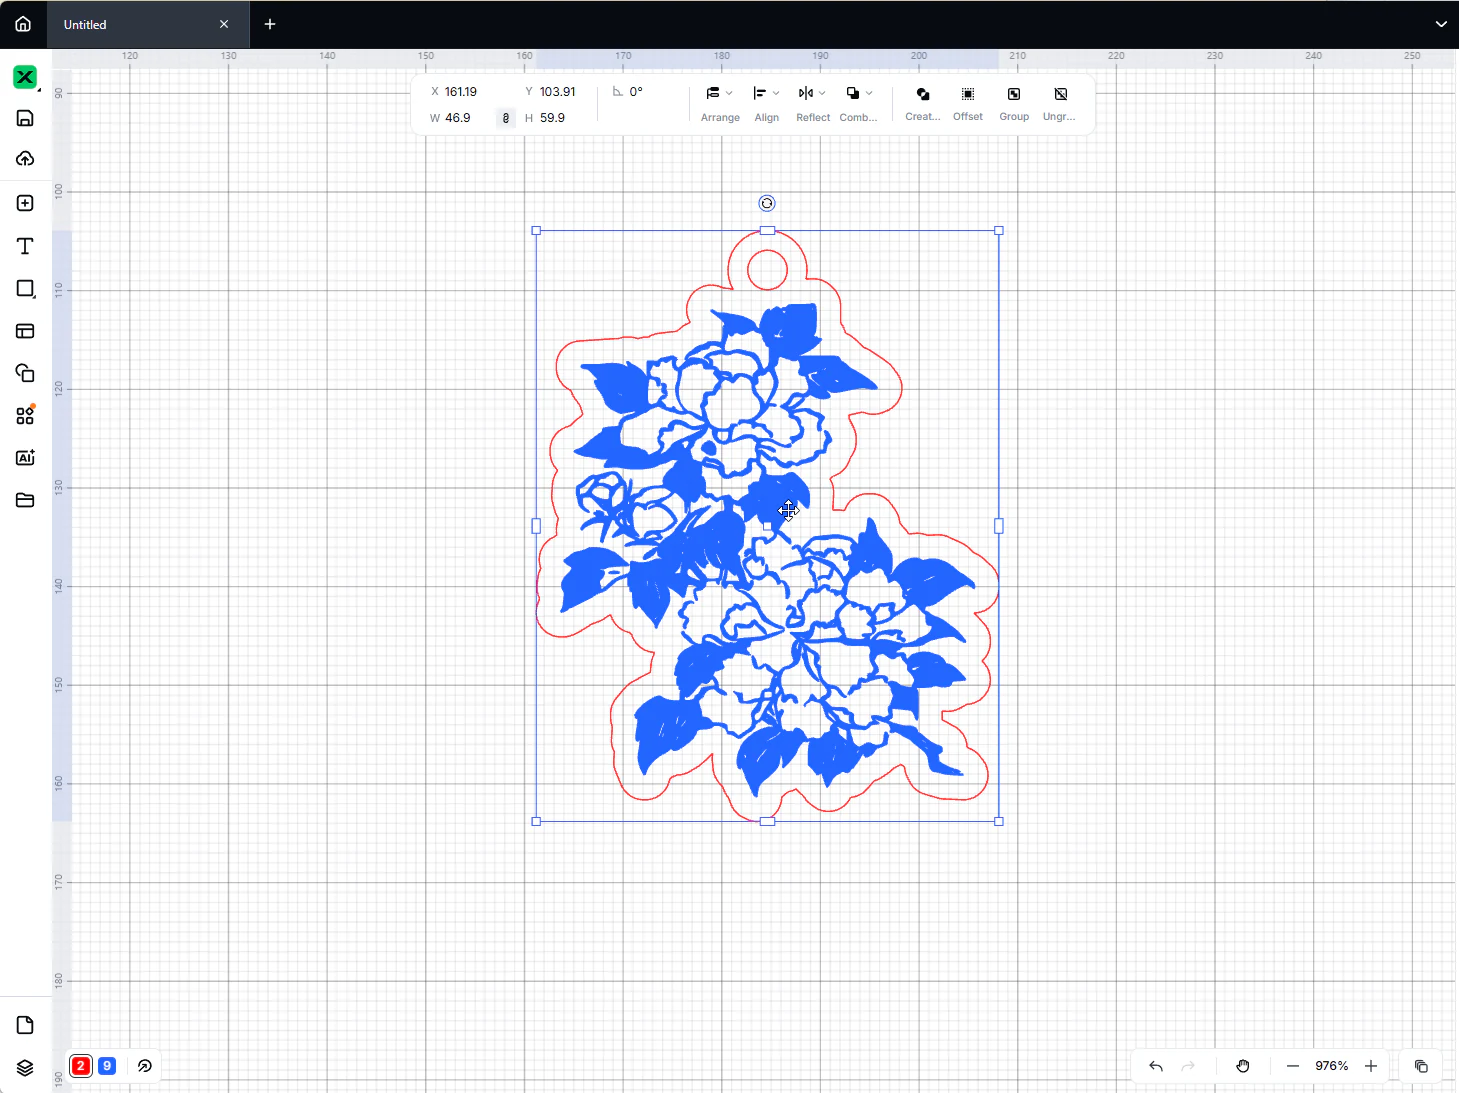
Follow the xTool Studio workflow for operation assignments and device-specific positioning.
Cricut Design Space: Basic Cut is not a laser Fill operation
Design Space imports the SVG as Basic Cut shapes. Here it came in at 1.25 × 1.6 in, smaller than the 1.85 × 2.36 in design. Always check the size after an upload: select everything, keep the lock closed and type the width you want before you make it.
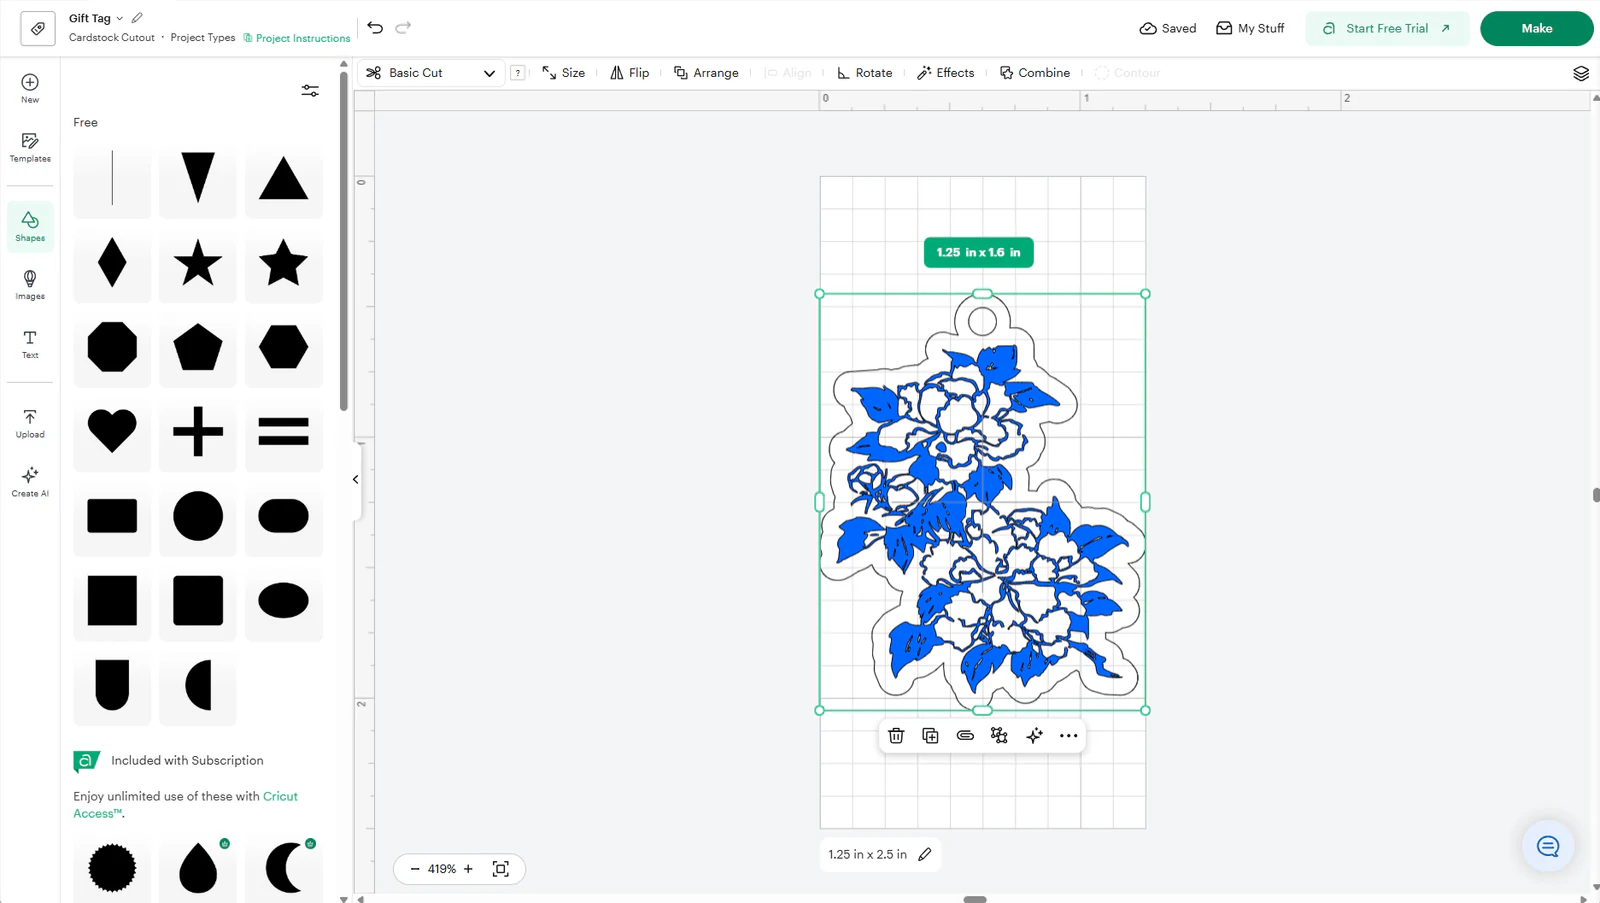
Decide what the cutter should do. To cut only the keychain shape, hide or delete the flower layer. To keep the flowers as printed artwork with the outline cut around them, use Print Then Cut in Cricut Design Space.
Silhouette Studio Basic Edition: import the PNG and trace it
Basic Edition cannot open SVG, so this example uses the PNG. After tracing, the flowers became red cut outlines at 0.525 × 0.628 in, and the outer keychain shape with its hanging hole is missing. Tracing a picture is not the same as opening the vector file: check and fix both the size and the shapes.
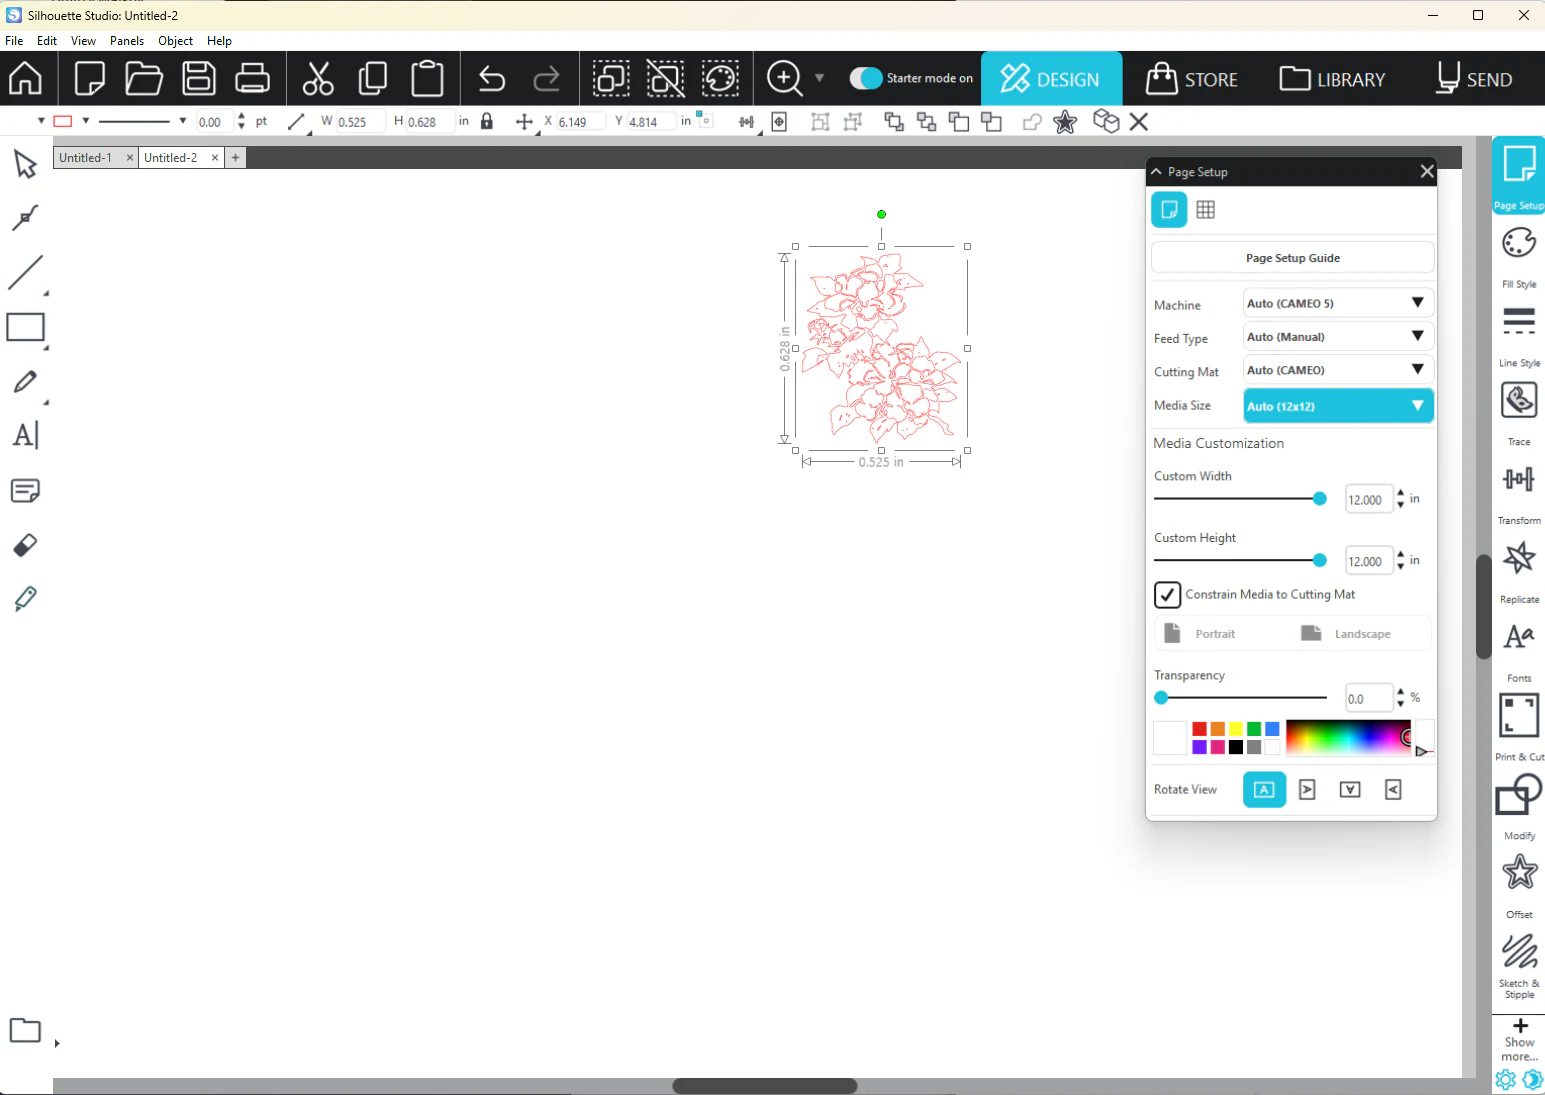
In Basic Edition, use Trace Outer Edge when you only want the keychain shape, then resize it to the real width. Designer Edition or higher opens the SVG with every path as it was designed. For printed artwork with a cut line around it, use registration marks and follow Print and Cut in Silhouette Studio.
Inkscape: inspect the actual objects and units
Open Layers and Objects: the file has separate cut and engrave groups, so you can hide, lock or edit one without touching the other. Inkscape shows sizes in px by default. Switch the unit menu in the toolbar to mm and select the whole design before you check or change the size.
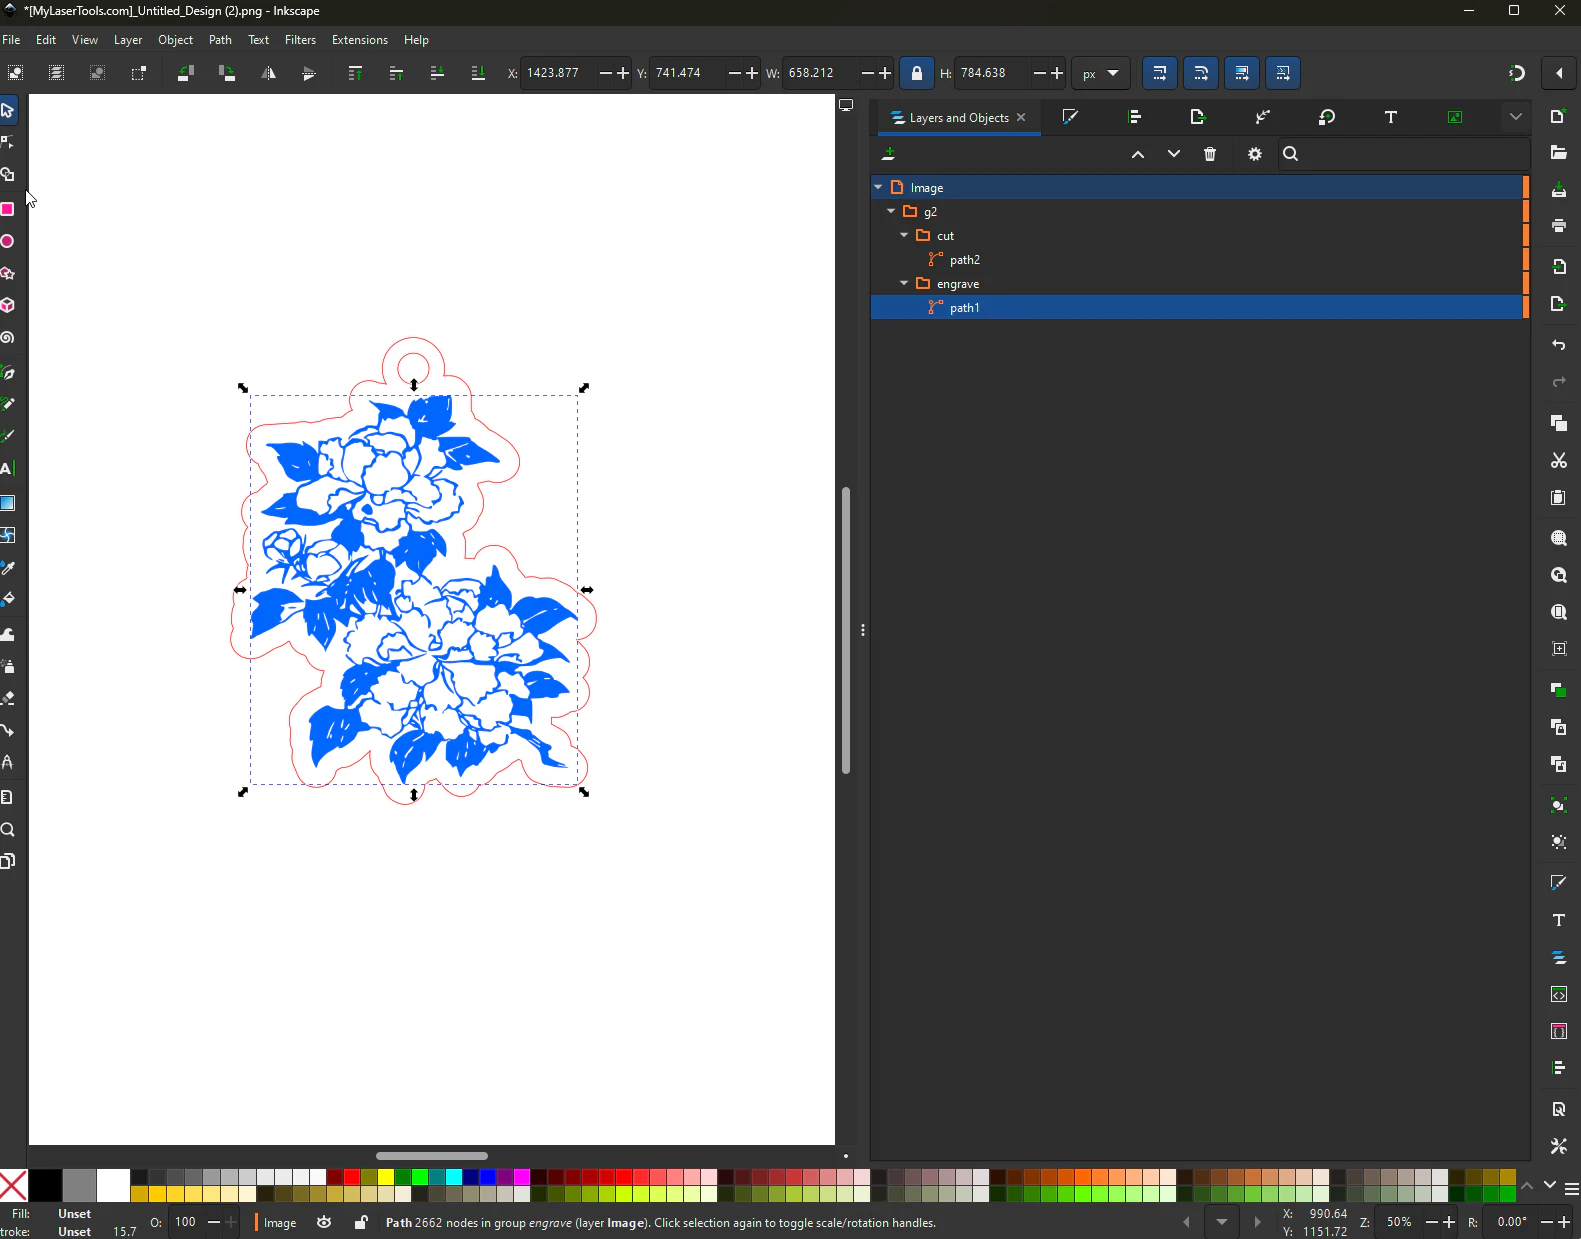
Continue with SVG editing in Inkscape and Illustrator to preserve paths, units and outlined text during edits.
Troubleshooting
- The size is different in another program: select the whole design, not only the artwork, compare the design size rather than the page size, and use the same units.
- Every flower detail cuts: the artwork layer is set to cut. Set it to engrave (Fill in LightBurn), or hide it on a cutter that cannot engrave.
- No outer shape or hanging hole: you traced the PNG. Open the SVG if your software can, or trace the outer edge only.
Software documentation
Next steps and project ideas
Do the same with your own design: note the full design size in MyLaserTools before you export, and check it again right after the import.
Was this guide helpful?
More in Laser techniques
Keep up with MyLaserTools.
Email me about new tools, product updates, tutorials, and occasional MyLaserTools offers. Unsubscribe at any time.
© 2026 MyLaserTools.com. All rights reserved.