

Your first project: make a name keychain
Allow about 15 minutes to design it. Making time depends on your machine and material.
Make a name keychain while learning the settings, export preview, downloads and import size. The steps below follow the laser version: cut the letters and backing from two colours, then glue them together. Using a 3D printer or a blade cutter? Design the keychain in steps 1–3, then jump to the instructions for your machine.
On this page (9)
What you need
- A laser that cuts 3 mm acrylic or plywood, and its software (LightBurn, xTool Studio or similar)
- Two offcuts of 3 mm acrylic or plywood in contrasting colours, about 120 by 60 mm each
- CA glue, or a 3M 468MP adhesive sheet
- A split ring or keychain clip
1. Type the name
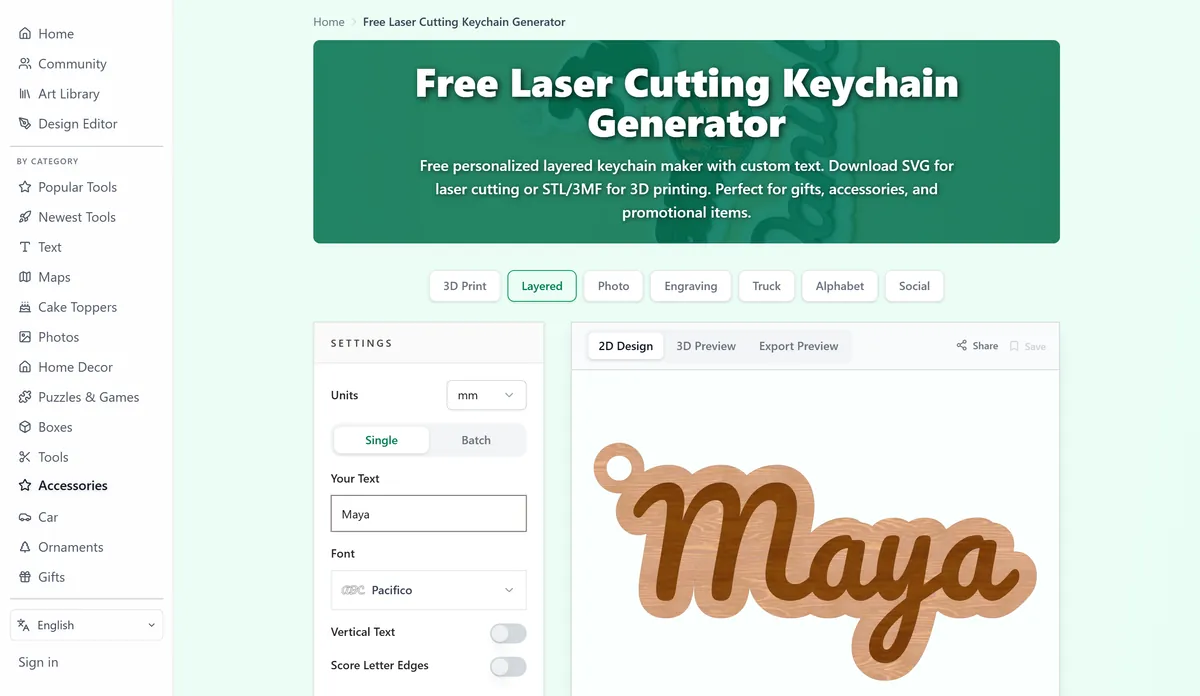
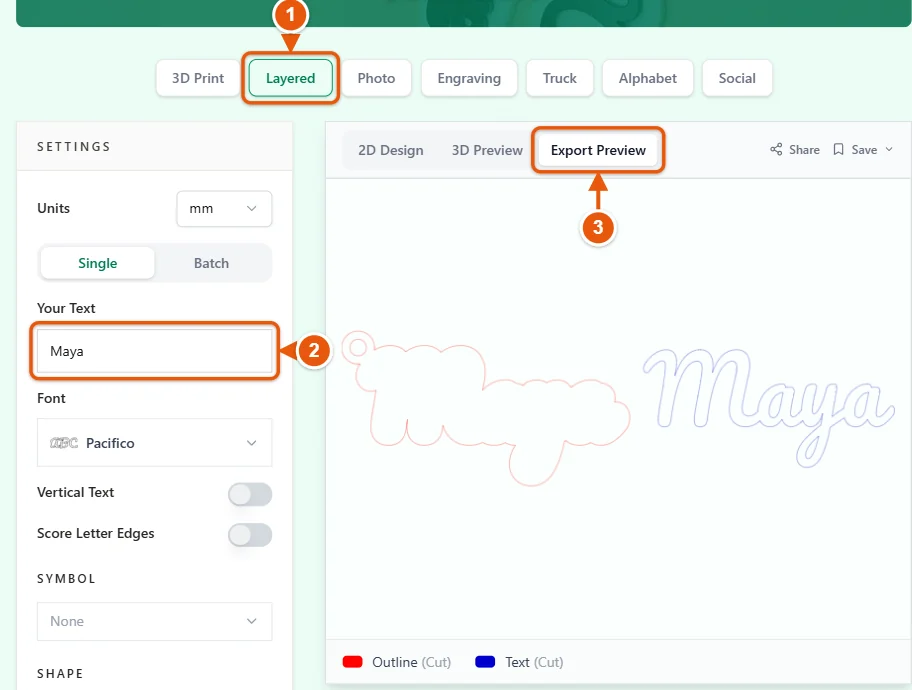
Open the Keychain Generator and leave the style on Layered. Type the name into Your Text. Names of three to eight letters work best; a long name gets thin at keychain size. Script fonts such as Pacifico join their letters, so the name cuts as one piece.
2. Set the size
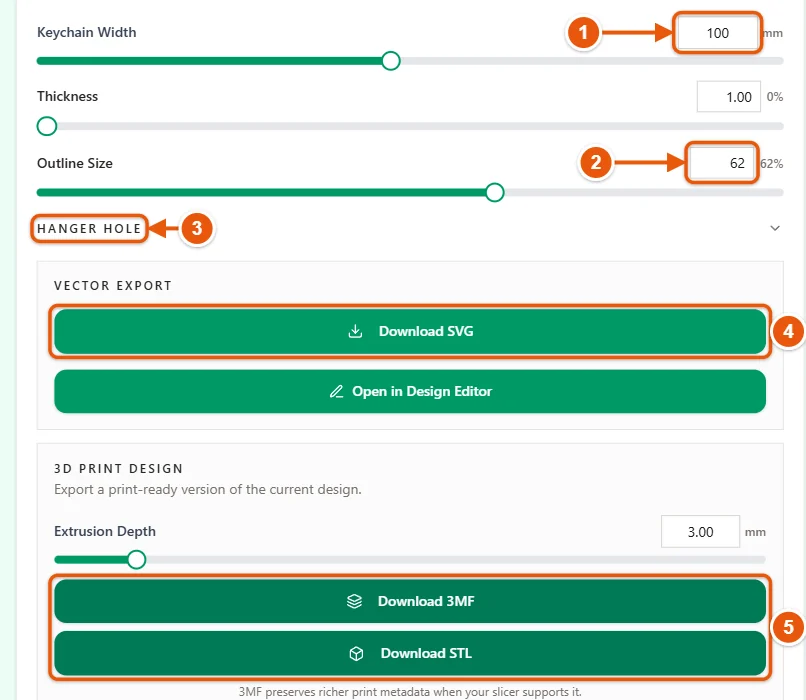
Keychain Width is the finished width. 60 to 80 mm suits keys or a bag. Outline Size sets how far the backing sticks out past the letters; if the backing looks thinner than about 2 mm anywhere in the preview, raise it so it does not snap. Open Hanger Hole and leave at least 2 mm of material all the way round the hole.
3. Check the export preview
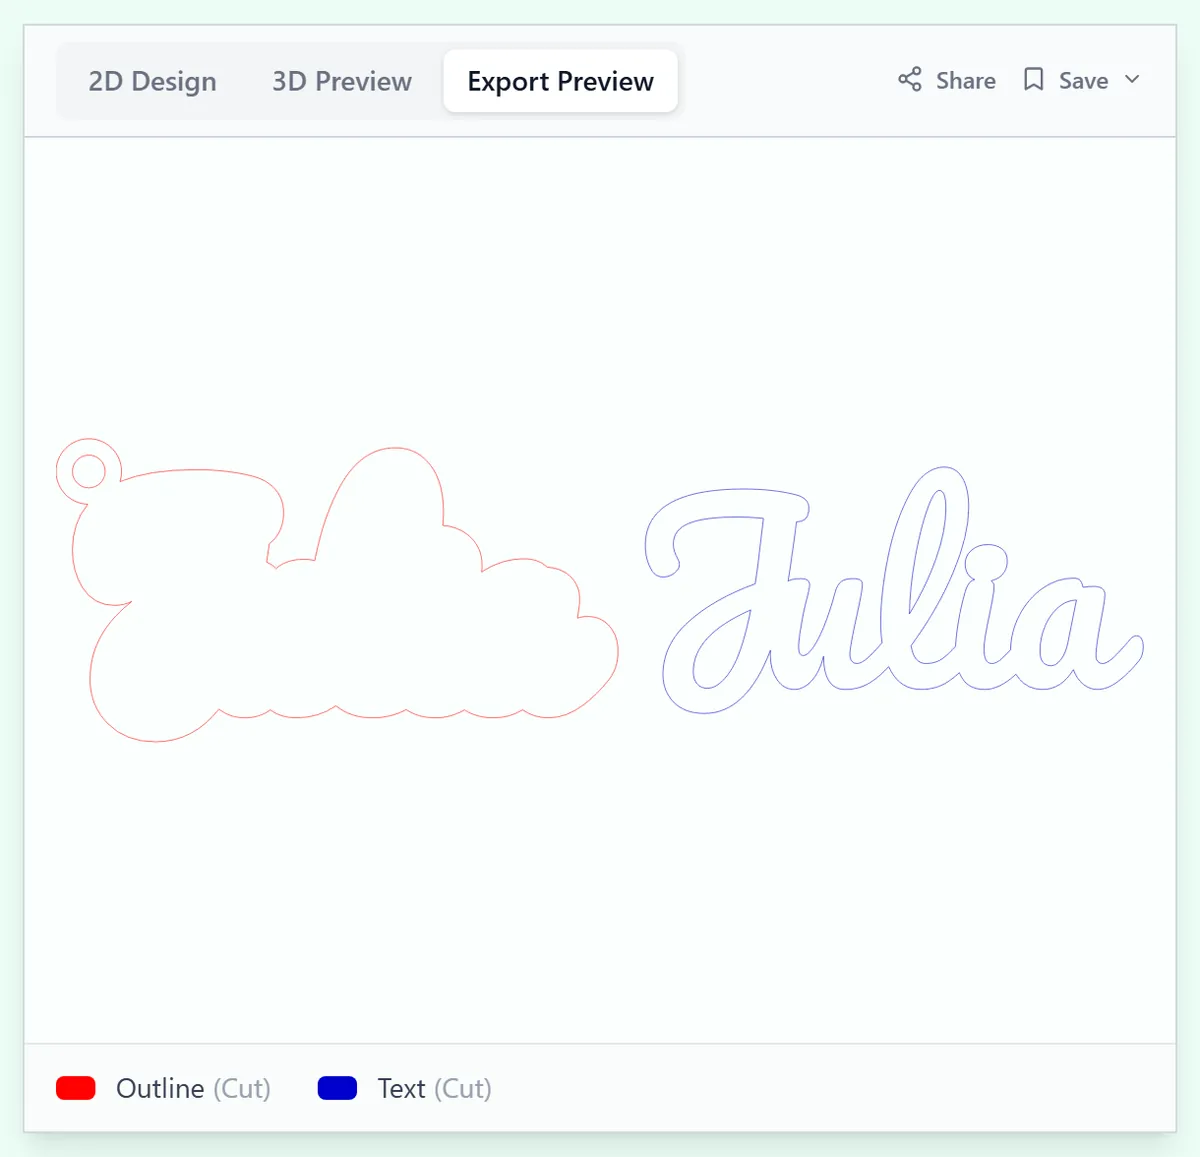
Click Export Preview above the picture. This is the file you will download: the backing outline in red and the letters in blue, side by side, so each one cuts from its own sheet. If a letter is missing or a line looks broken here, fix it in the settings before you download.
4. Download the SVG
Click Download SVG under Vector export. The file is saved at the size you set, with one colour per layer. Printing it on a 3D printer instead? Use Download 3MF and follow the slicer guide.
5. Import it into your laser software
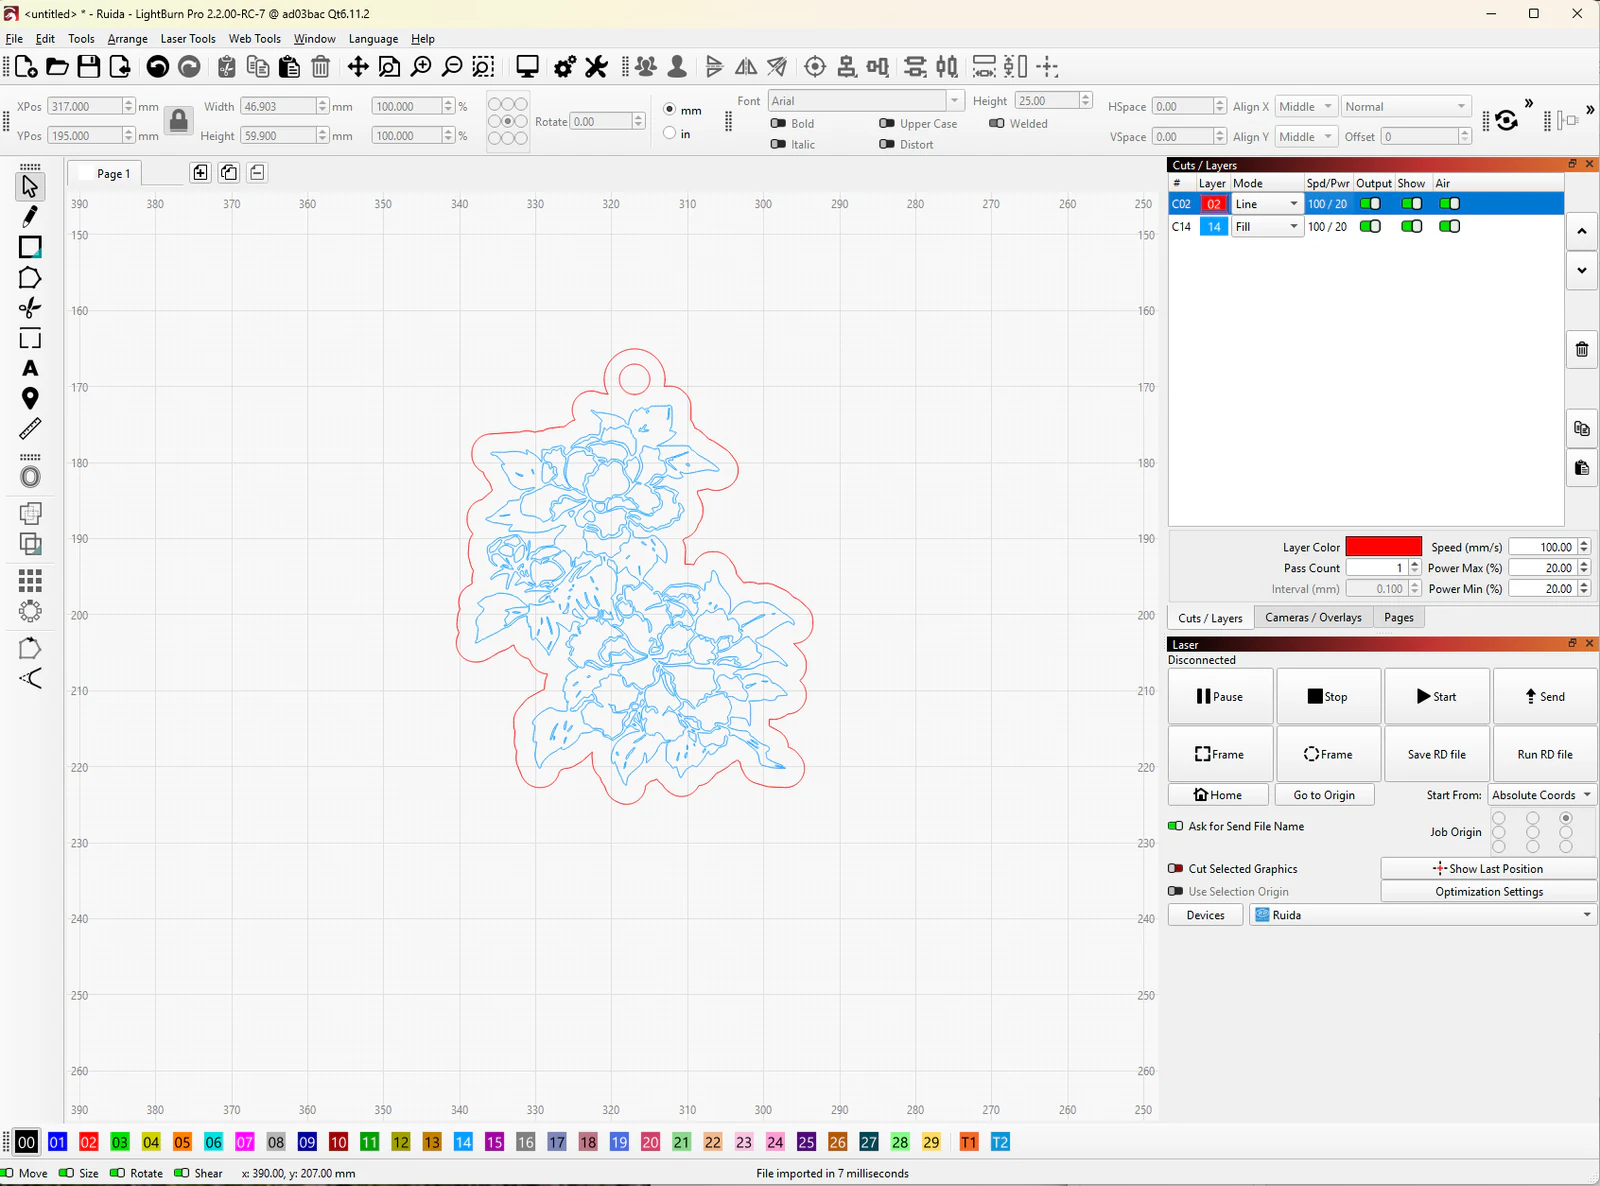
In LightBurn, use File > Import and read the width in the size boxes at the top. It should match Keychain Width. Each colour lands on its own layer. In xTool Studio, import the file and check the size the same way. A width that is off by a third or a quarter means the software read the file at the wrong DPI: here is the fix.
6. Cut the two layers
Put the letter colour on the bed and cut only the blue layer, with the red layer's output switched off. Then swap in the backing colour and cut only the red layer. No power and speed for this material yet? Cut a material test grid first, on the same sheet.
7. Glue it together
Peel the protective film off both pieces. Run a thin line of CA glue along the back of the letters and press them onto the backing, lining up the hole end first. Give it a few minutes before you add the ring.
Troubleshooting
- The letters came out as separate pieces: the font does not join its letters. Pick a script font such as Pacifico, or glue each letter where it belongs.
- The keychain is the wrong size: check the units and the import size in your software before you change the design.
- The ring around the hole snapped: make the hole smaller or move it inwards so at least 2 mm of material surrounds it.
- Brown or melted edges: lower the power or raise the speed, and cut with air assist on.
No laser? Make it on a 3D printer or a Cricut
On a 3D printer: keep the Layered style and set Extrusion Depth under 3D print design, then click Download 3MF. The backing and the letters come in as two parts, so you can give each one its own filament in the slicer. With one nozzle and no AMS, add a filament change at the layer where the letters start. The slicer guide shows each slicer.
On a Cricut or Silhouette: a blade cutter does not cut 3 mm acrylic, but it cuts the letters from vinyl. Download the SVG, upload it to Design Space or Silhouette Studio, cut the letters in adhesive vinyl and press them onto an acrylic keychain blank. The Cricut guide covers the upload.
Next steps and project ideas
- Make a set at once: switch Single to Batch and type several names. They all come out in one file.
- Try the Truck, Photo or Alphabet tabs at the top of the tool for a different style.
- Click Open in Design Editor to add a date or a second line. The Design Editor guide shows how.
Was this guide helpful?
More in Getting started
Keep up with MyLaserTools.
Email me about new tools, product updates, tutorials, and occasional MyLaserTools offers. Unsubscribe at any time.
© 2026 MyLaserTools.com. All rights reserved.