

Cut vinyl and Print Then Cut MyLaserTools designs in Cricut Design Space
Cricut Design Space does two things with MyLaserTools files. It cuts an SVG from vinyl, iron-on or card, and with Print Then Cut it prints a PNG on your home printer and cuts around it. Both start with Upload. Print Then Cut comes first below; for vinyl, skip to Cut vinyl or iron-on from an SVG.

On this page (7)
What you need
- A Cricut Maker, Explore or Joy, and Design Space
- For vinyl: adhesive vinyl or iron-on and a StandardGrip mat
- For Print Then Cut: a Maker, Explore or Joy Xtra, a home printer and printable sticker paper or white cardstock
- The SVG for cutting, or the transparent PNG for Print Then Cut
1. Upload the picture
Click Upload, choose the transparent PNG from the tool and save it as a Print Then Cut image. A PNG has no size of its own, so set the width in the top bar to the size you want. Use the PNG, not the SVG, for anything with a photo in it: Design Space does not accept SVG files with pictures inside.
2. Check what will be cut
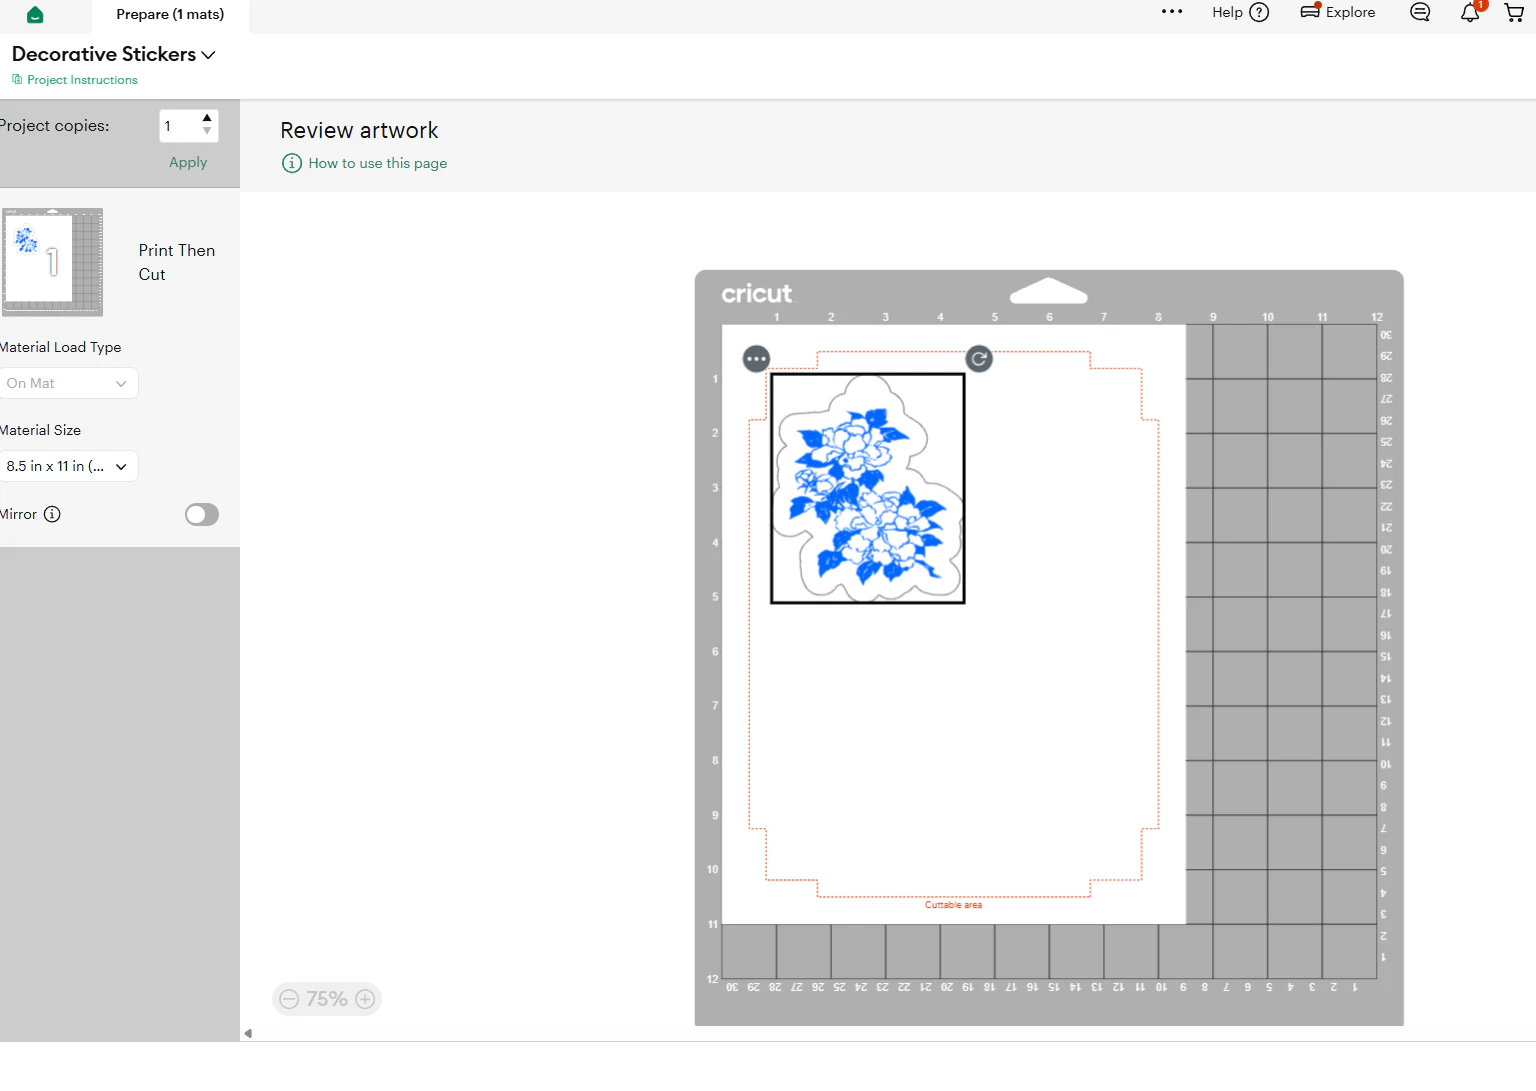
With the picture selected, check that Operation says Print Then Cut. If you put text on a backing shape, select both and click Flatten, so they print as one and only the outer edge is cut. A PNG can lose holes the SVG had, such as a keyring hole, so look for them in the preview.
3. Print and cut from Design Space
Click Make and print from Design Space. It adds the black frame the Cricut sensor reads, so a print of the MyLaserTools PDF will not work here. Keep the print scale at 100% and cut in the same session. Put the sheet on the mat where the screen shows it and follow the prompts.
Cut vinyl or iron-on from an SVG
- Click Upload, choose the SVG from the tool and add it to the canvas.
- Check the width in the top bar against the width you set in MyLaserTools. If it differs, close the lock and type the right width.
- Each colour in the SVG becomes its own layer and is cut on its own mat. To cut everything from one sheet, select all and click Attach, so the pieces stay where they are.
- For iron-on, turn Mirror on for the mat, because the vinyl goes on face down. For adhesive vinyl and card, leave it off.
- Cut, weed away the vinyl you do not want, then apply it with transfer tape, or with a heat press or EasyPress for iron-on.
Print Then Cut sheet preparation
Check the sheet before you print: the design has to sit inside the frame of sensor marks, and the cut line has to follow the shape you want, with the hanging hole if it has one. Turn Mirror on only for iron-on, never for stickers or paper.
Troubleshooting
- Every letter cuts separately: select the letters and the backing and click Flatten. Attach keeps pieces in place on the mat, but each piece is still cut on its own.
- A white rectangle or the wrong edge is cut: the PNG background is not transparent. Remove the background during upload, or download a transparent PNG.
- Iron-on letters read backwards on the shirt: Mirror was off. Turn it on for every iron-on mat.
Manufacturer documentation
Next steps and project ideas
Next: cut a city map in vinyl with maps on a Cricut, or make a first Print Then Cut sticker with photo keychains.
Take the design into your software
Was this guide helpful?
More in Your software
Keep up with MyLaserTools.
Email me about new tools, product updates, tutorials, and occasional MyLaserTools offers. Unsubscribe at any time.
© 2026 MyLaserTools.com. All rights reserved.