

Print and cut in LightBurn: align artwork and cut paths
LightBurn's Print and Cut lines up a laser cut with artwork you printed earlier, using two printed targets. It works on gantry lasers and is a different method from camera alignment. MyLaserTools photo exports do not include these targets, so add them to your layout before you print.

On this page (6)
What you need
- A gantry laser that homes and knows its position, such as most CO2 lasers and diode lasers with limit switches.
- The printed artwork and its matching SVG, a printer, and a material that is safe to laser.
1. Build one aligned master layout
Export the artwork from the Design Editor or the photo keychain, with the print artwork and the cut paths in one layout. Add two small crosshairs outside the piece, as far apart as the sheet allows; the further apart, the more accurate the alignment. Print the artwork and both crosshairs at 100% scale, with the cut outline hidden. In LightBurn, keep the same crosshairs as vectors you can select. After this, never move or resize the artwork, the paths or the crosshairs on their own.
2. Register both targets
Connect and home the laser. Open Laser Tools → Print and Cut → Start Wizard. Jog the head to the centre of the first printed crosshair with the software or the controller buttons, select the matching crosshair on the canvas and record it. Repeat for the second one. Do not push the head by hand during this, or the laser loses its position.
3. Check alignment and output
Choose scaled alignment if your printer shrinks or stretches the print a little, or no scaling to keep the exact design size. Keep Absolute Coordinates on. Turn Output off for the artwork and crosshair layers so only the cut paths run. Check Preview, frame the job and try it on a scrap print first.
The print-and-cut SVG in LightBurn
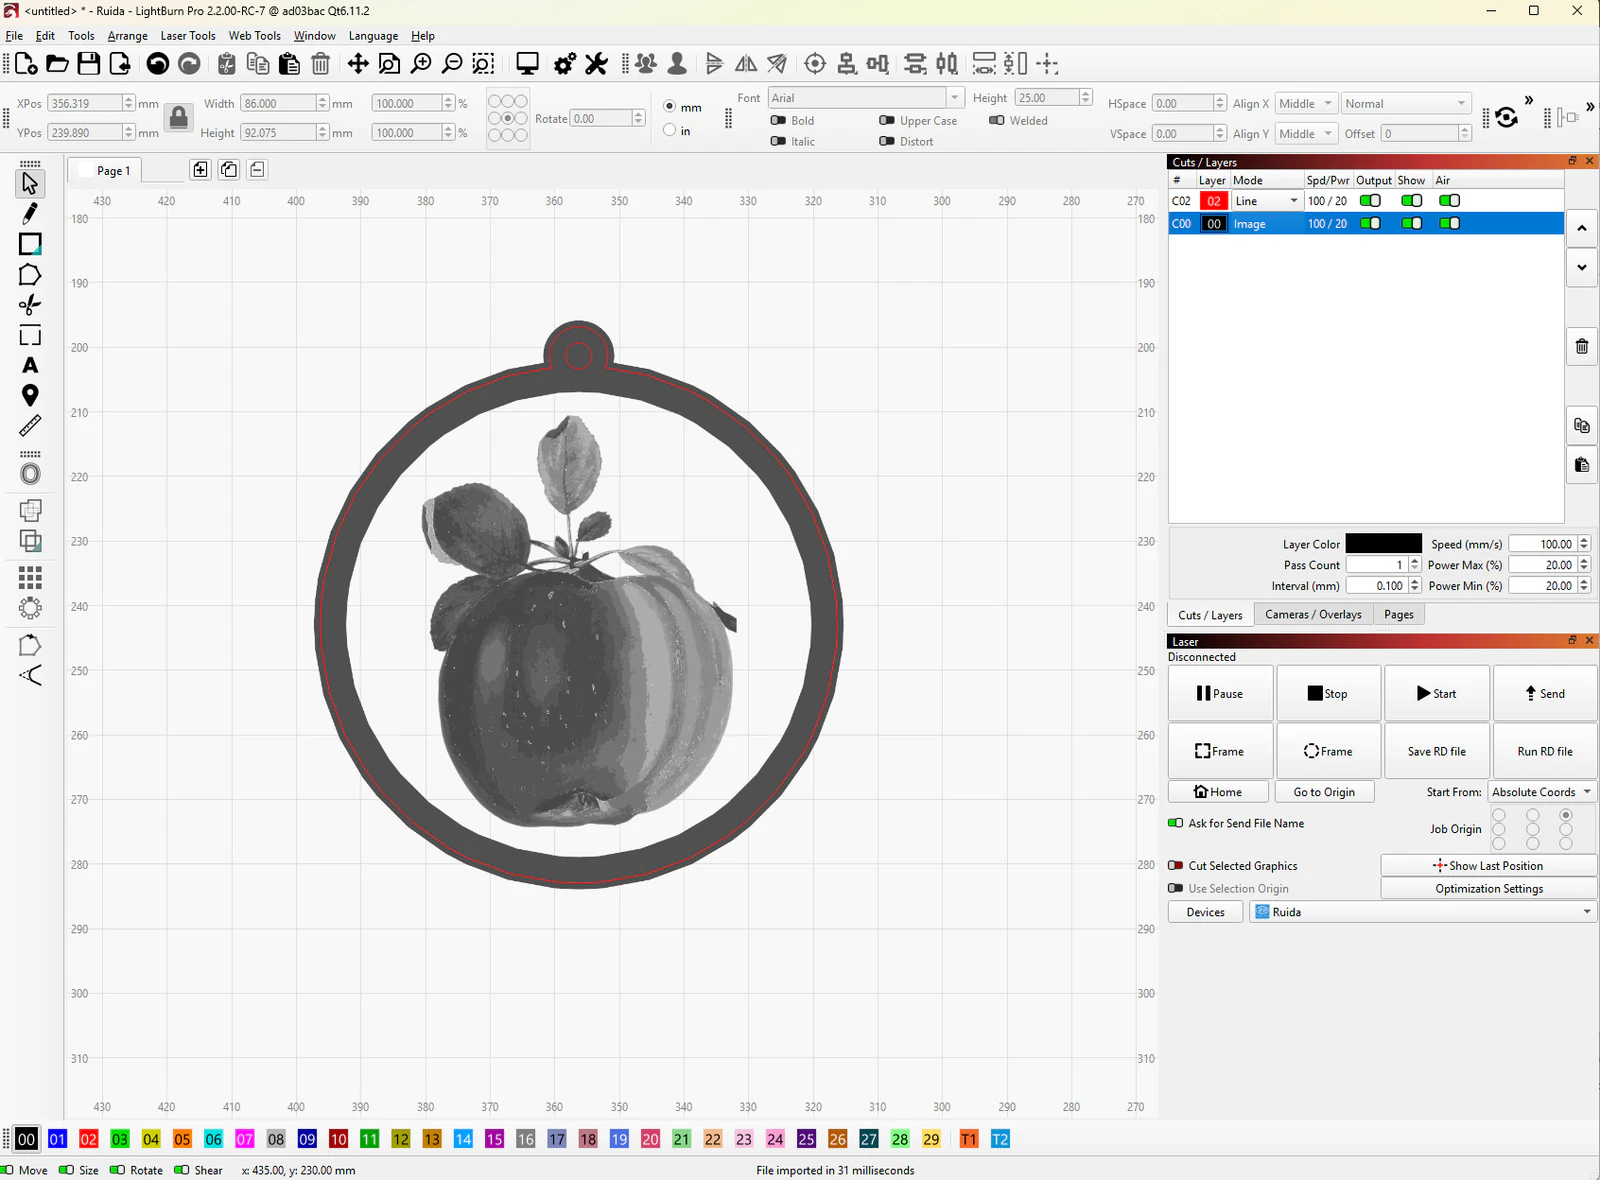
The apple artwork is a picture inside the SVG, so LightBurn puts it on an Image layer and shows it in grey. LightBurn would engrave it, not print it. When you cut around an apple you already printed, turn Output off for C00 Image. Keep the outer shape and the hanging hole on the Line layer, and put your two crosshairs on a Tool layer, which never burns.
Troubleshooting
- The cut is rotated or shifted: reset the alignment, check you recorded the crosshairs in the right order and register again.
- The offset grows across the sheet: the print is not at 100% scale, or the crosshairs are too close together. If you cropped or resized the print file on its own, rebuild it from the original layout.
Manufacturer documentation
Next steps and project ideas
Next: using MyLaserTools with LightBurn, or go back to the Learning Center.
Was this guide helpful?
More in Your software
Keep up with MyLaserTools.
Email me about new tools, product updates, tutorials, and occasional MyLaserTools offers. Unsubscribe at any time.
© 2026 MyLaserTools.com. All rights reserved.