

Mixed media maps: laser cut, score, UV print and 3D print in one piece
Difficulty: Intermediate. Time: an afternoon plus print time. Needs a laser and a UV printer or a 3D printer, or both.
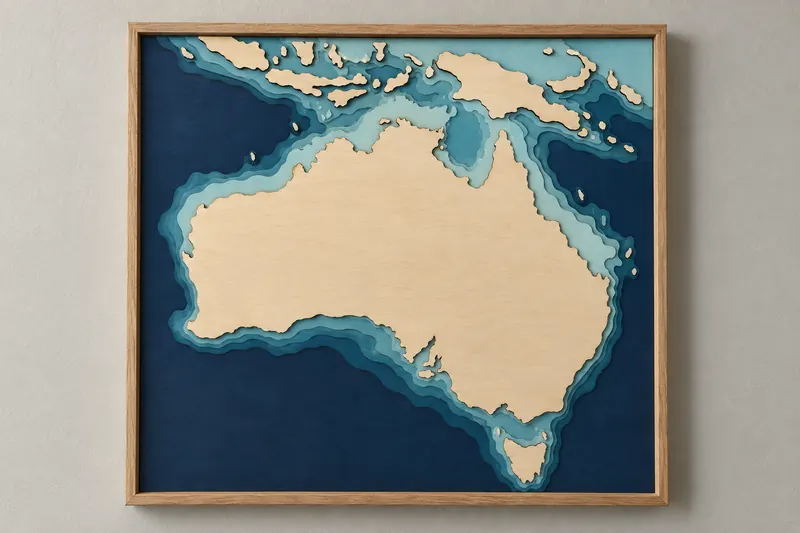
In the Map Designer every layer can be made a different way. A lake can be UV printed in full colour on the backplate while the shore plate above it is laser cut. Topography or lake depth can come off a 3D printer as one stepped piece that sits in a cut frame. Streets and contour lines can be scored or engraved into the top sheet instead of cut.
Mixing processes saves sheets and time. A depth chart with five bands is five cuts and a glue-up; printed, it is one sheet. And it lets each part of the map look like what it is: printed colour for water, real height for mountains, fine lines for roads.
On this page (5)
What you need
- A laser for the cut and scored sheets
- A flatbed UV printer for printed layers, or a 3D printer for terrain and depth pieces
- Acrylic or laser-grade plywood for the cut sheets; white or light sheets show UV print colours best
1. Start from a layered preset
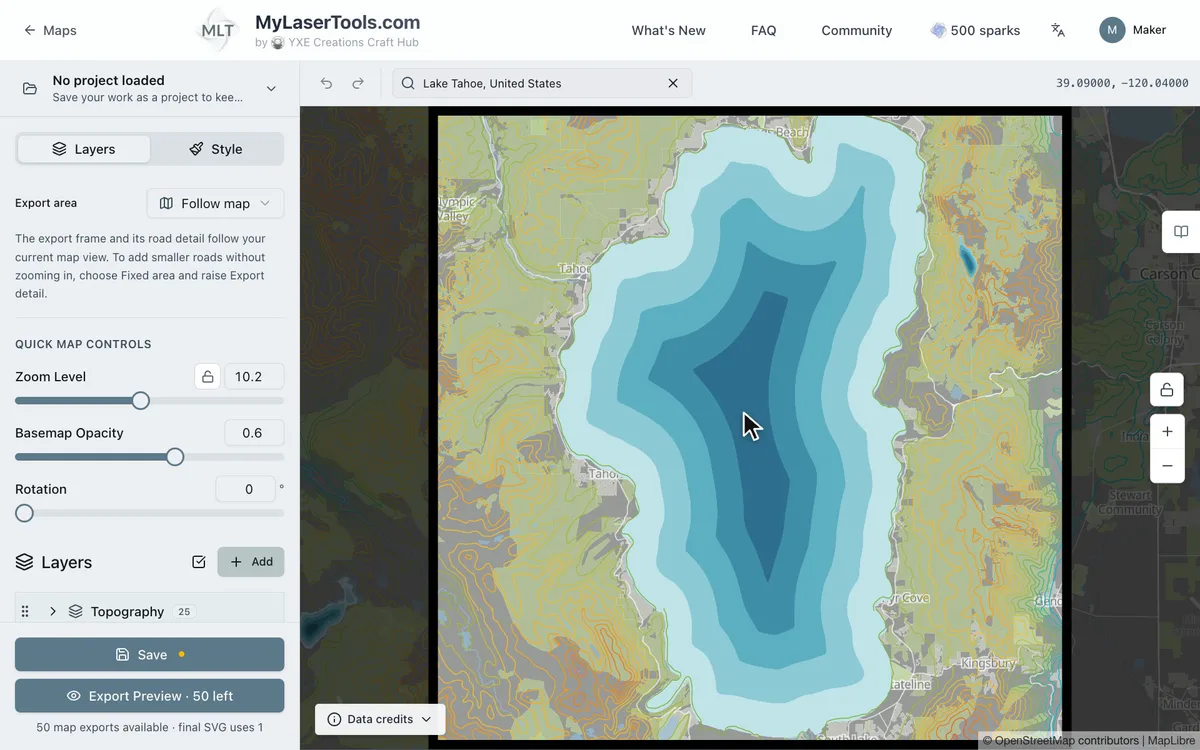
Pick a preset that already has the layers you want to mix. Land and Sea Relief Map has lake depth bands and terrain, Lake Depth Chart and Coastal Depth Chart have depth bands under a shore plate, and Topography has contour bands. Find your place and frame it first; the processes come next.
2. Choose a process for each layer
Hover over a layer in the layer list and click the pencil to open Edit Layer. Choose how the layer is made under Export Type, then click Save Changes:
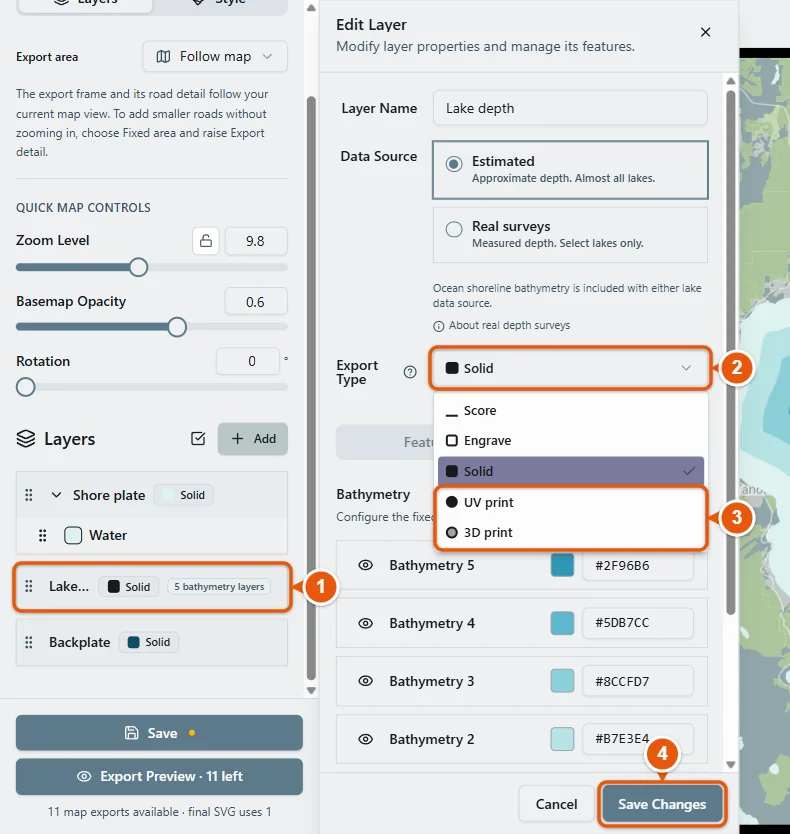
- Solid is a plate: a laser cut sheet, or a raised plate in a 3D print. Cut keeps only the outline, so the shapes drop out of the sheet.
- Score and Engrave mark the sheet below without cutting through. Score is one thin line per path, the fastest choice for streets and contour lines. Engrave fills the shapes.
- UV print is not cut at all. Its colours are printed onto the solid layer underneath it, or the backplate, before that sheet goes on the laser. Use it for water, depth bands or parks.
- 3D print on topography or lake depth turns every band into a solid step, and the whole group comes out as one stepped piece in the STL and 3MF. On other layers it adds a thin colour layer on top of the part below.
Some combinations that work well: depth bands UV printed onto the backplate under a cut shore plate; contour lines UV printed or scored onto a single sheet instead of cut as a stack; lake depth or terrain 3D printed and set into a laser cut frame; streets scored into the top sheet and the coastline cut.
3. Check the build in the 3D preview
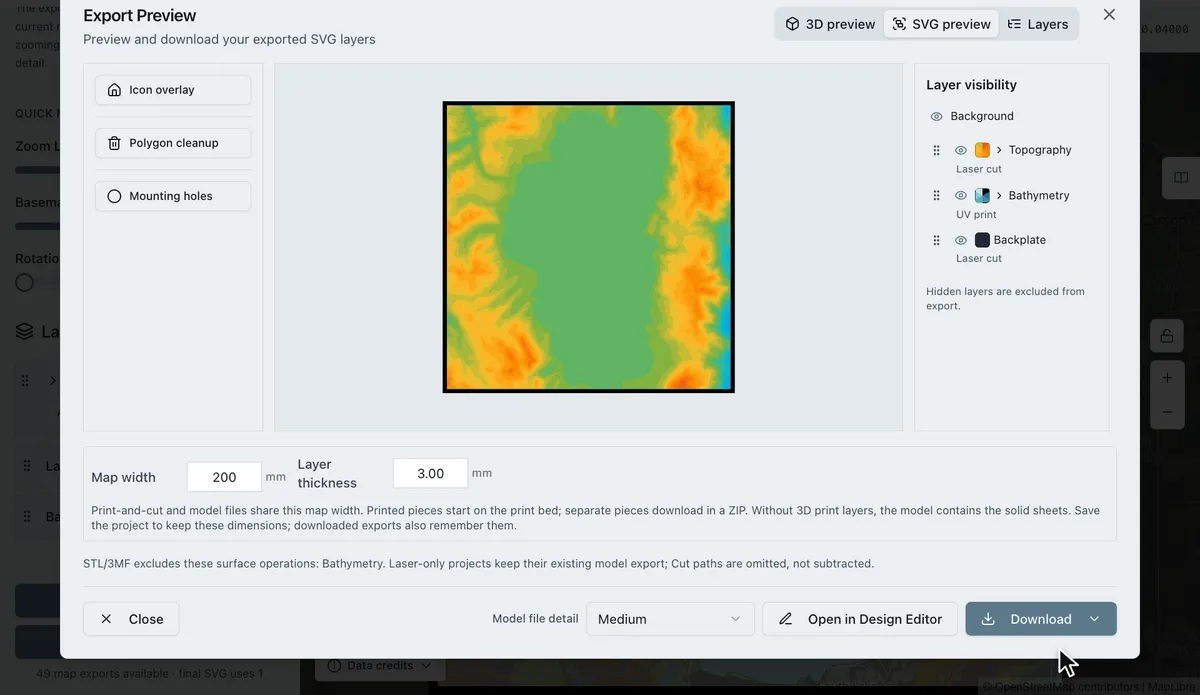
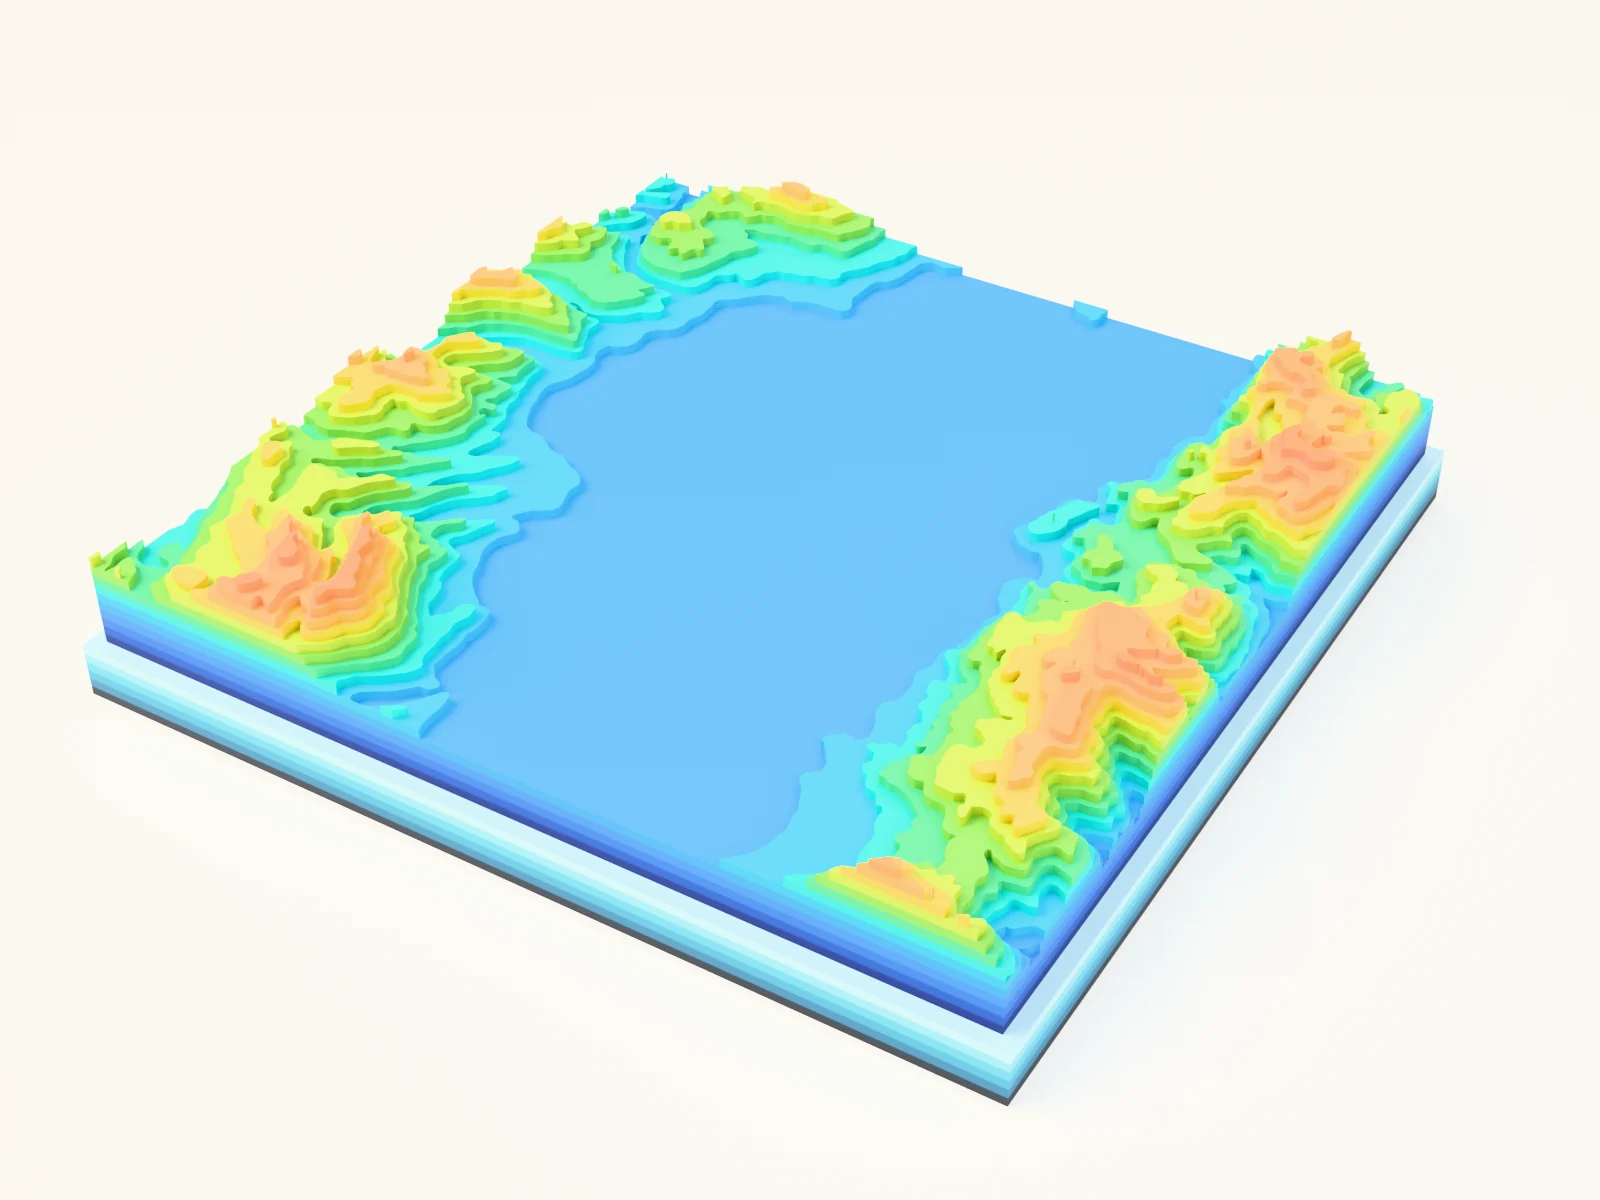
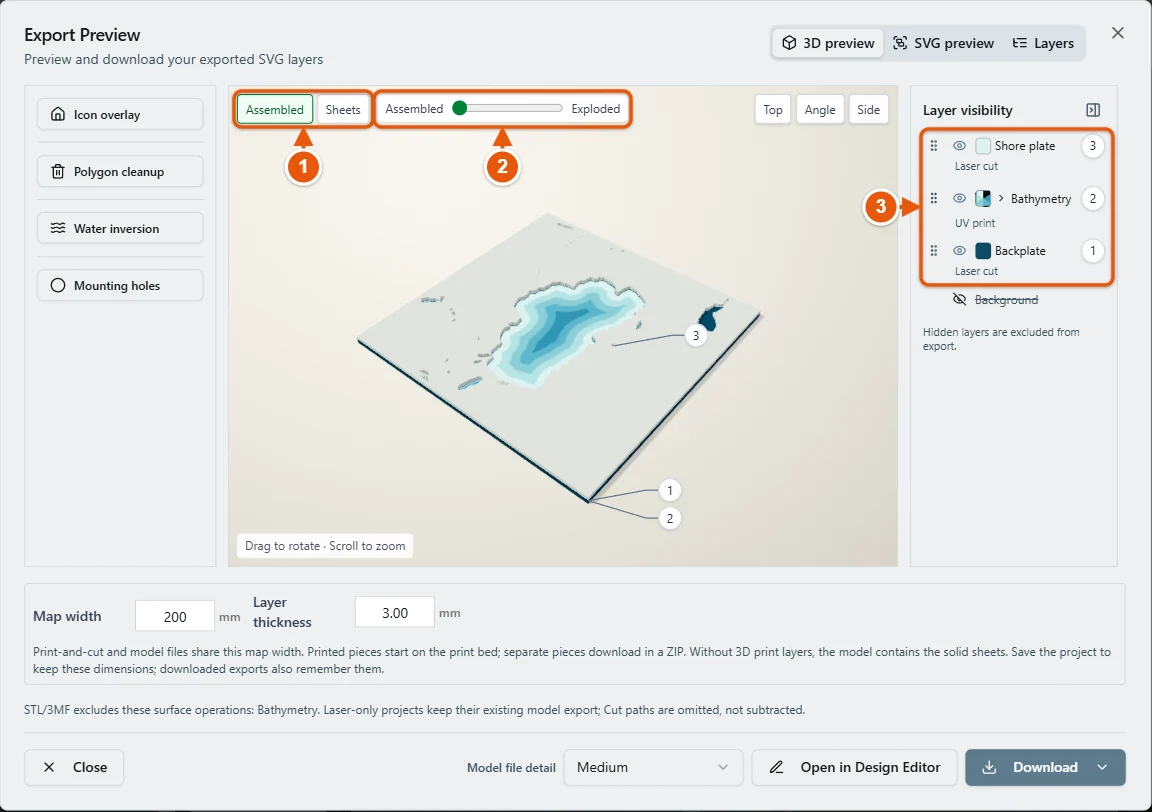
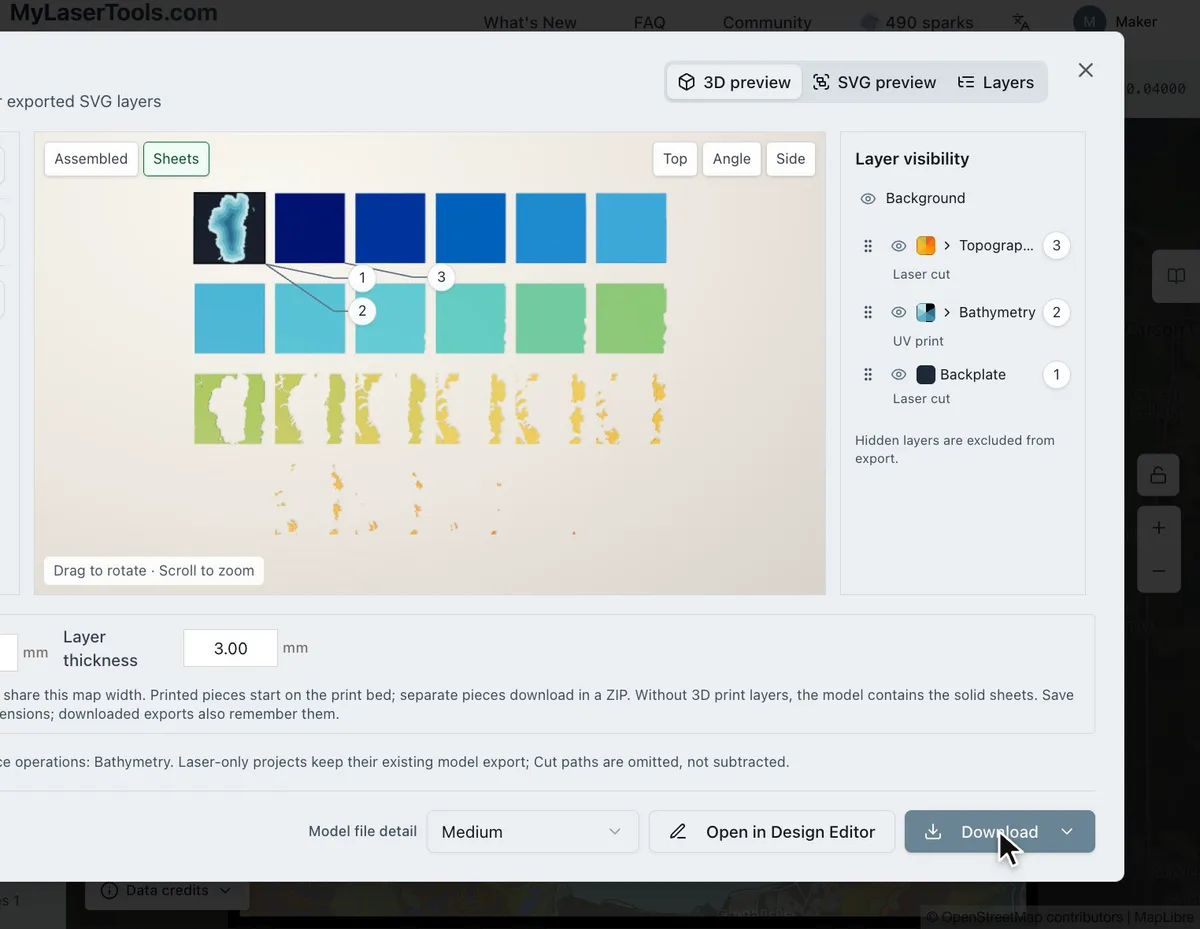
Open the Export Preview and click 3D preview. Assembled shows the finished stack and Sheets lays every sheet out on its own. Drag the slider towards Exploded to lift the layers apart and see what sits on what. The layer list on the right names the process of each layer and its place in the stack, so you can spot one still set to the wrong thing before you download.
4. Download the files for each machine
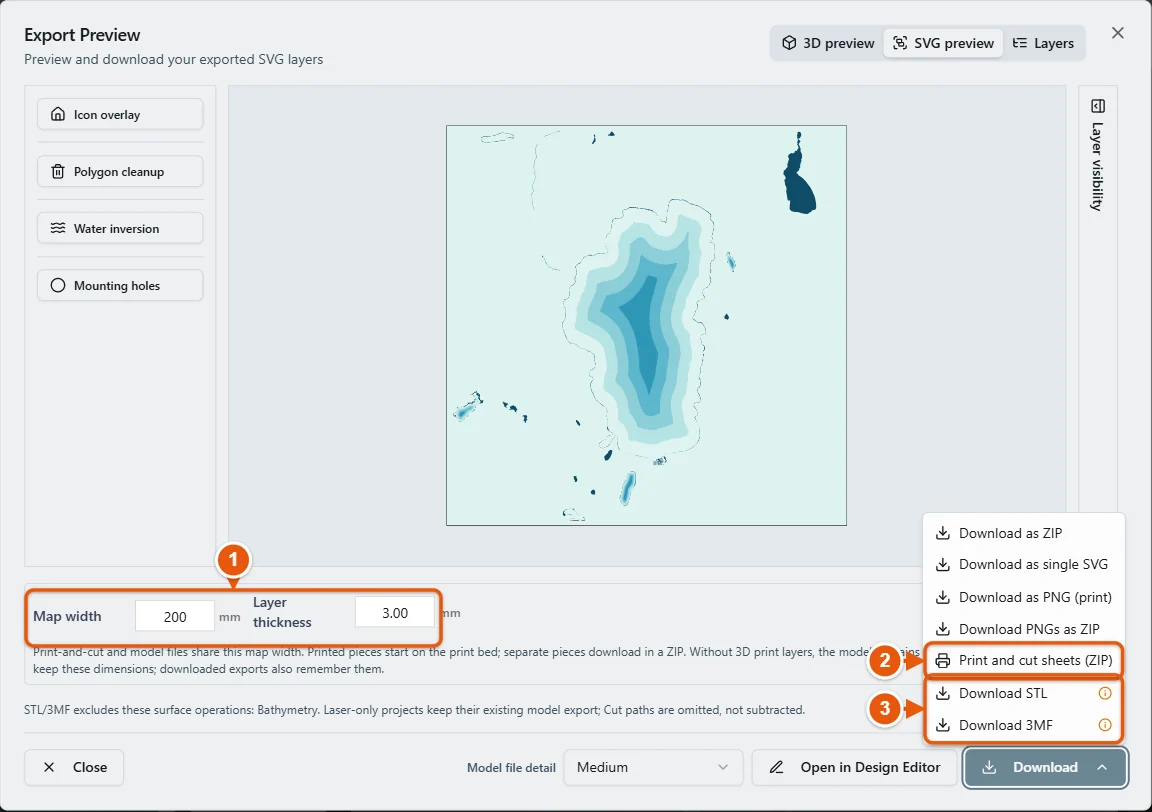
- Print and cut sheets (ZIP) gives one folder per sheet, bottom to top: the UV print image as PNG and PDF, the matching cut and score lines as SVG, and three registration targets in the margin. Print at 100% scale and line up the targets in your laser software before cutting. The magenta targets in cut.svg are only for alignment, so turn their output off.
- STL or 3MF gives the 3D printed pieces. 3MF keeps each band as a named part with its own colour. UV print and laser marks are left out of these files.
- When a printed piece also gets UV print, its folder in the ZIP is labelled UV print on 3D part and holds only the artwork to print onto the finished piece.
Troubleshooting
- The print and the cut do not line up: the print was scaled. Print at 100%, never fit to page, and line up the targets in your laser software before cutting.
- The UV print lands on the wrong sheet: it prints onto the nearest Solid layer below it, or the backplate. Move it in the layer list so it sits right above the sheet you want.
- The 3D piece is missing from the STL: only layers set to 3D print are in the model. Check the layer list in the Export Preview.
Next steps and project ideas
- Print the lake depth bands on white acrylic and cut a wood shore plate to sit on top.
- 3D print a mountain from the Topography bands and set it into a laser cut plywood frame with the streets scored around it.
- UV print contour lines straight onto one sheet of mirror acrylic for a flat topo map that still shines.
- Read UV printing maps for the white backer choice and 3D printing relief maps for slicing the stepped pieces.
Was this guide helpful?
More in Making maps

Keep up with MyLaserTools.
Email me about new tools, product updates, tutorials, and occasional MyLaserTools offers. Unsubscribe at any time.
© 2026 MyLaserTools.com. All rights reserved.