

Use MyLaserTools in xTool Studio: SVG cutting and CO₂ engraving
xTool Studio, and the older Creative Space, look a little different for each version and each machine. Importing an SVG works the same everywhere, but what happens next depends on the machine: an M1 can print and blade cut, a P3 or S1 laser engraves and cuts.
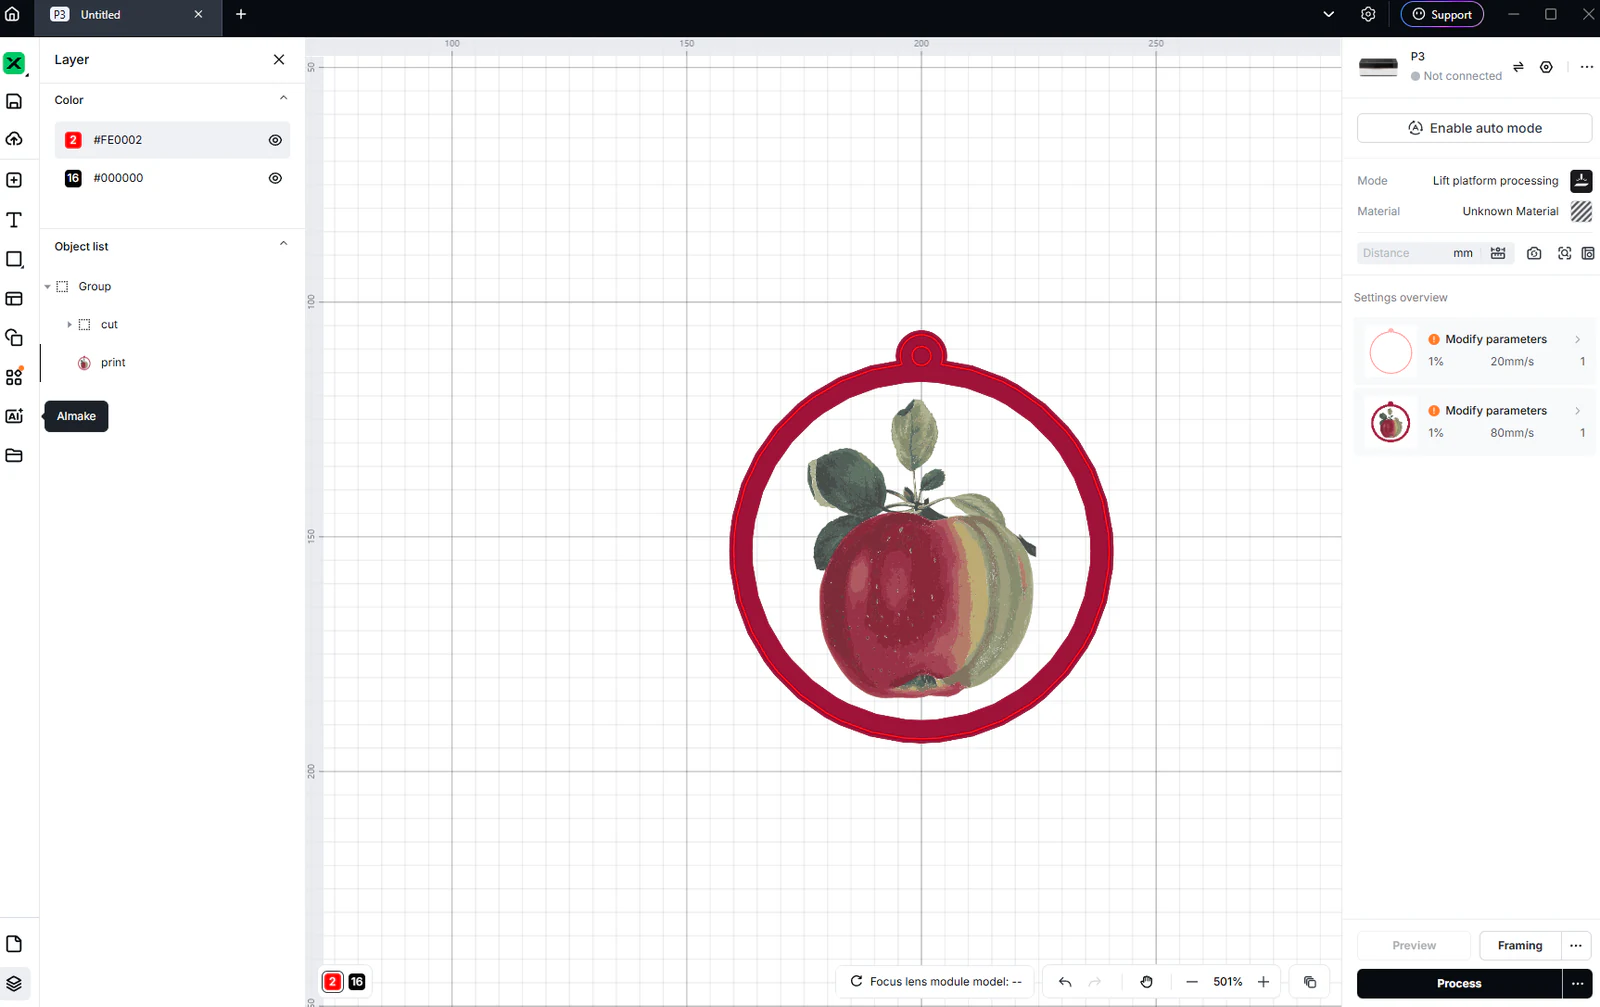
The screenshots use the apple ornament in a P3 project for CO2 engraving and cutting. For printing on clothing with the Apparel Printer, read the Apparel Printer DTF guide. In a laser project, a colour picture is engraved in shades of grey, never printed in colour.
On this page (10)
- 1. Import and check real dimensions
- 2. Assign an operation to each object
- 3. Choose the positioning method your device supports
- Finished artwork: ornaments and standees
- Print artwork and cut paths in the same SVG
- P3 bitmap: Engrave is a laser operation
- P3 vector: choose Cut when you need a cut-through outline
- P3 Settings overview: check every object before you start
- Troubleshooting
- Manufacturer documentation
What you need
- xTool Studio, with your machine connected.
- The SVG from MyLaserTools, or for photo tools, the photo export and its cut outline.
1. Import and check real dimensions
Create a project, choose your machine and import the SVG. Compare the width with the size you set in MyLaserTools. If it is off by a fixed ratio, change the SVG import resolution in the settings and import again. For print-and-cut files, keep the print and the cut together and resize them as one, never one at a time.
2. Assign an operation to each object
Select each object and choose what the laser does with it: Cut for outlines that release the piece, Score for thin lines on the surface, Engrave for filled areas and pictures. The colours from MyLaserTools only group the objects; they do not choose the operation. Pick your material in xTool Studio and confirm the settings with a test grid. For layered work, keep parts of the same material and thickness together.
3. Choose the positioning method your device supports
Use your machine's camera or framing to place the job on the material. On an M1, use Print & blade cut for printed stickers and paper. A laser without a camera needs a jig or printed alignment marks to cut around artwork printed somewhere else. Instructions for one xTool model often do not match another, so follow the guide for yours.
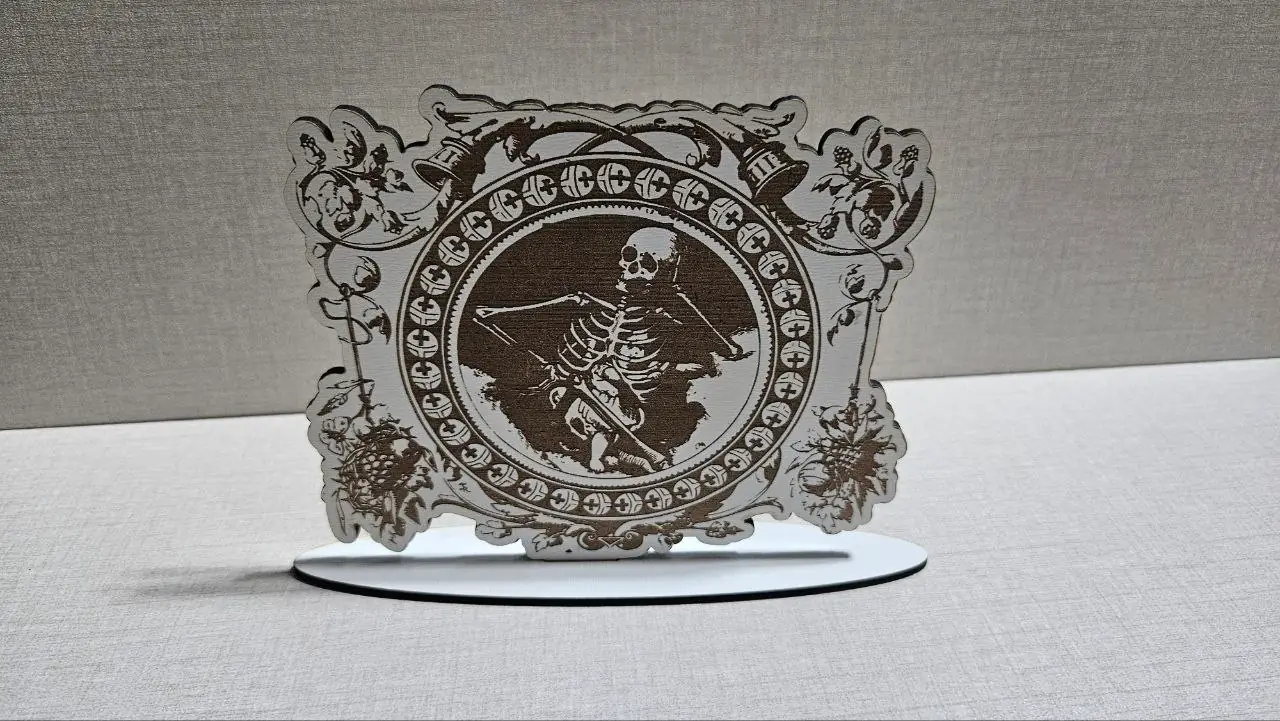
Finished artwork: ornaments and standees
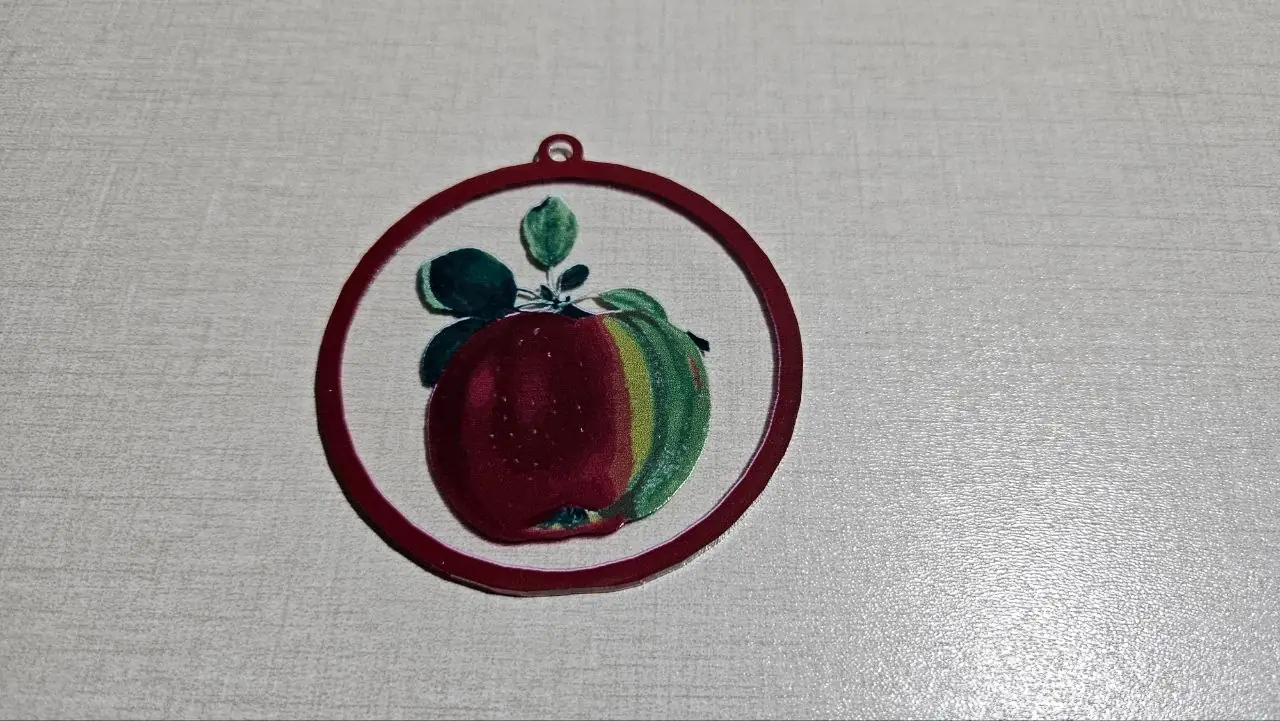
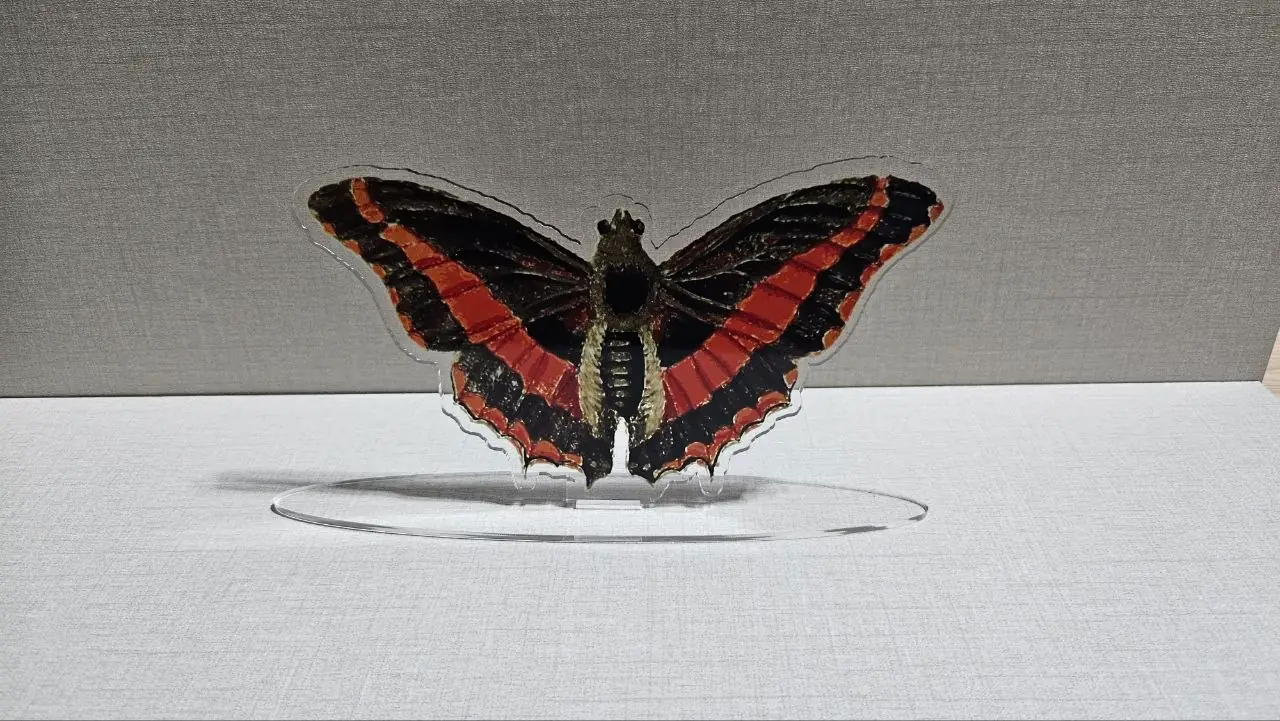
Finished ornaments and standees with printed artwork and a laser cut outline. Look at how close the cut runs to the artwork and how the standees sit in their bases.
Print artwork and cut paths in the same SVG
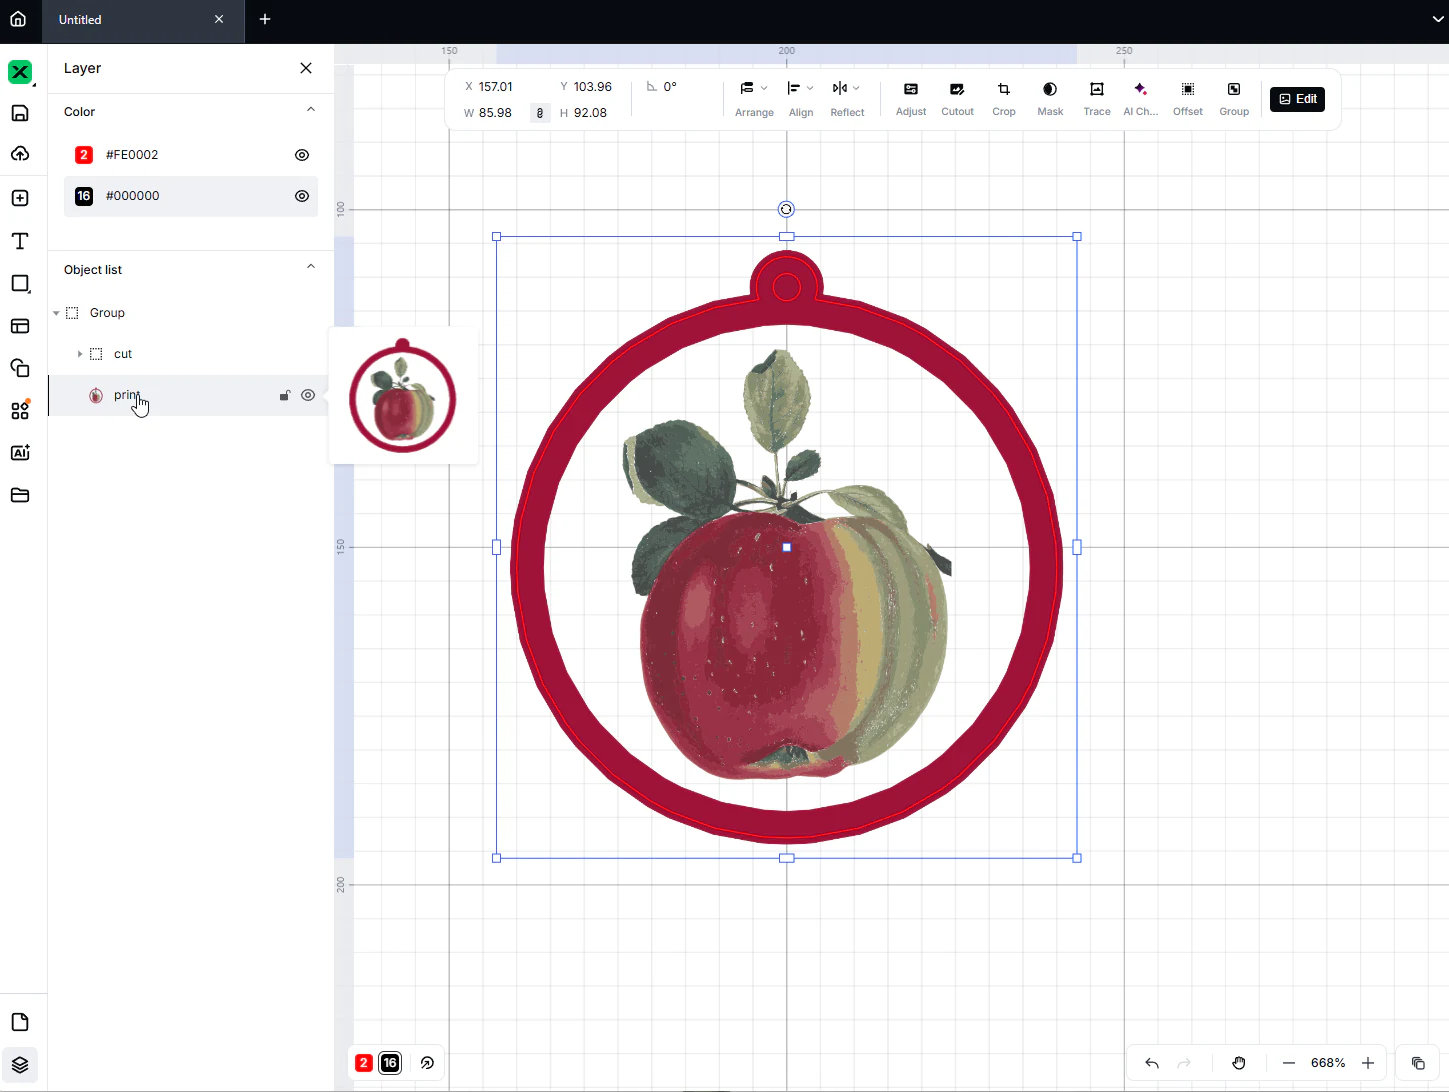
Keep print and cut together so they stay aligned. The apple and the coloured ring are the print; the outer shape and the hanging hole are the cut. Before you start the laser, check every object's operation, so an apple you already printed does not get engraved over.
P3 bitmap: Engrave is a laser operation
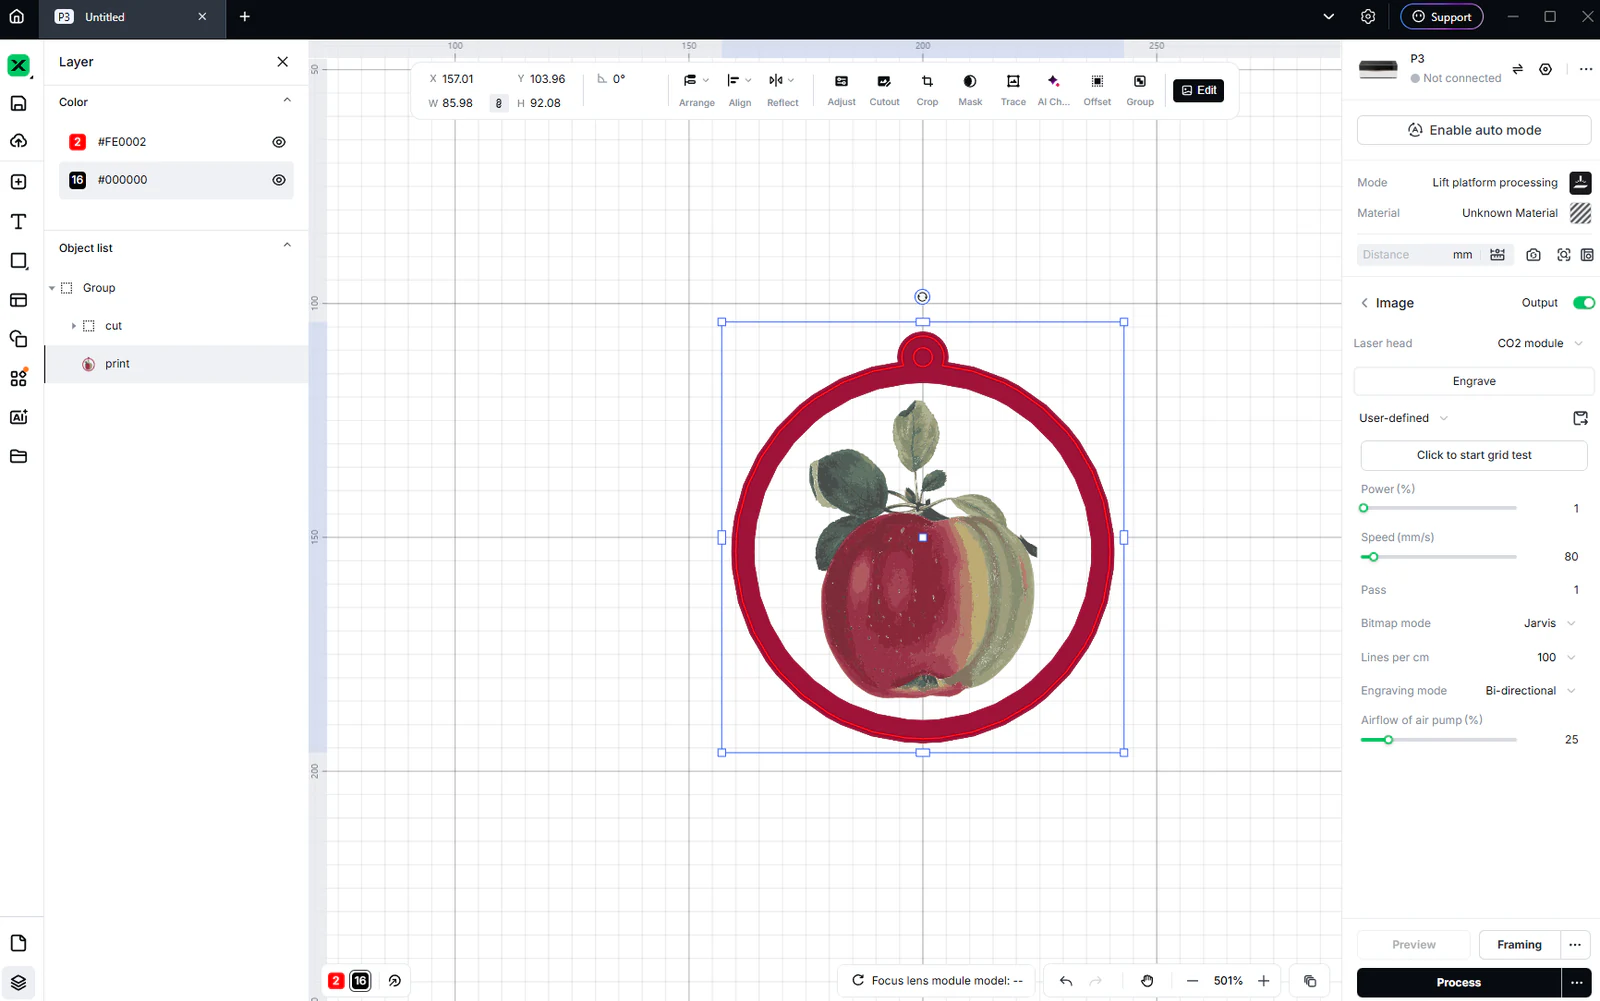
To engrave the apple as a picture, set the image processing and run a test on your material first. The laser engraves it in shades of one colour, not in the colours you see on screen. To cut around an apple you already printed, turn this picture's Output off.
P3 vector: choose Cut when you need a cut-through outline
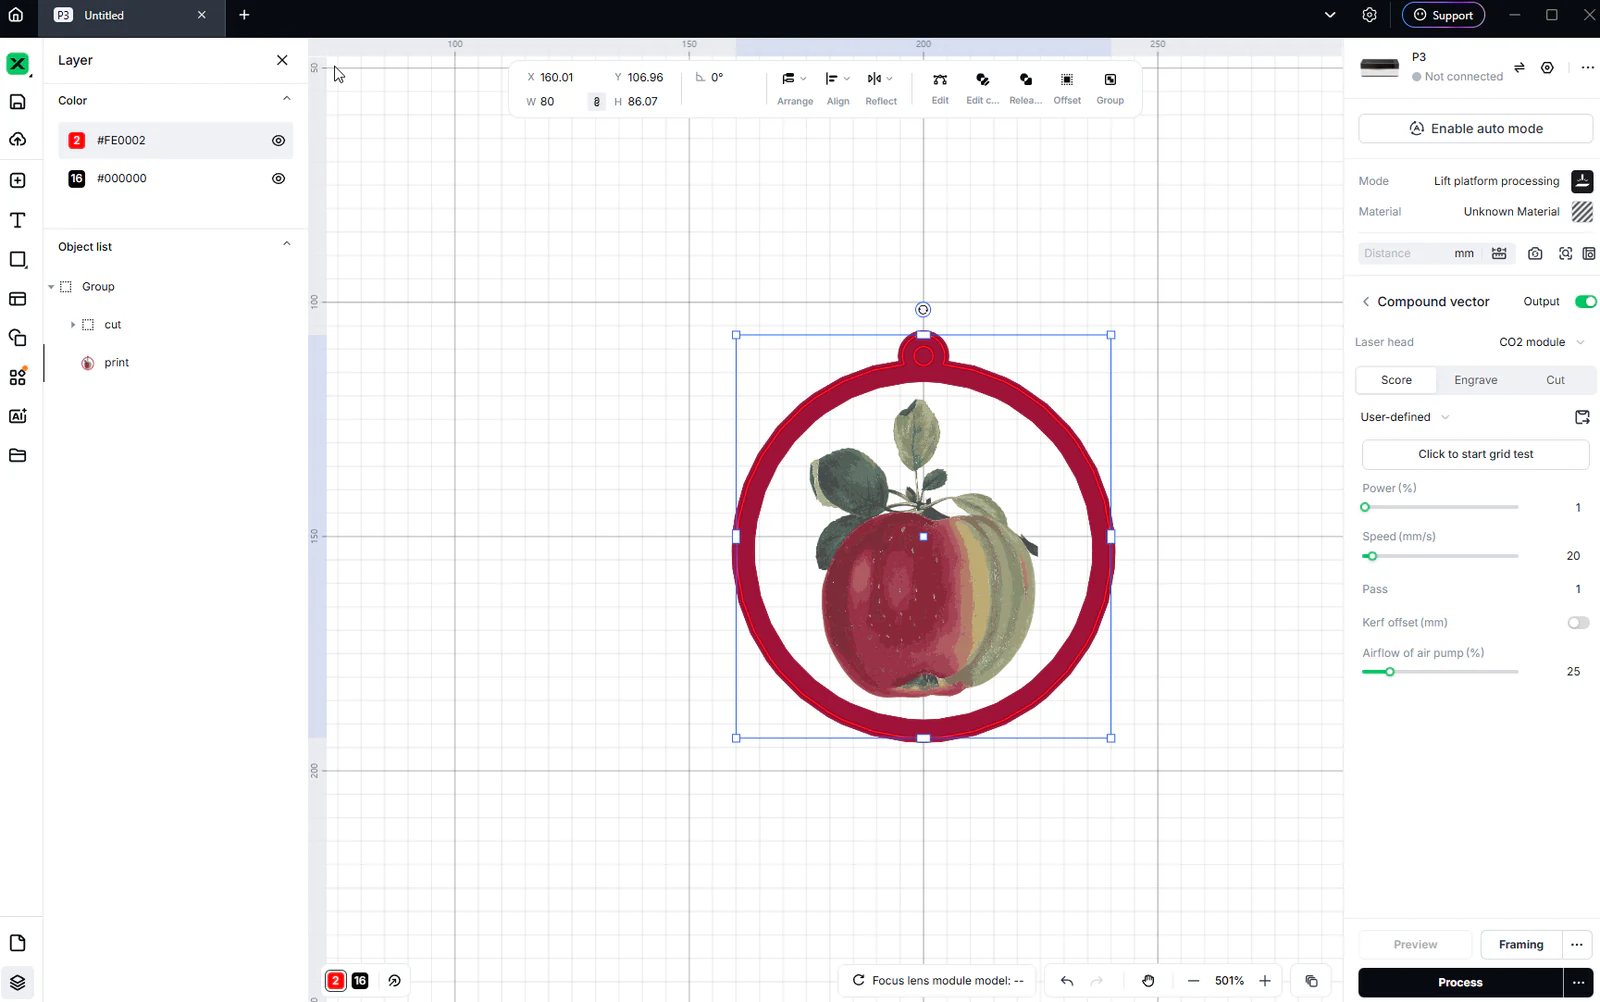
To cut the ornament out, select the outline and the hanging hole and choose Cut, then set it for your material. Score only marks a line on the surface. The outline and the picture have different sizes on purpose; keep them where they are instead of resizing one to match the other.
P3 Settings overview: check every object before you start
Go through the list and check each object's operation and Output. When a piece is engraved and cut, engrave first and cut last, so the piece does not move after it is free. For a printed piece, the picture should not run at all. Choose your real material, measure the distance, then check the preview and frame the job. The power and speed in the screenshot are defaults, not settings for your material.
Troubleshooting
- Import fails: re-export a simplified SVG and review unsupported masks or effects.
- The wrong operation ran: select the object and check its processing setting. The colour does not set it.
Manufacturer documentation
Next steps and project ideas
Next: layered laser projects, or go back to the Learning Center.
Take the design into your software
Was this guide helpful?
More in Your software
Keep up with MyLaserTools.
Email me about new tools, product updates, tutorials, and occasional MyLaserTools offers. Unsubscribe at any time.
© 2026 MyLaserTools.com. All rights reserved.