

How to make an editable template in the Design Editor
Difficulty: Beginner. Time: about 10 minutes.
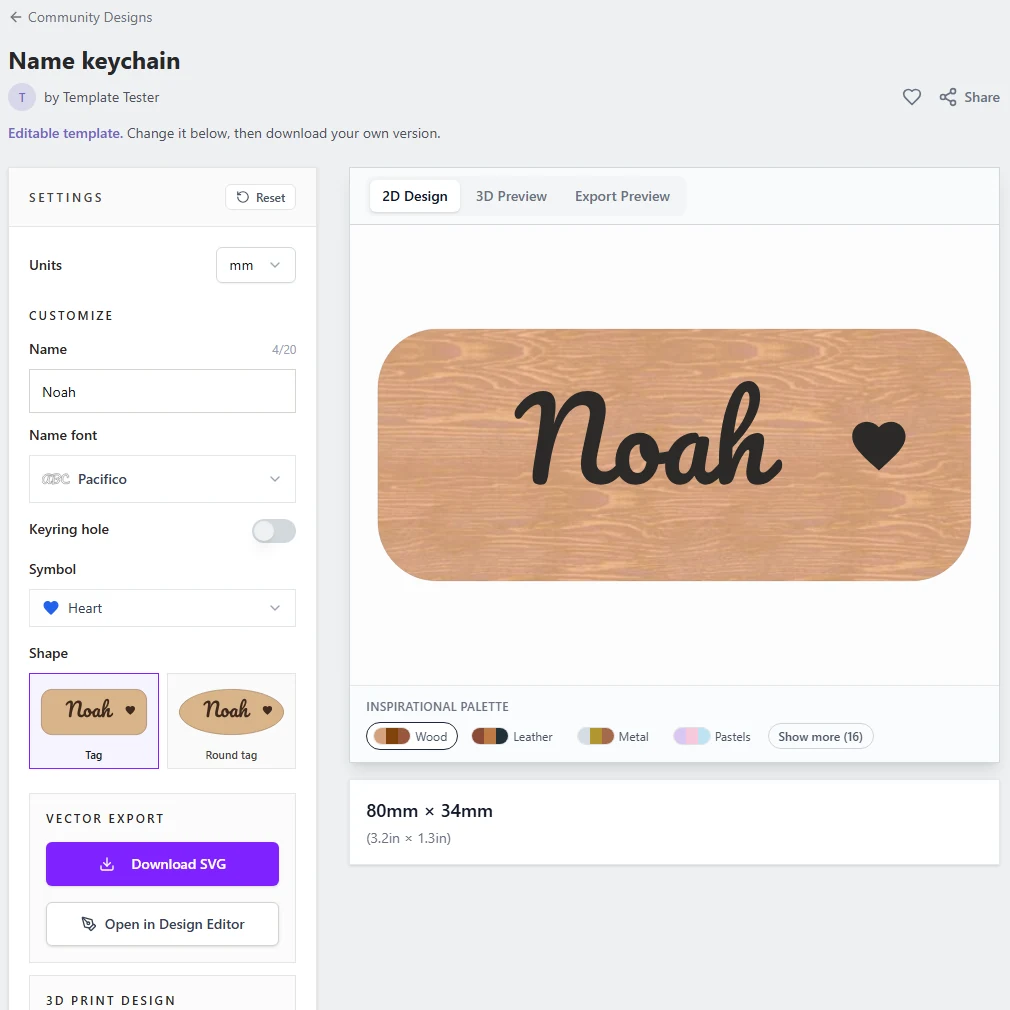
A template is a design with a few parts left open. You make a name keychain once, and anyone can type their own name, pick a shape and download a file ready to cut. They don't need to know the Design Editor, and your template never changes.
Templates are free. You need an account to save and share one, and a saved template counts as a Design Editor project. People who use a shared template don't need an account.
On this page (11)
- Step 1: Make the design
- Step 2: Choose what people can change
- Step 3: Name each option and set how it starts
- Step 4: Preview it as a customer
- Step 5: Save it
- Step 6: Share it in the community gallery
- What people see
- Tips for good templates
- Do people need an account to use a template?
- Can people change parts I didn't open up?
- How do I stop sharing a template?
What you need
- A free MyLaserTools account.
- A design in the Design Editor. Text, shapes, symbols from the library and your own SVG files all work.
Step 1: Make the design
Build the design the way it should look before anyone changes it. For a name keychain that is a tag, a keyring hole, a name and a small symbol. If you want to offer a choice, like a round or a square tag, draw both versions in the same place.
Give each part a clear name in Layers (double-click the name to rename it). People see some of these names later, for example Round tag as a choice on the form.
Step 2: Choose what people can change
Click a part of the design. Properties now shows Let people change this with the options that fit that part. Click one, and the Template panel opens with the new option at the top, ready to name.
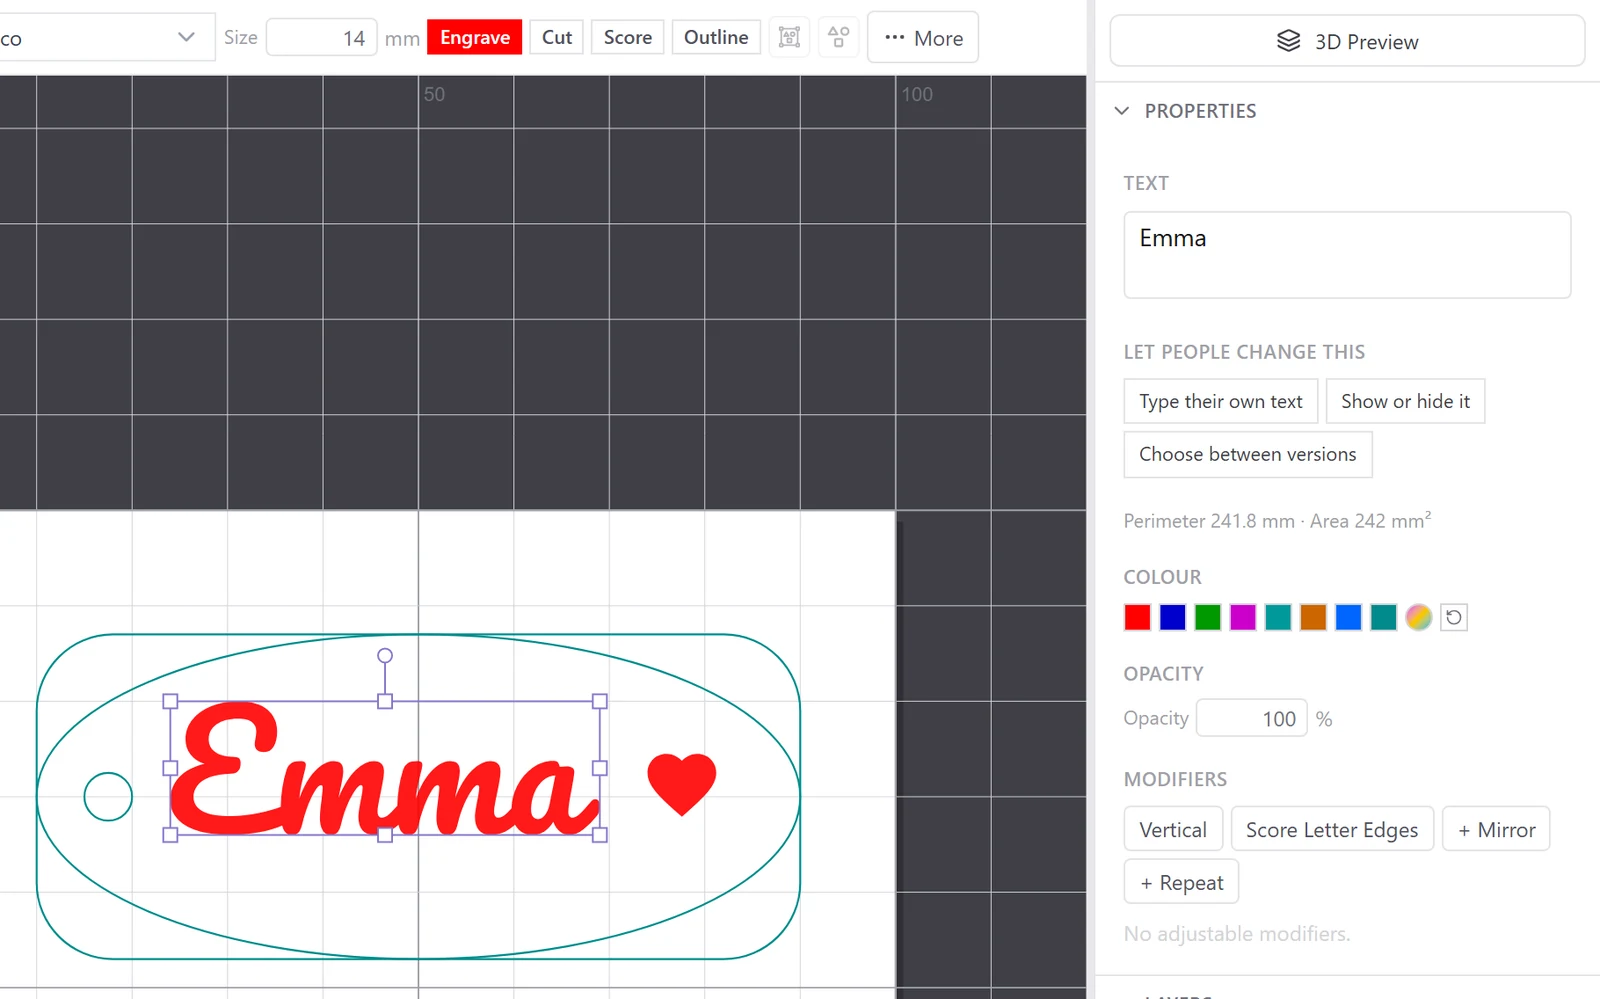
- Type their own text: for a name, a date or a message. Tick Let people change the font if they may pick another font.
- Show or hide it: for an optional part, like the keyring hole.
- Change its size: for a hole or a symbol. You set the smallest and largest size under More options.
- Change the line width: for Outline lines.
- Pick a different symbol: people choose any symbol from the library, and it fits the space of the one you used.
- Choose between versions: select two or more versions together, then click it. Shift-click to select more than one part, on the canvas or in Layers.
Step 3: Name each option and set how it starts
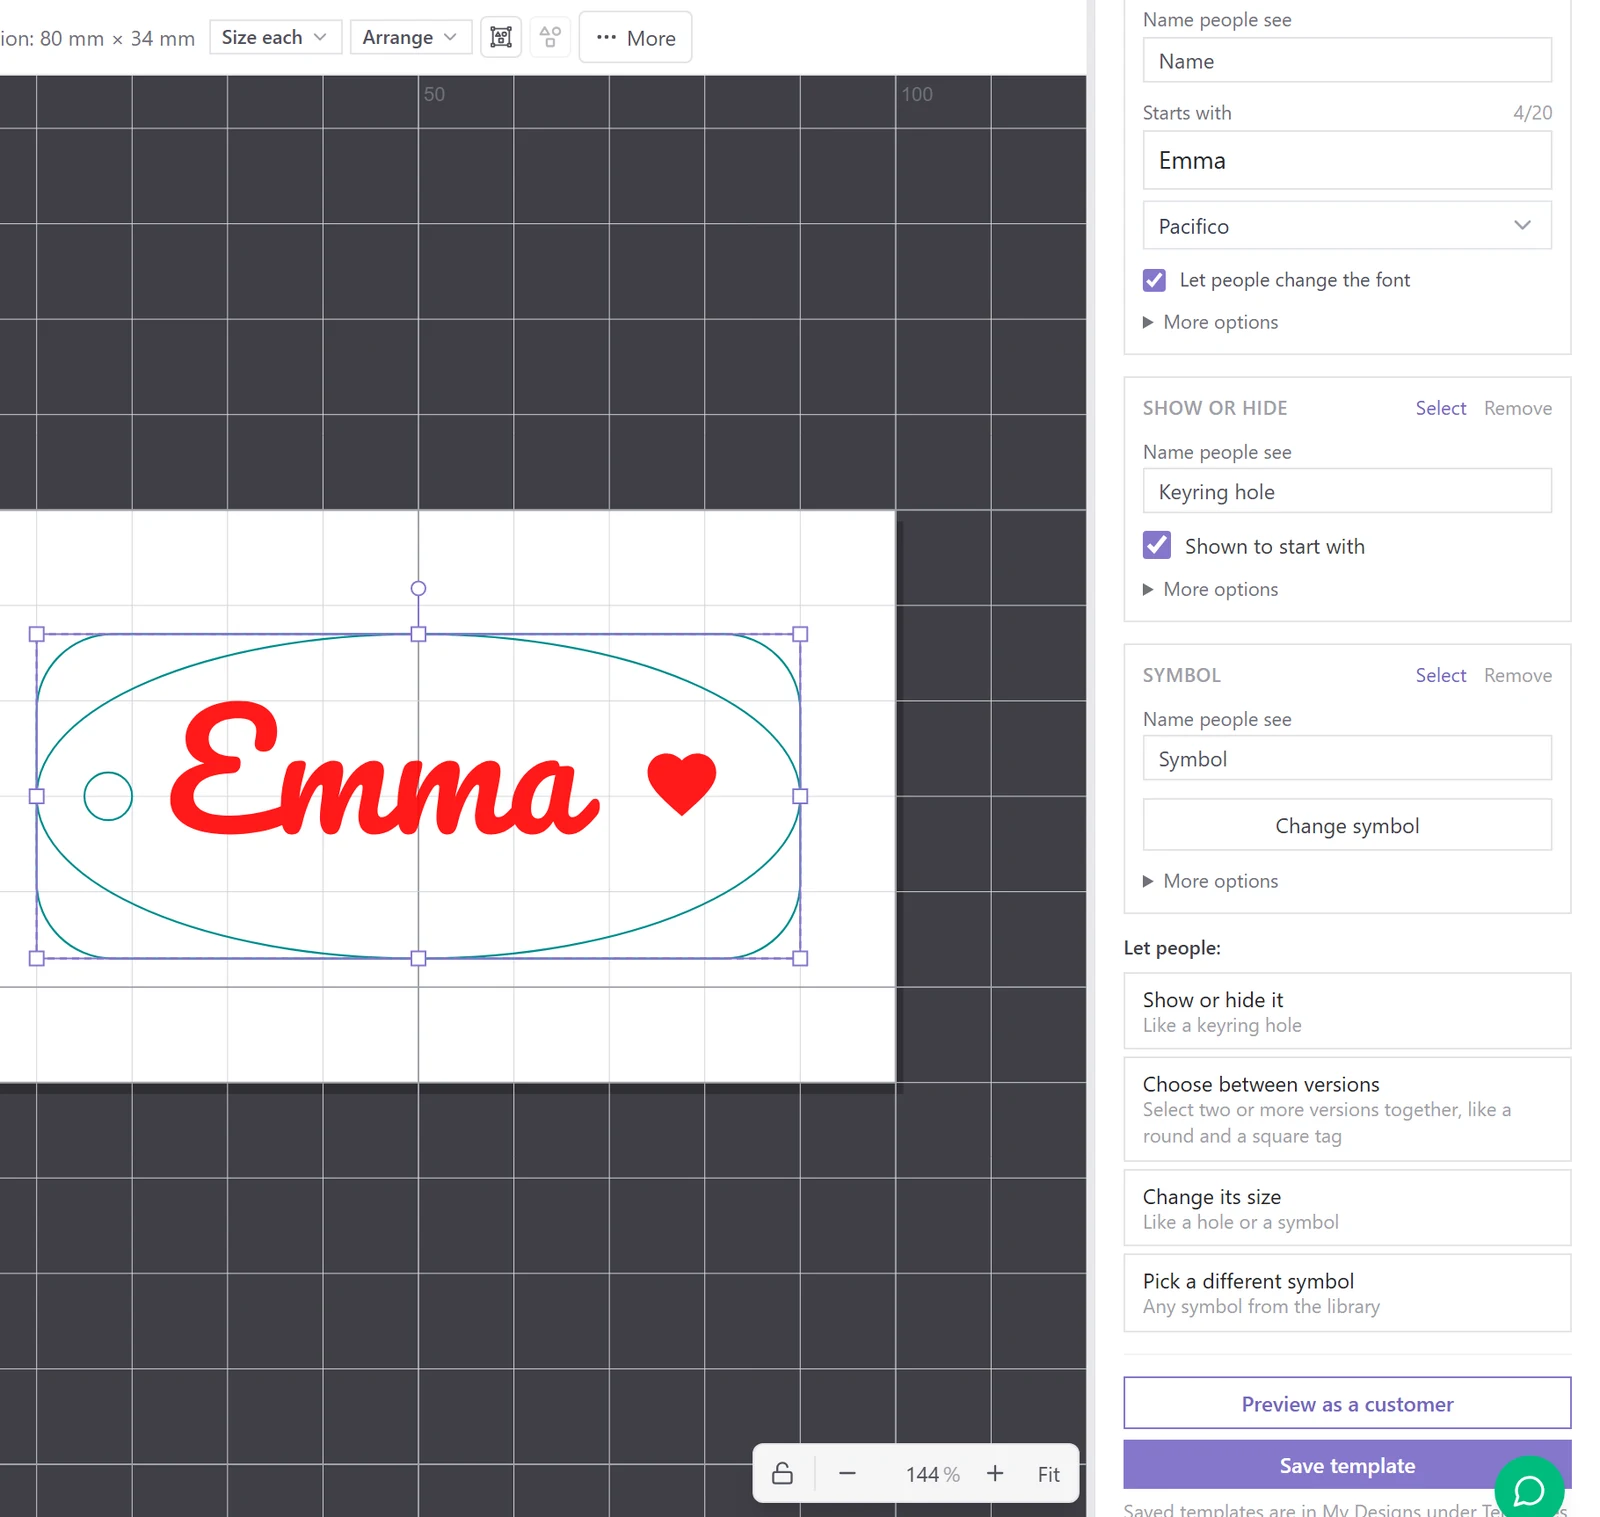
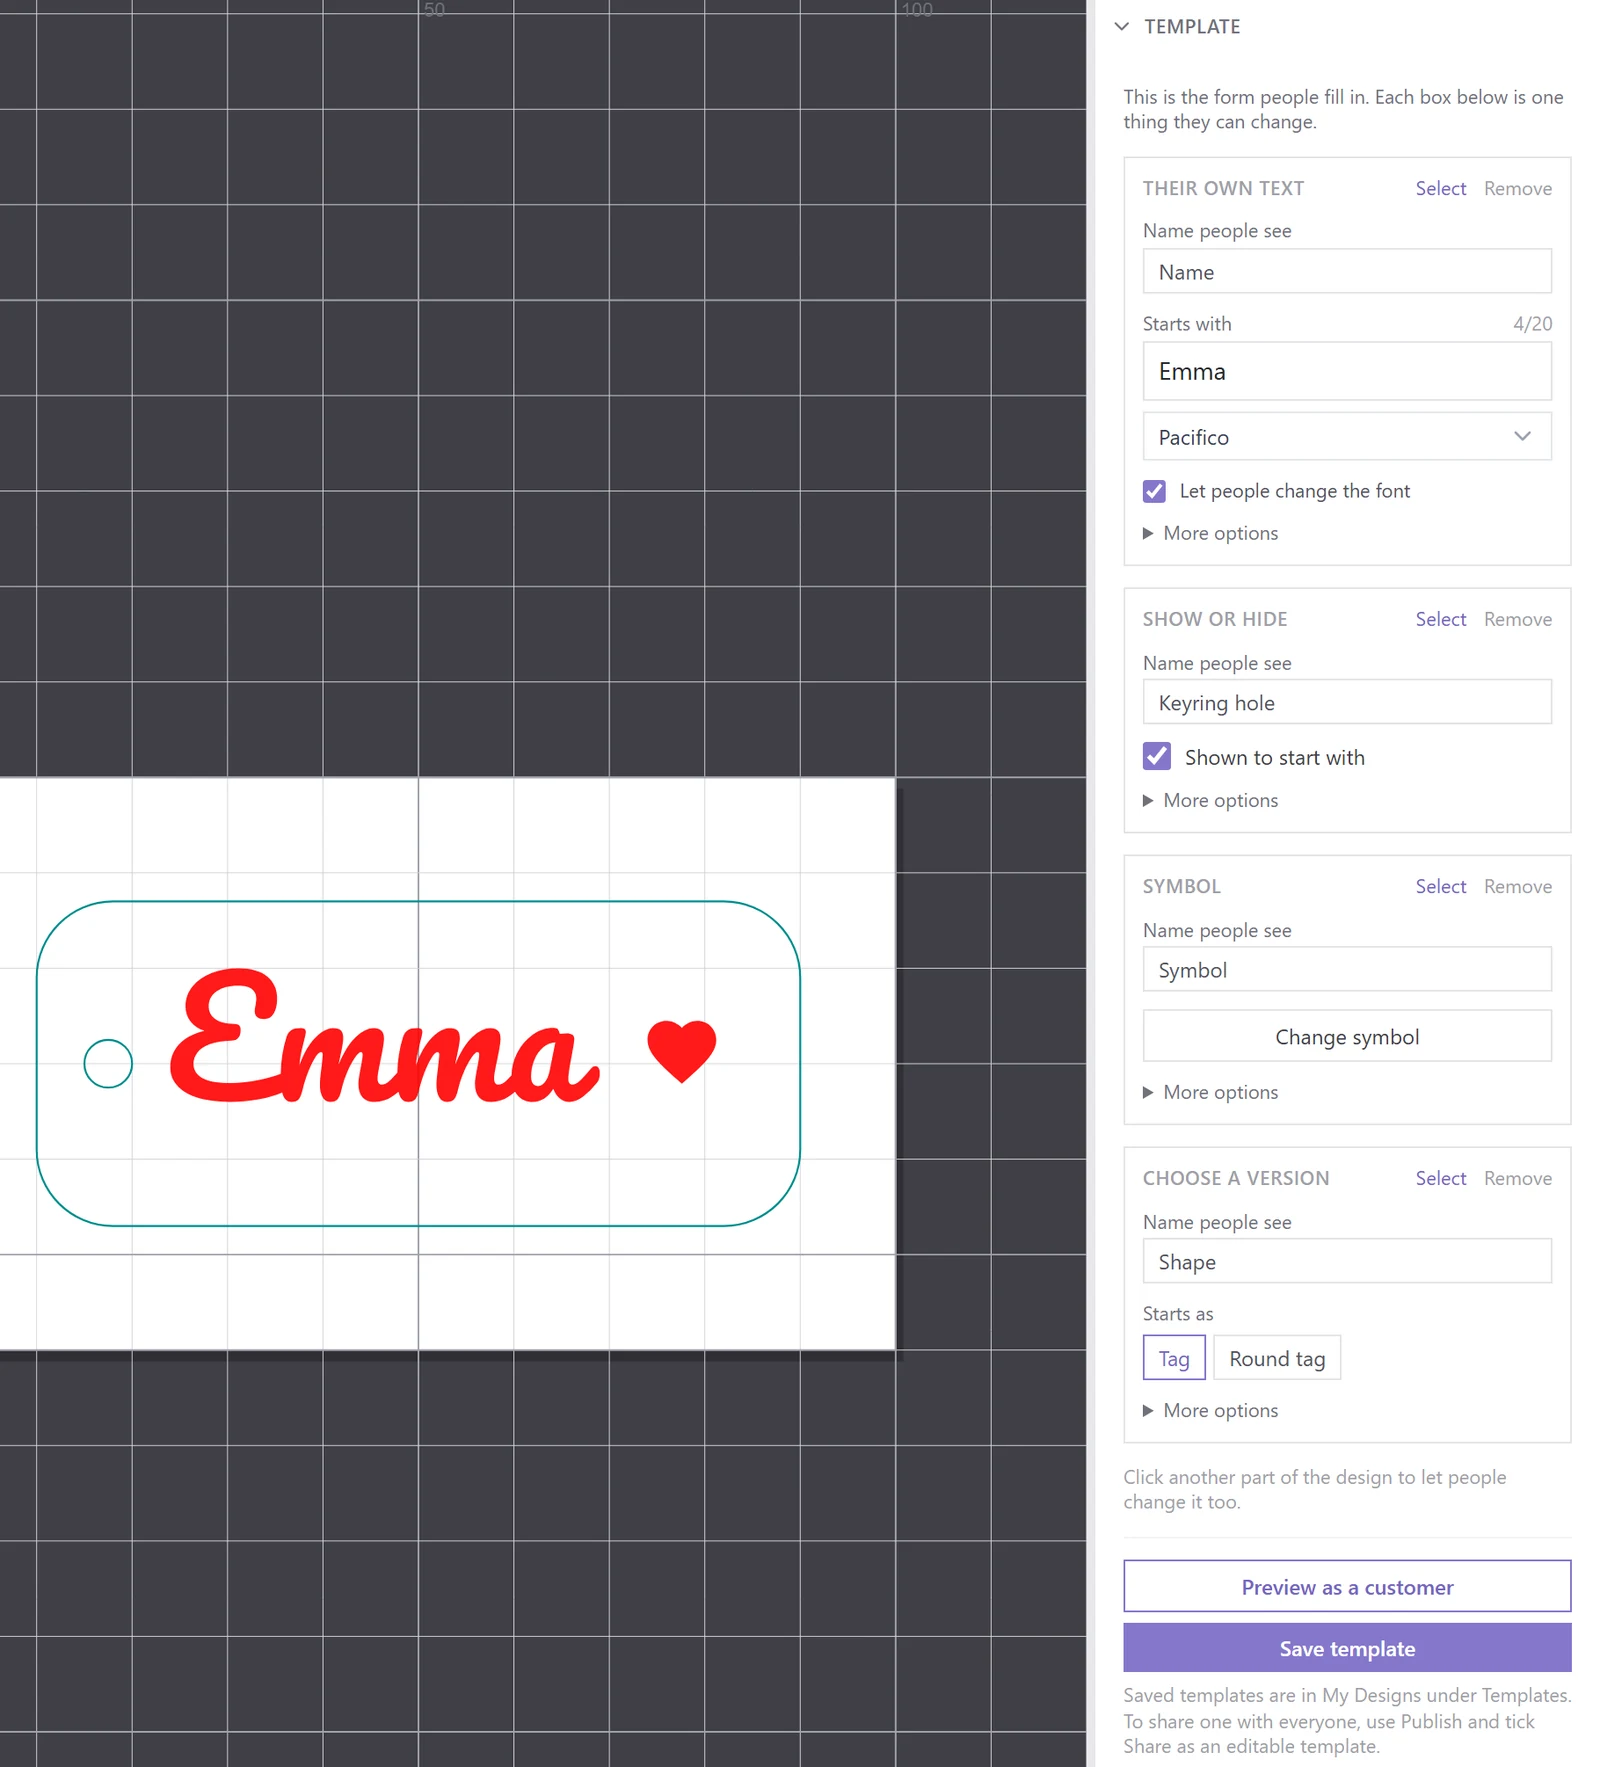
Each option is one box in the Template panel. Name people see is the label on the form, so write it for them: Name, Keyring hole, Shape. Below it you set how the option starts, which is also what your design shows now.
Long text shrinks to keep the width you gave it, so a long name doesn't run off the tag. Rarely needed settings, like the most letters allowed, are under More options.
Step 4: Preview it as a customer
Click Preview as a customer at the bottom of the Template panel. It opens the page people will use, with the live preview, the 3D view and the downloads. Try a long name and every option. Nothing you change here touches your design.
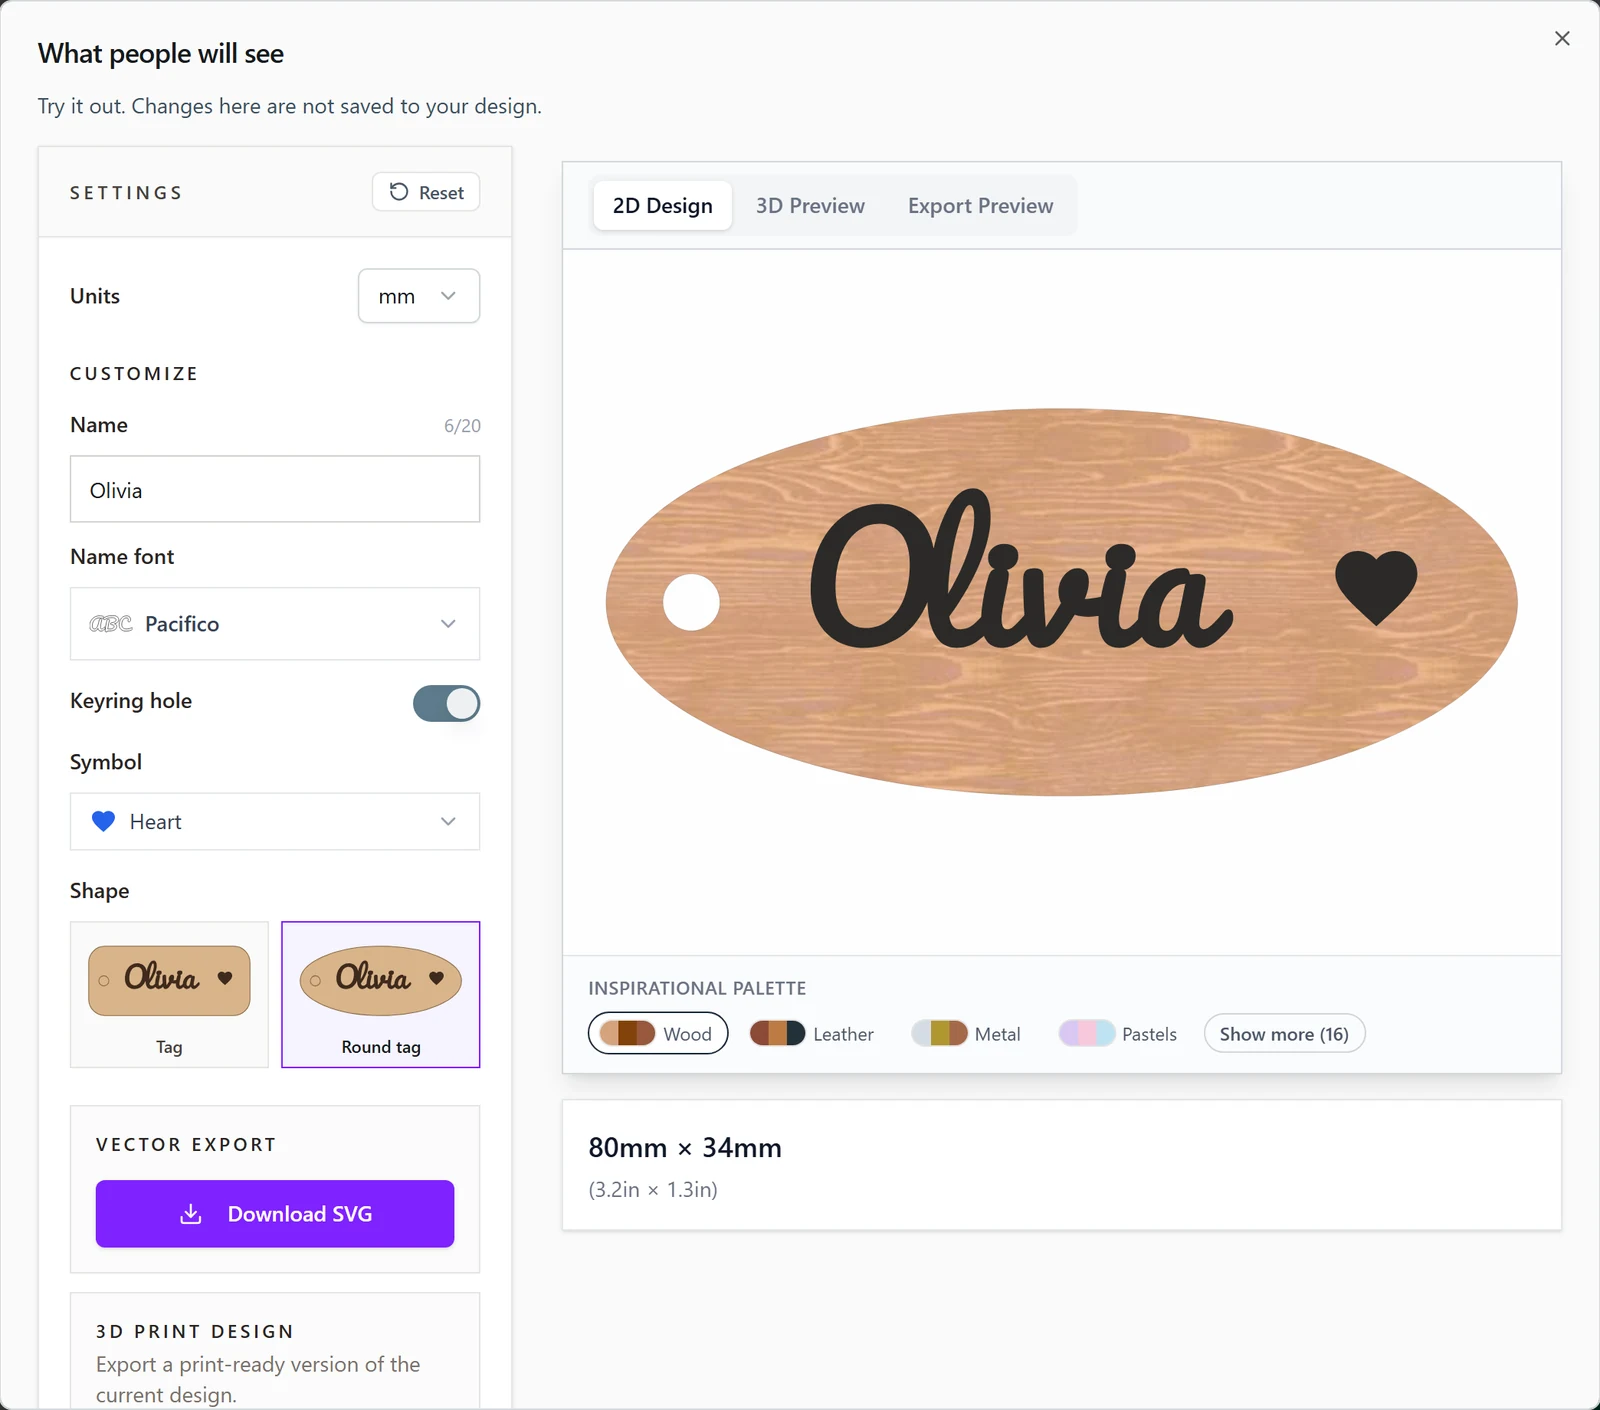
Step 5: Save it
Click Save template. Your templates are listed in My Designs under Templates. Use opens the same customer page, so you can fill one in for an order and download the file without opening the editor.

Step 6: Share it in the community gallery
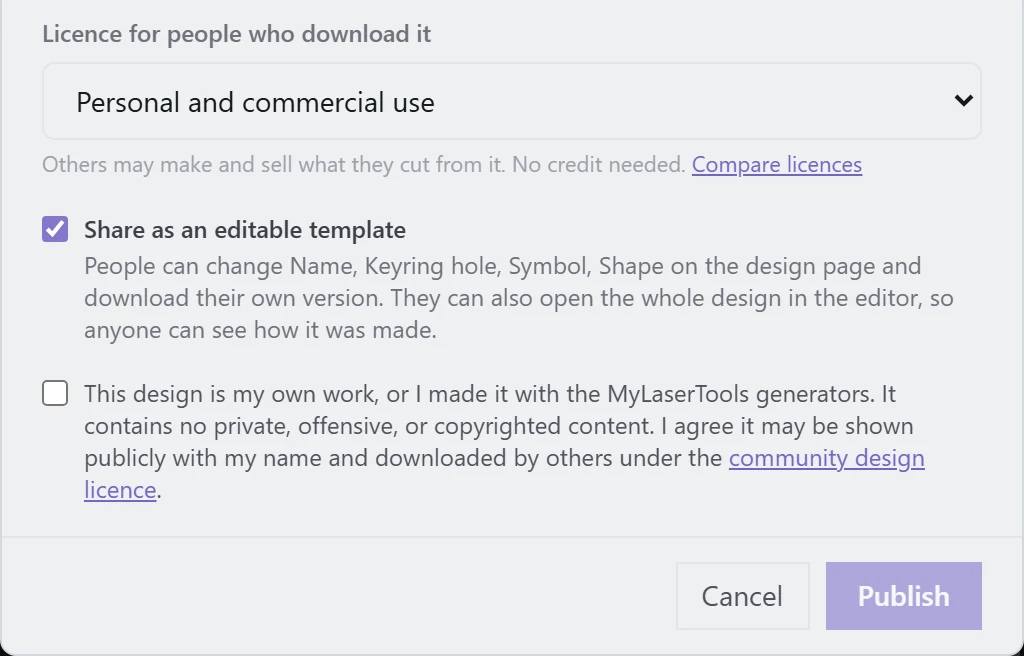
To let everyone use it, click Publish, add a title and a description, and tick Share as an editable template. In the community gallery the design gets an Editable template label, and its page becomes the customer page. Every download counts toward your design.
If you change the template later, choose Published > Update public copy and keep the box ticked.
What people see
People open your design in the gallery, change the options and download an SVG for the laser, or an STL or 3MF for a 3D printer. Open in Design Editor gives them the whole design to edit further.
Tips for good templates
- Try the longest name you expect in the preview before you share it.
- Offer only the things people really change. Three or four options suit most designs.
- Name versions before you make a Choose between versions option, because people see those names.
- Download the SVG from the preview and open it in your laser software once, to check the cut.
Do people need an account to use a template?
No. Anyone can fill in a shared template and download the file. They need an account only to save their own copy in the Design Editor.
Can people change parts I didn't open up?
Not on the design page. Open in Design Editor gives them the whole design, like any shared design, so share only what you are happy for people to edit.
How do I stop sharing a template?
Choose Published > Update public copy and untick Share as an editable template. The design stays in the gallery as a normal design. You can also hide it or remove it from the gallery in the same menu.
Next steps and project ideas
- Design Editor: start a new design or open one of your projects.
- Community designs: templates other makers have shared.
- My Designs: your saved templates under Templates.
Was this guide helpful?
More in Using MyLaserTools

Keep up with MyLaserTools.
Email me about new tools, product updates, tutorials, and occasional MyLaserTools offers. Unsubscribe at any time.
© 2026 MyLaserTools.com. All rights reserved.