

Making a personalized gift card holder with the Gift Card Holder Generator
Difficulty: easy. Time: 10 minutes to set up, about 15 minutes to cut and glue one holder. Best methods: laser cut 3 mm plywood with coloured art pieces, or a multi-colour 3D print.
The holder is drawn around the card, so a standard 85.6 by 54 mm gift card fits snugly, and the spacer is open at the top so the card goes in after the glue has dried.
Every name you type becomes its own holder in the same file, and the small art pieces are packed into the free space of the plates so a whole class set fits on a few sheets.
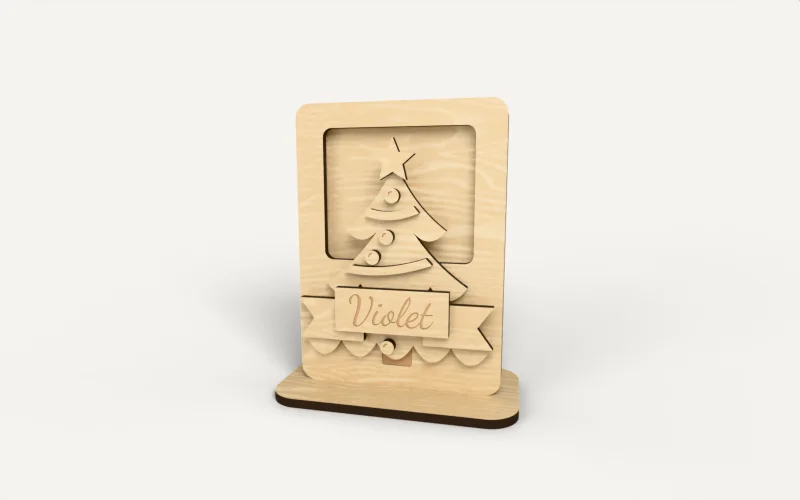
What you need
- 3 mm plywood for the plates, plus offcuts in two or three colours for the art
- Wood glue or PVA
- A gift card, and ribbon for the hanging tab
1. Pick a design and type the names
Choose a Design: Christmas tree, Wrapped present, Gingerbread house, Birthday cake or Classic frame. The classic frame takes any Symbol from the library, so it works for teachers, birthdays or a thank you.
Type the names under One name per line, up to 20. Pick a Font and a Name height; a long name shrinks to fit its ribbon or sign and the panel says so.
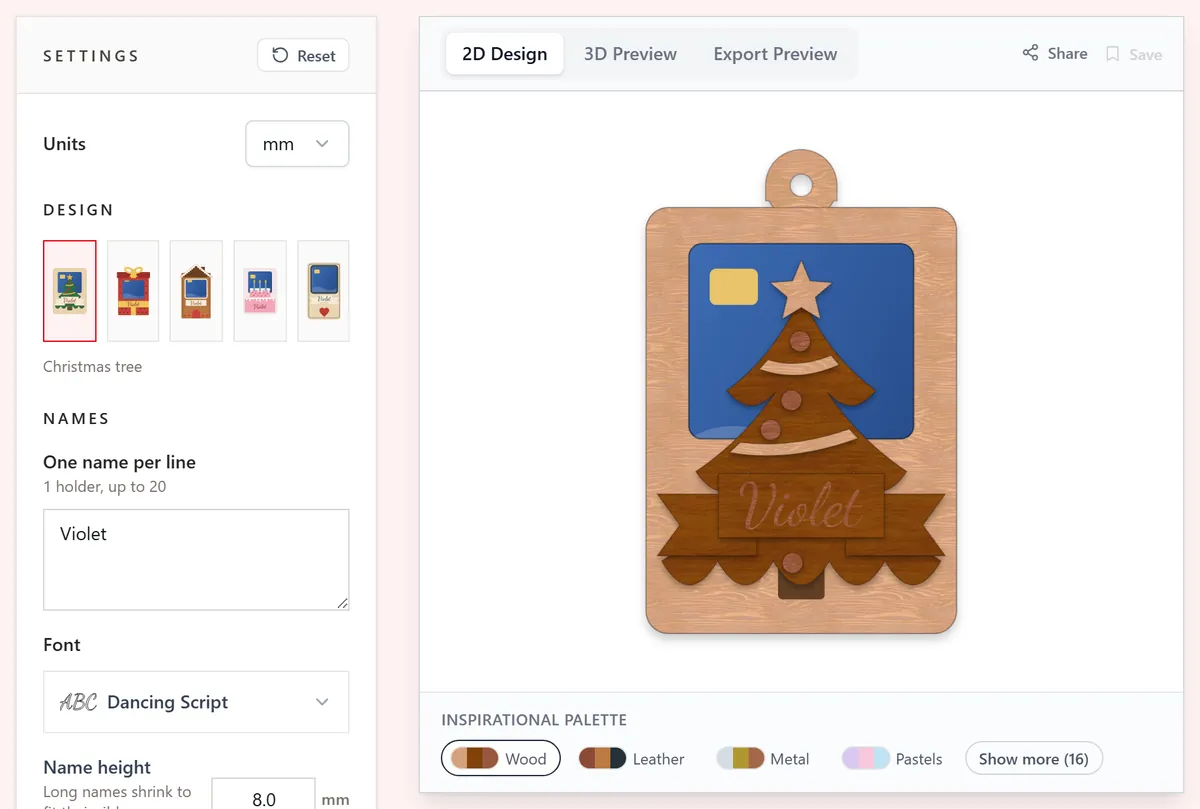
2. Set up the holder
- Layered cuts the art as separate pieces to glue on in different colours. Flat puts everything on one front, scored and engraved, with no small parts to glue.
- Leave Card on the standard gift card, or choose Custom size and enter the card's width and height.
- Set Sheet thickness to your plywood: it sizes the stand's slot and the 3D preview.
- Turn on Gluing guide to score light lines where each art piece goes.
- Under Hang or stand, pick a Hanging tab for the tree, a Stand with a slotted base, or None.
Choose your build method
Laser cutting
Cut and glue
- Download the SVG. Run the engrave and score layers first, then cut the red layer.
- Cut the art pieces from coloured offcuts, or paint them before gluing.
- Glue the spacer onto the back, edges lined up, then the front onto the spacer. Keep glue away from the pocket.
- Glue the art onto the front, lowest layer first. With the gluing guide on, each piece has its outline to sit on.
- Slide the card in from the top once the glue is dry.
3D printing
Print settings
- Download the 3MF to print every layer in its own colour, or the STL for one piece.
- Print it lying on its back. The front bridges over the card pocket, so use your slicer's bridge settings.
Next steps and project ideas
- Paste a whole class list for teacher gifts at the end of term.
- Use the birthday cake with a cinema or café card inside.
- Hang it on the tree on Christmas Eve, with the card waiting behind the window.
Take the design into your software
Was this guide helpful?
More in Workshop and crafts

Keep up with MyLaserTools.
Email me about new tools, product updates, tutorials, and occasional MyLaserTools offers. Unsubscribe at any time.
© 2026 MyLaserTools.com. All rights reserved.