

Making a protected-lands map with the National Parks Map preset
Difficulty: Easy. Time: about an hour of machine and glue time once exported. Best methods, in order: laser cutting (it's tuned for it), 3D printing, UV print.
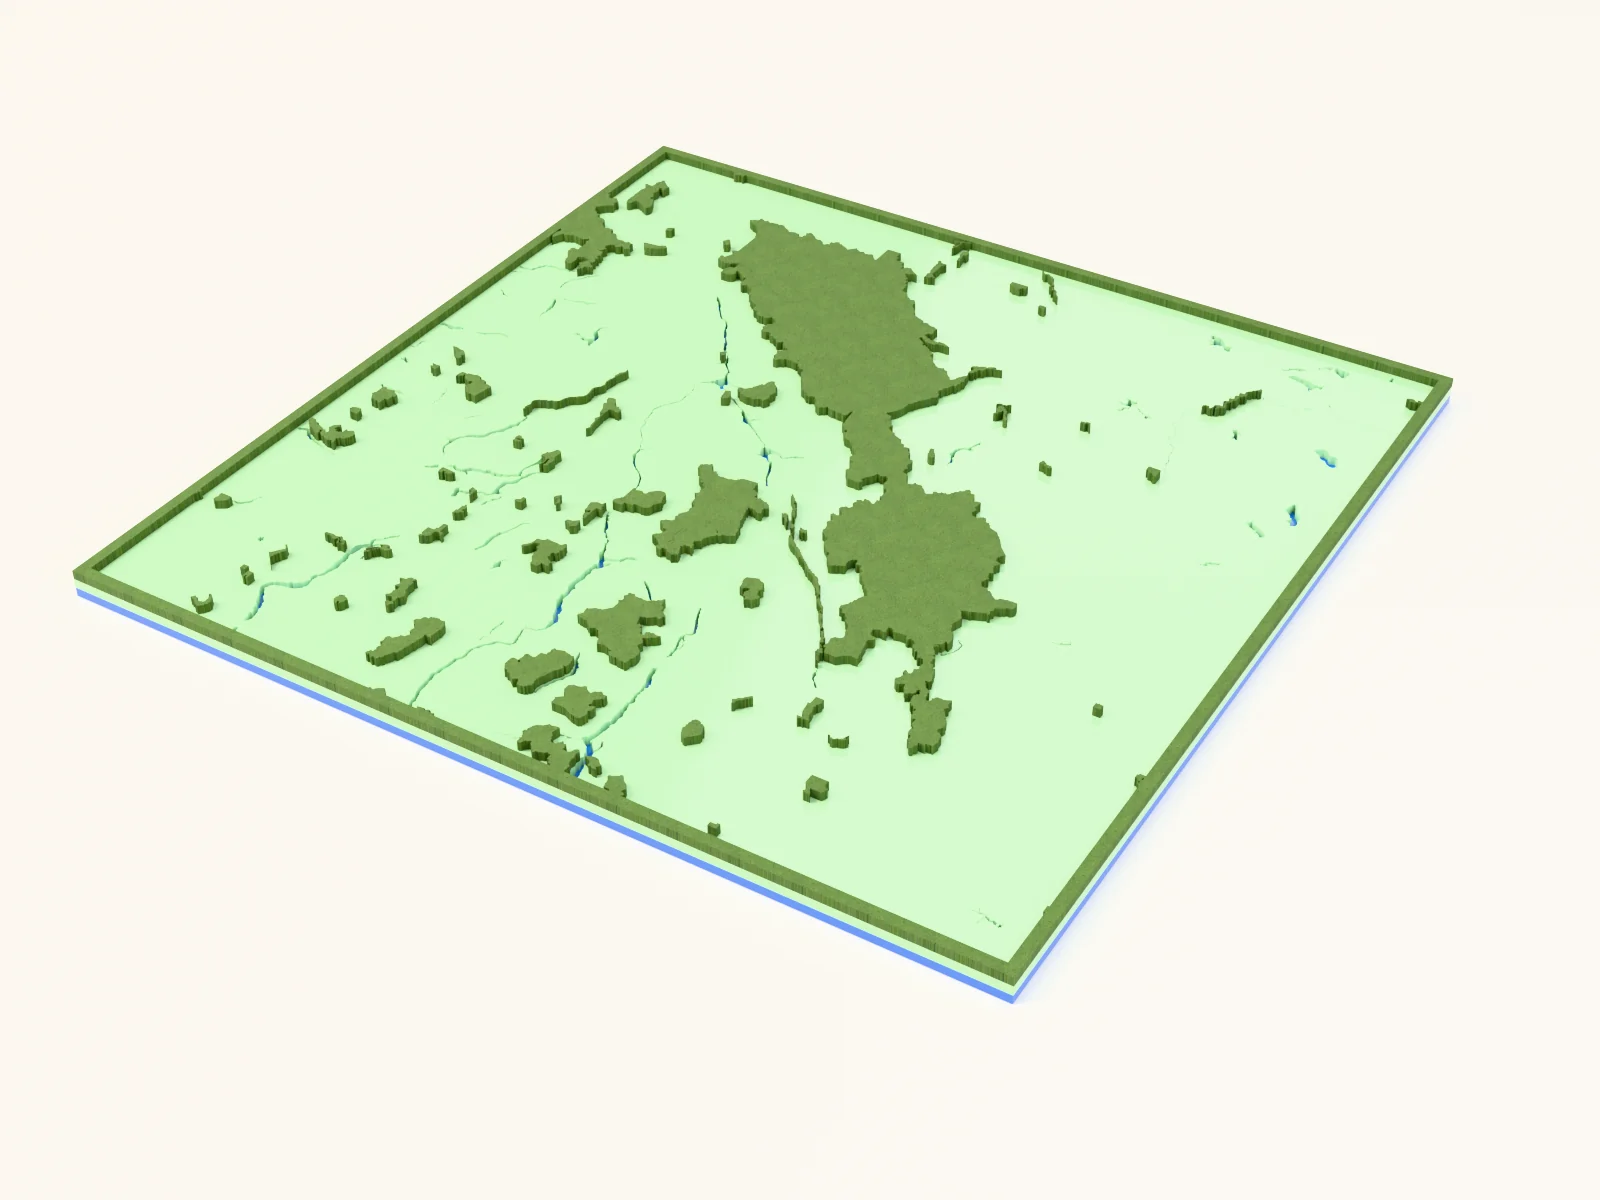
This is the simplest, boldest map in the set: national park boundaries filled in solid green, the lakes and rivers inside and around them cut out as holes, and a blue backplate showing through as water. With only three layers and no fine road work, it cuts and prints fast and clean.
It loads framed on the Canadian Rockies (Banff/Yoho country) at zoom ~6.3: a wide regional view where whole parks read as graphic green masses. It works for any protected region: Yellowstone and the Greater Yellowstone parks, the Lake District, Torres del Paine, Kruger, the Scottish Highlands.
On this page (6)
What you need
Laser cutting
- 3 mm laser-grade plywood or MDF for the protected-land plate, or green acrylic
- 3 mm acrylic or painted ply in blue for the backplate (
#236cd1), or paint it after cutting - Any diode or CO2 laser that fits your target size (200×200 mm and up works well)
- Wood glue or CA glue, clamps or weights, sandpaper (220 grit)
3D printing
- Any FDM printer; PLA in 2 colors (green + blue) or a single color
- Slicer that accepts 3MF (Bambu Studio, PrusaSlicer, OrcaSlicer)
UV print / sublimation
- The exported high-res PNG
- UV flatbed printer or sublimation setup with a hardboard/aluminum blank
1. Start from the preset
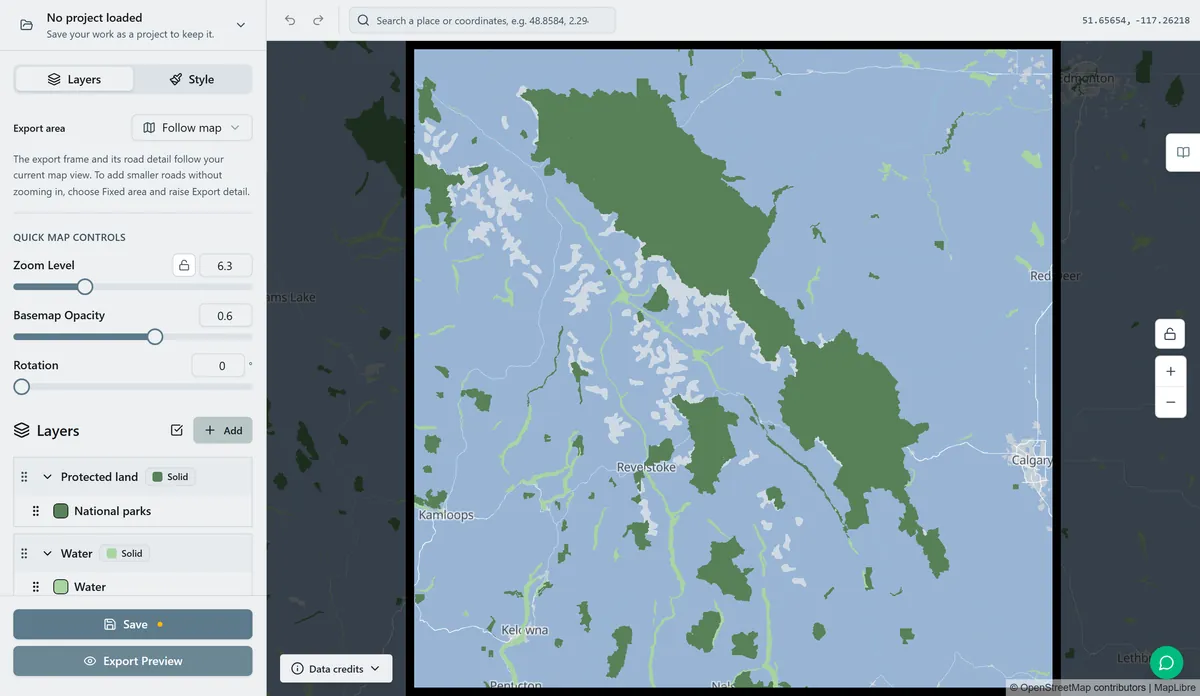
Open the National Parks Map preset. It loads on the Canadian Rockies at zoom ~6.3: a wide regional view that fits several adjacent parks at once. Search your park or region and adjust the zoom: stay around 6 to 7 for a multi-park region, zoom to 8 to 9 for a single large park so its boundary fills the frame. This preset relies on mapped national-park boundaries, so if the preview is empty, there's no protected-area data there: pick a known park.
2. Tune the layers
Three layers, top to bottom:
- Protected land: one Solid fill, National Parks in green (
#588157). This is the hero: every national park in view becomes a filled shape. There's no road or label clutter, just the park silhouettes. - Water: Solid fill (
#a8d5a2) with invert as holes on. The lakes, rivers and coastline are subtracted from the plate so the blue backplate shows through. At this regional zoom you'll catch big alpine lakes and reservoirs: they give the green masses their shape. - Backplate: solid base plate,
#236cd1blue. Change this to match your acrylic or paint.
3. Export
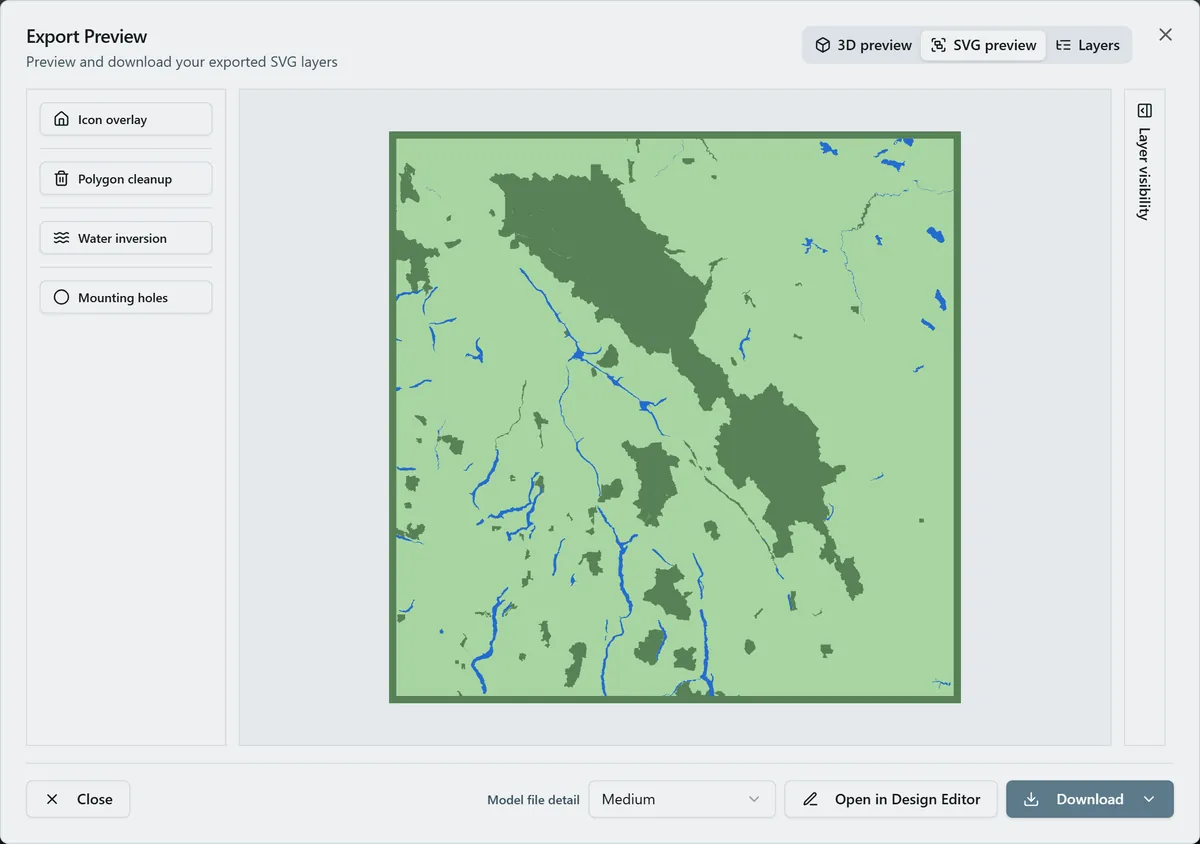
- Laser: export the per-layer SVG ZIP; the green plate (with water holes) and the backplate. Leave water inversion on. Turn on small-polygon cleanup to drop tiny pond and island slivers common at regional zoom. Add a Hanger hole ring if it's hanging rather than framed.
- 3D printing: export 3MF for the two-color stack, or STL for single color.
- UV print: export the high-res PNG (4096 px). Keep Background on for a full-color print, or off for a transparent print on a colored substrate.
Choose your build method
Laser Cutting & Engraving
Laser cutting
- Cut the Backplate from your blue material first: it's the registration reference.
- Cut the Water layer (the green protected-land plate with water holes). This is the visible face, so use your cleanest sheet. Keep any islands and the loose interior water shapes taped down so fragments don't get lost.
- Because there are no roads to engrave, this is a clean two-piece glue-up: no fine score work needed.
- Glue bottom-up: backplate → green plate. Thin, even glue; weight it flat for 30 minutes, or skip squeeze-out with 3M tape: 467 or 468 transfer tape for acrylic, 300LSE for harder materials.
- Sand the edges flush, finish with oil or clear spray.
- Want depth? Pour a little tinted epoxy into the lake holes before mounting for a glassy water look.
3D Printing
3D printing
- Export the 3MF and open it in your slicer: the green plate and blue water arrive pre-stacked. With an STL you'll slice in one color; a filament swap at the plate height gives a clean green-on-blue look.
- Print flat on the bed, no supports. 0.2 mm layer height is plenty.
- Scale: 150 to 200 mm wide keeps the lake holes and narrow river channels readable; below ~120 mm thin channels may close up.
UV & Sublimation Printing
UV print / sublimation
- Export the high-res PNG. Background on = full-color artwork; background off = transparent PNG so your substrate color becomes the water.
- Print onto hardboard, slate, or aluminum; for sublimation, mirror the image and press per your blank's specs.
Next steps and project ideas
- Iconic parks shine: Yellowstone, Banff, the Lake District, Torres del Paine, Yosemite plus its neighbors.
- Swap the backplate to deep navy
#0E4C66for a richer water, or pale stone for a topographic-paper feel. - Recolor the parks to a deep forest
#283618or a brighter#80b918to match a national-park sign palette. - Add a heart icon from the export modal over a trailhead, campsite, or summit you love.
- Use the Hanger hole ring mounting option and cut at ornament size (~90 mm) for a souvenir tree decoration.
- Engrave the park name, established date, and a coordinates line onto the backplate or a border band before assembly.
- Make a series: cut the same park at zoom 6, 7.5, and 9 as a set that zooms in from region to single valley.
Take the design into your software
Was this guide helpful?
More in Map Designer

Keep up with MyLaserTools.
Email me about new tools, product updates, tutorials, and occasional MyLaserTools offers. Unsubscribe at any time.
© 2026 MyLaserTools.com. All rights reserved.