

Making a laser cut lunar calendar
Difficulty: easy. Time: 10 minutes design, about an hour cutting. Best method: laser-cut 3 mm plywood.
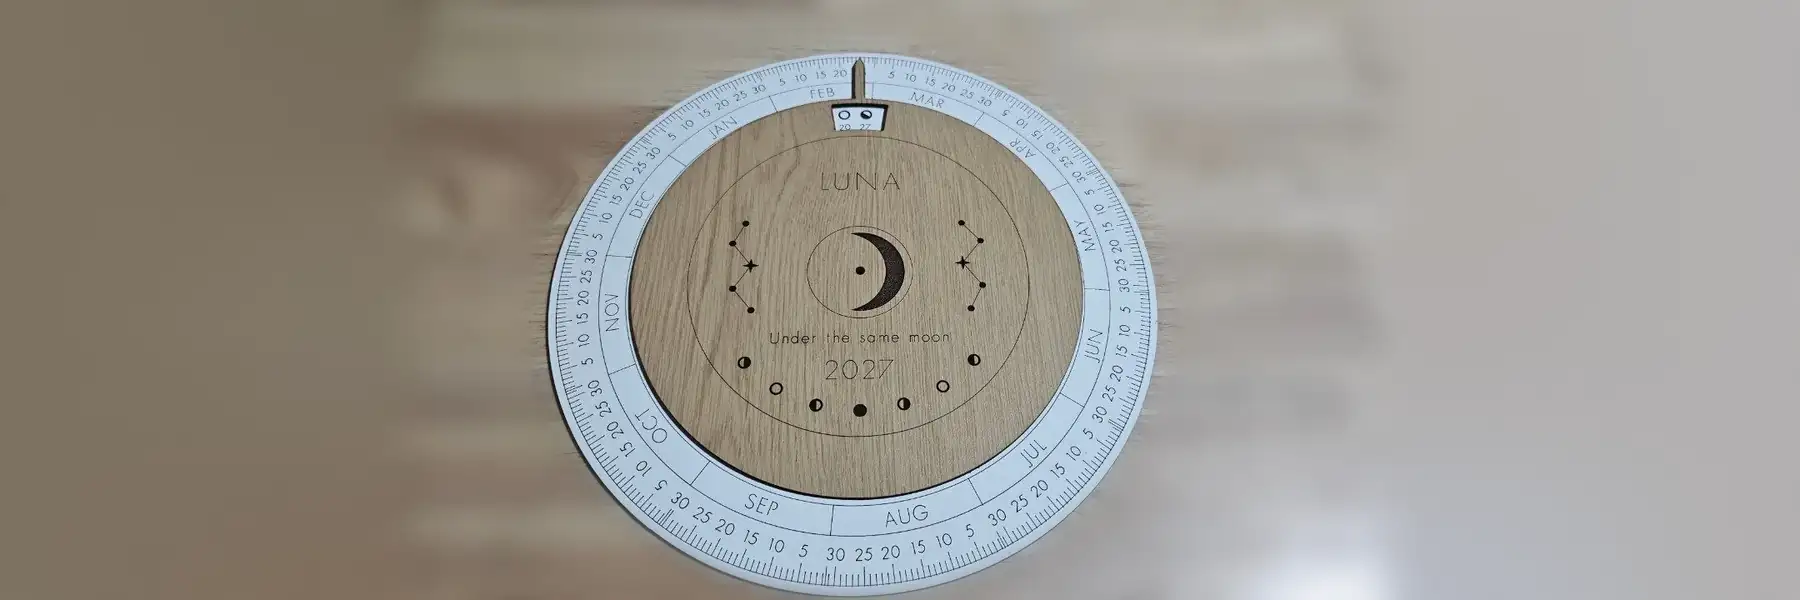
A lunar calendar is a year laid out as a circle. January starts at the top and the days run clockwise, so the moon phases sit around the ring in the order they happen. Turn the pointer to today and you can see how far it is to the next full moon.
The generator works out every phase to the minute and then places it on the date for your time zone. That matters more than it sounds: a full moon at half past midnight in Paris is still the previous evening in New York, and the icon belongs on a different day.
On this page (6)
What you need
Materials
- Discs: 3 mm birch plywood. A pale wood shows the small engraved numbers best.
- Split pin: a 4 mm split pin, paper fastener or short rivet for the centre. Not needed for the flat wheel.
- Masking tape on the face before engraving, if your laser leaves smoke marks.
1. Pick how it turns
- Window disc puts a large top disc over the phase ring. Its pointer marks the day and a window shows the two or three phases around it.
- Pointer arm glues a smaller top disc to the base and adds a thin arm that turns over everything, so the whole year stays visible.
- Flat wheel is one disc with the artwork in the middle and no moving parts.
2. Set the year, time zone and hemisphere
Type the year and pick the time zone where the calendar will hang. The counter under the settings tells you how many phases fall in that year, usually 49 or 50. South of the equator, switch Hemisphere to Southern so the first and last quarter icons are lit from the correct side.
3. Size it
Diameter sets the whole wheel. The hint under it shows how tall the smallest text will be; keep it above 2 mm or they blur on wood. 200 mm is a good size for a desk or a wall. Set Split pin hole to your pin's shank plus a few tenths of a millimetre so the disc turns without wobbling.
4. Write on the top disc
Choose Celestial, Minimal or Botanical, then change the title and the personal message. All text is engraved with a single line font, which is one pass of the laser instead of a filled outline. If the font is missing a letter you typed, the generator says so and you can try another font.
5. Check the assembled view and export
The Assembled tab shows the discs stacked and turned to a date you pick. When it looks right, download the SVG. If the sheet is bigger than your laser bed, use Part to export to save one disc at a time.
Choose your build method
Laser cutting
What to cut and engrave
- Fill engrave the blue layer: the moon phase icons, the big crescent and the leaves.
- Line engrave the teal layer: day ticks, numbers, month names, rings and all the text. Use a fast, low power line setting.
- Cut the red layer last: the disc outlines, the window, the pointer and the pin holes.
Put it together
- Peel the tape and wipe the discs with a barely damp cloth.
- Lay the top disc on the base with the pointer up, push the split pin through both centre holes and open its legs flat at the back.
- For the pointer arm build, glue the small top disc to the base first, then pin the arm on top.
- Turn the pointer to today. Check one phase against a moon app to be sure the time zone is right.
Next steps and project ideas
- Cut the top disc from a darker wood, like walnut, so it stands out from the base.
- Put a birth date or anniversary in the message and give the calendar for that year as a gift.
- Use the hanging tab and a brass pin for a wall version, or glue a small stand behind a flat wheel.
Take the design into your software
Was this guide helpful?
More in Home decor


Keep up with MyLaserTools.
Email me about new tools, product updates, tutorials, and occasional MyLaserTools offers. Unsubscribe at any time.
© 2026 MyLaserTools.com. All rights reserved.