

Making a turning advent calendar with the Countdown Wheel Generator
Difficulty: easy. Time: 10 minutes to set up, about 20 minutes to cut and glue. Best methods: laser cut 3 mm plywood, or 3D print the parts flat.
The number ring turns around a fixed hub. Two spacer bars stand on edge between the plates to leave rotation clearance. A cut pin and key or an M3 screw holds the assembly together.
Turn it with a knurled rim that shows all the way round the plate, or with a star tab at the side.

What you need
- 3 mm plywood, with offcuts in a second colour for the word and the ring
- Wood glue
- Ribbon for hanging
- For the screw option: an M3 screw, washer and nut, supplied separately
1. Write the words
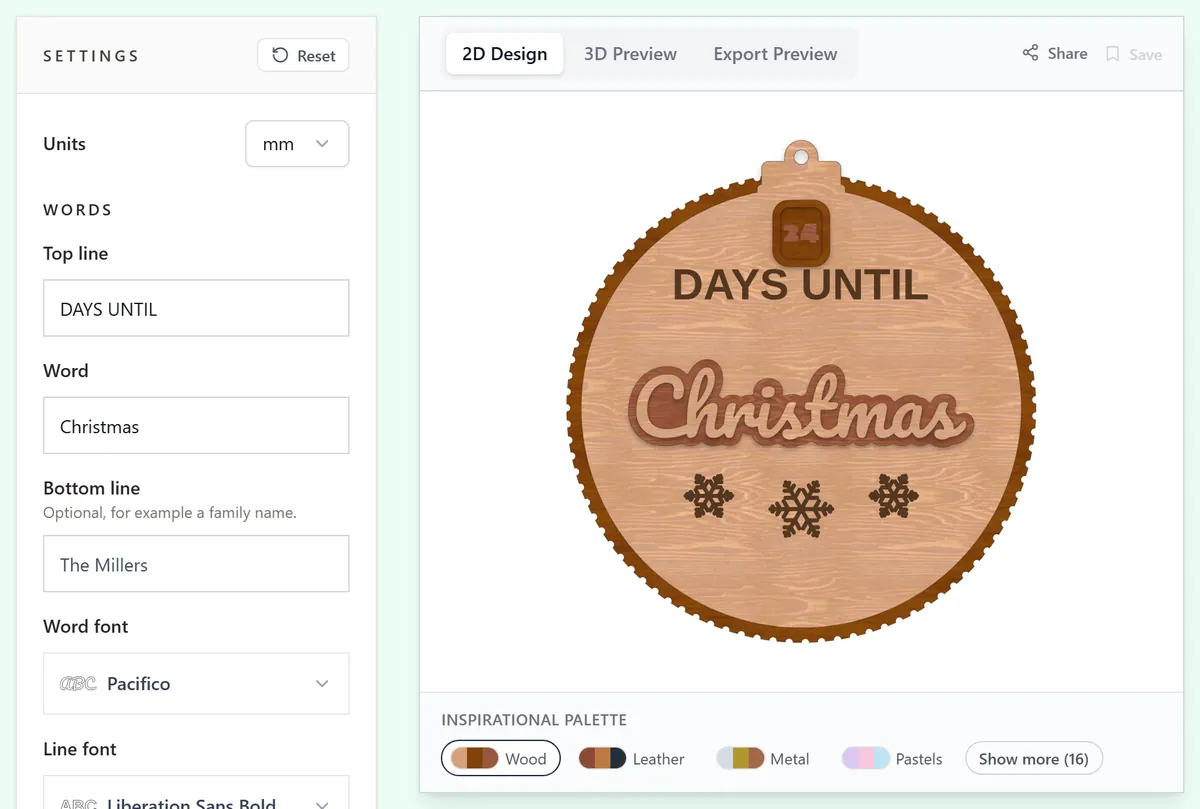
Type the Top line and the big Word, for example DAYS UNTIL and Christmas, and if you like a family name in the Bottom line. Choose a Word font, a Line font and a Number font.
2. Set the countdown
- Set Days: 24 for an advent calendar, 25 to reach Christmas Day, or any number from 3 to 31.
- Choose Count down or Count up under Numbers.
- Move Show day to turn the ring in the preview and check every number in the window.
3. Shape the wheel
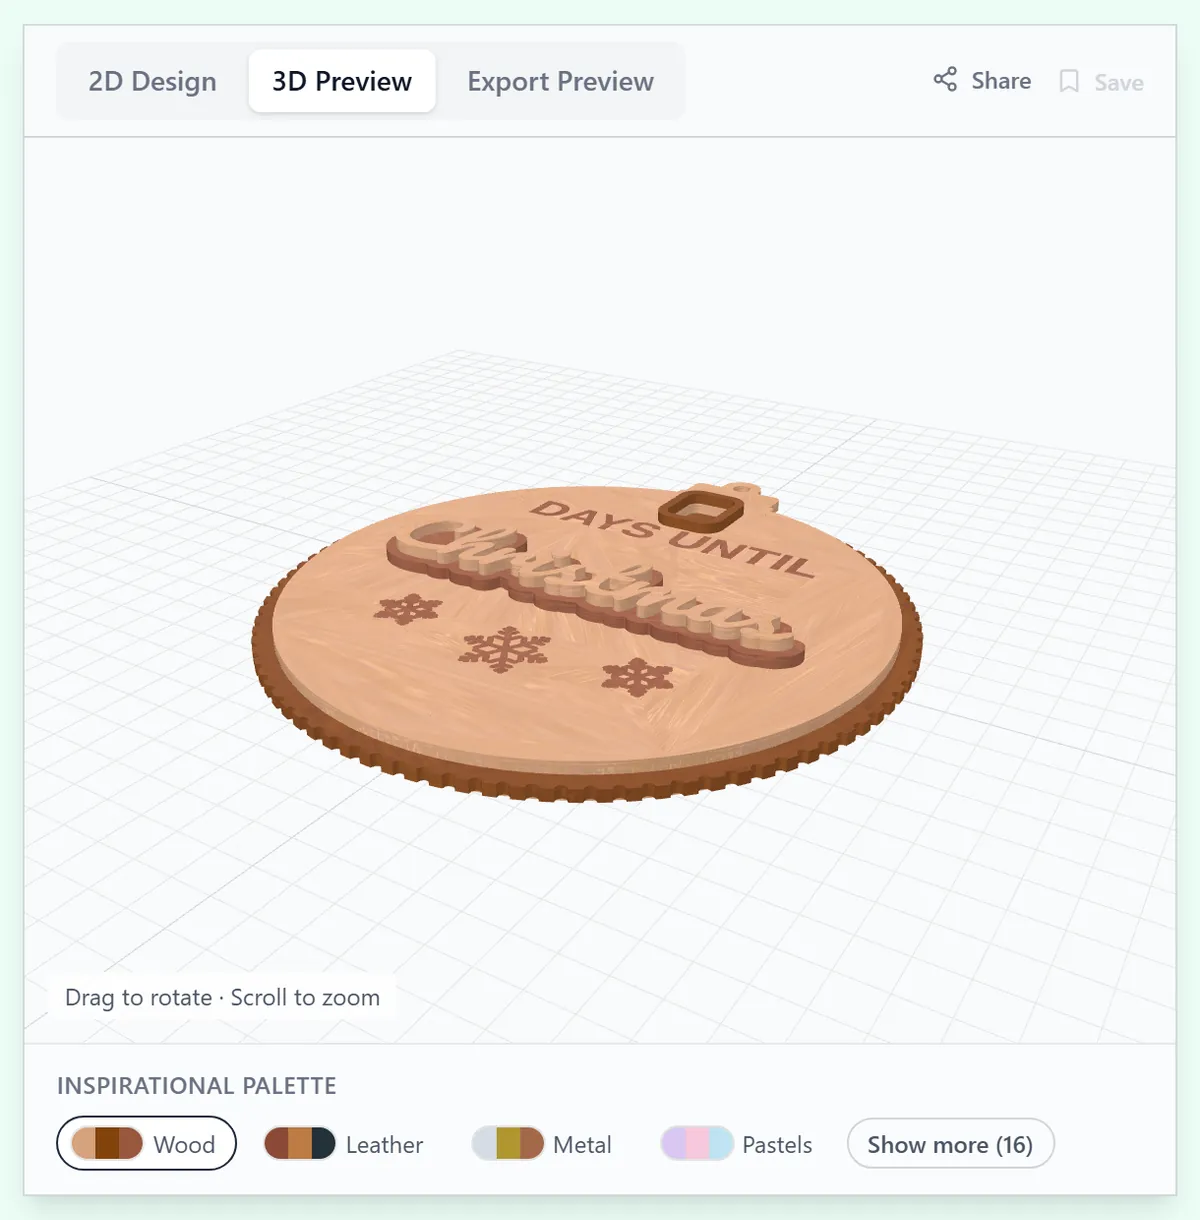
- Pick a Round, Bauble or Scalloped plate and set the Diameter.
- Under Turn with, a Knurled rim shows all the way round; a Star tab sticks out at the side.
- Choose the Art: snowflakes, stars, hearts or none. Layered puts the word on its own backing; Flat engraves everything on the front.
- Under Hang or stand, pick a Hanging hole or a Stand.
Choose your build method
Laser cutting
Cut and assemble
- Download the SVG. Engrave first, then cut all parts from the measured sheet thickness. Select Cut pin and key or M3 screw and adjust Rotation clearance before exporting.
- Dry-fit first. Glue the hub to the back with the fastener holes aligned. Stand the two spacer bars on edge in the hub slots, resting on the back, and glue them in place.
- Place the ring around the hub without glue. Fit the front onto the spacers. For the cut option, insert the retaining pin from the back and slide the locking key through its slot above the front. For the screw option, push the two square locating pegs through the back, hub and front so the front cannot turn, then fit the M3 screw from the back and the washer and nut at the front.
- Check that the ring turns fully without rubbing. Sand a tight fit or increase the clearance and remake the parts. Tighten the screw gently; with the cut option, a small spot of glue can secure the key to the pin after testing. Keep glue away from the ring.
- Glue the word, backing and any layered art onto the front. Let the glue cure before turning the ring.
3D printing
Print settings
- The 3MF and STL lay every part flat next to each other. Print them with no supports.
- Use the 3MF to print the numbers and the words in a second colour, then put the wheel together like the laser version.
Next steps and project ideas
- Count down to a birthday, a holiday or the last day of school with your own words.
- Count up the days of a new baby's first month.
- Make one for each child, with their name in the bottom line.
Take the design into your software
Was this guide helpful?
More in Home decor


Keep up with MyLaserTools.
Email me about new tools, product updates, tutorials, and occasional MyLaserTools offers. Unsubscribe at any time.
© 2026 MyLaserTools.com. All rights reserved.