

Making personalized keychains with the Keychain Generator
Difficulty: easy. Time: 15 minutes design, 5-20 minutes per keychain. Best methods: laser cutting acrylic or plywood, multi-color 3D printing.
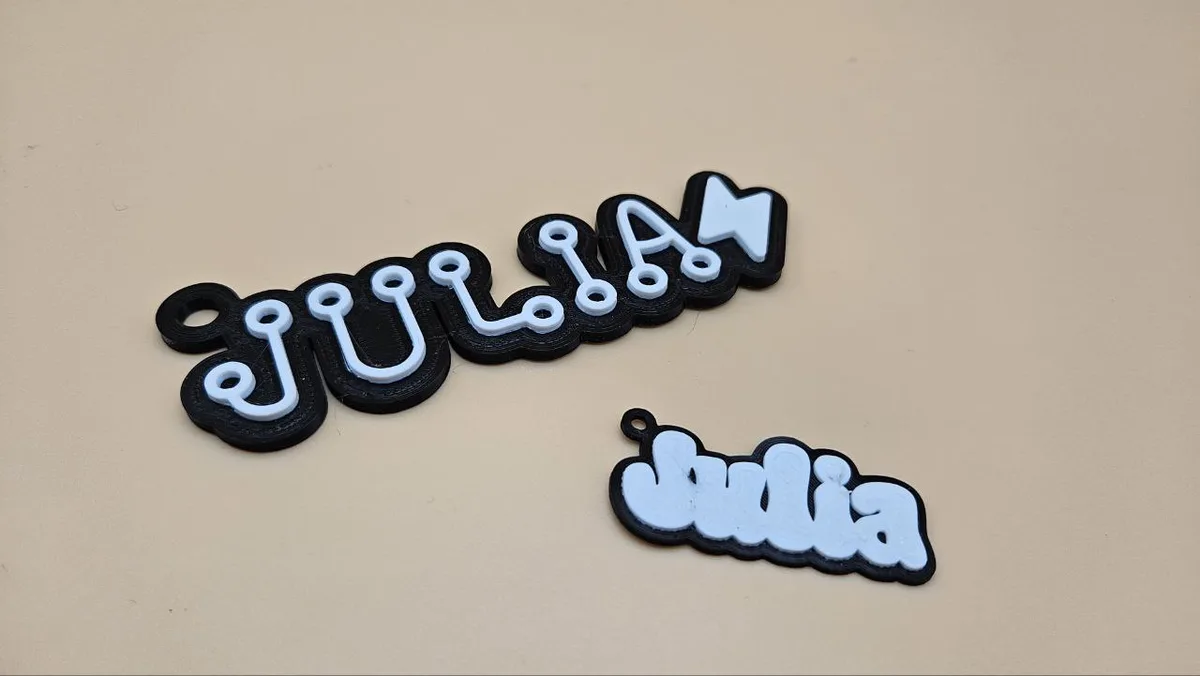
This is the workhorse personalization tool: type a name, pick a font, and the generator builds a keychain with the letters connected into one solid piece so nothing falls apart at the cutter. Two tabs at the top switch between the Layered style (connected text sitting on a slightly larger outline layer) and the Truck style (a little truck silhouette with the name riding on it). Both styles get a proper hanger hole with a reinforced ring, and both export as SVG for laser cutting or STL/3MF for 3D printing.

On this page (6)
What you need
- Laser cutting: 3 mm acrylic in two contrasting colors for the layered look, or laser-grade plywood for a warm wood version
- Laser assembly: CA glue or 3M 467/468 tape to bond the text layer to the outline layer
- 3D printing: any FDM printer; a multi-color setup makes the two-layer contrast automatic
- Hardware: keychain snap clips or split rings and jump rings
1. Pick a style and type the name
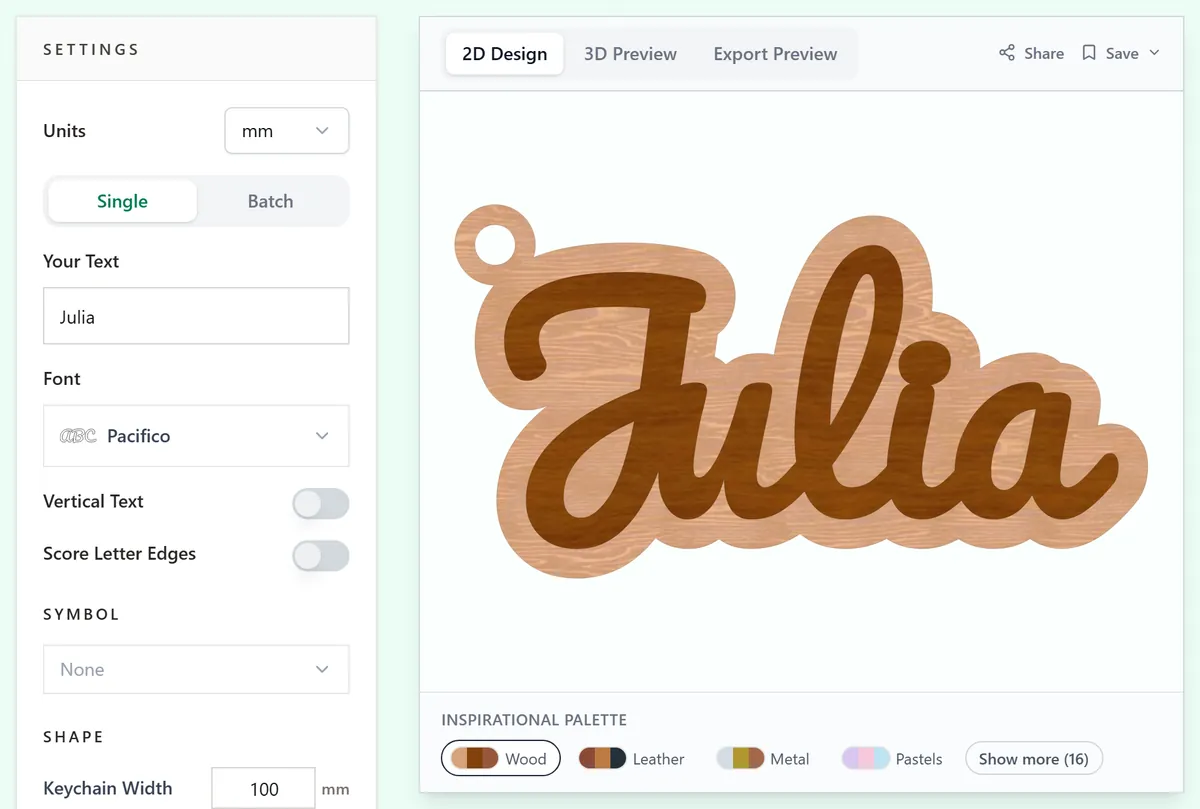
Choose Layered or Truck with the tabs, then enter the name in Your Text. Pick a font: bold, rounded script fonts connect cleanly and survive small sizes. Short names (3-8 letters) make the best keychains; very long names get thin and fragile at keychain scale.
2. Tune size, border, and the hanger hole
- Keychain Width sets the finished size: 60-80 mm is the sweet spot for a bag or key ring.
- Outline Thickness / Border Thickness controls how much the backing layer extends past the letters. 2-3 mm reads as a clean halo without looking chunky.
- Turn on Add Hanger Hole and adjust Hole Size, Inner Hole Size, and Hole Offset so the ring of material around the hole stays at least 2 mm wide.
- Add an optional Symbol (heart, star, paw and friends) and place it with Symbol Position and the offset sliders.
- On the Truck style, use Text Offset X / Y to seat the name nicely inside the truck body.
3. Export
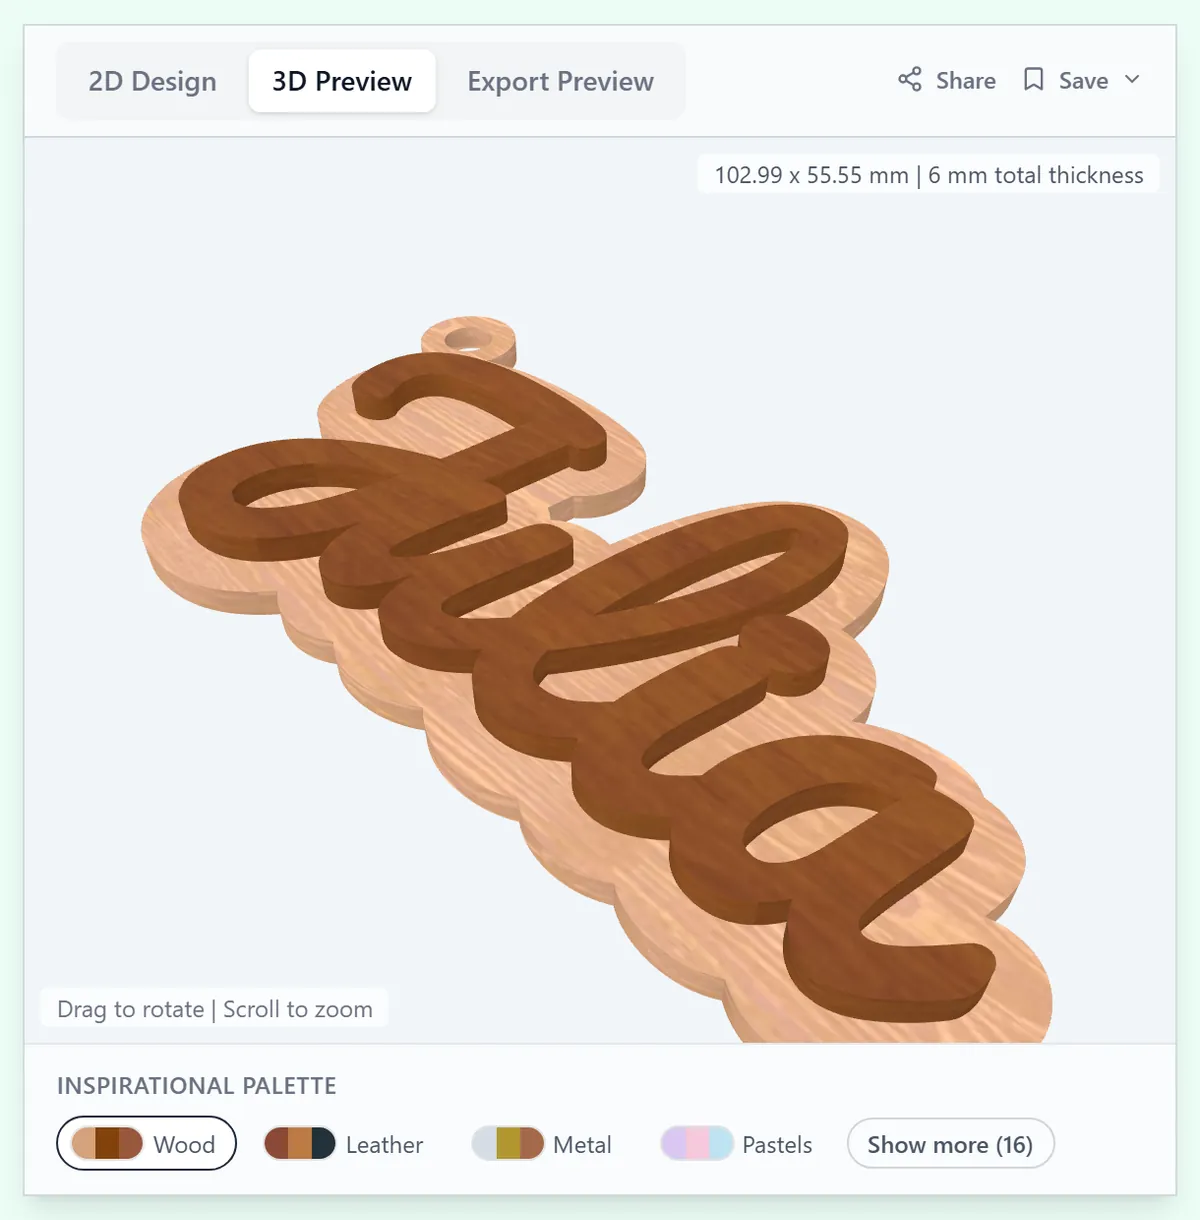
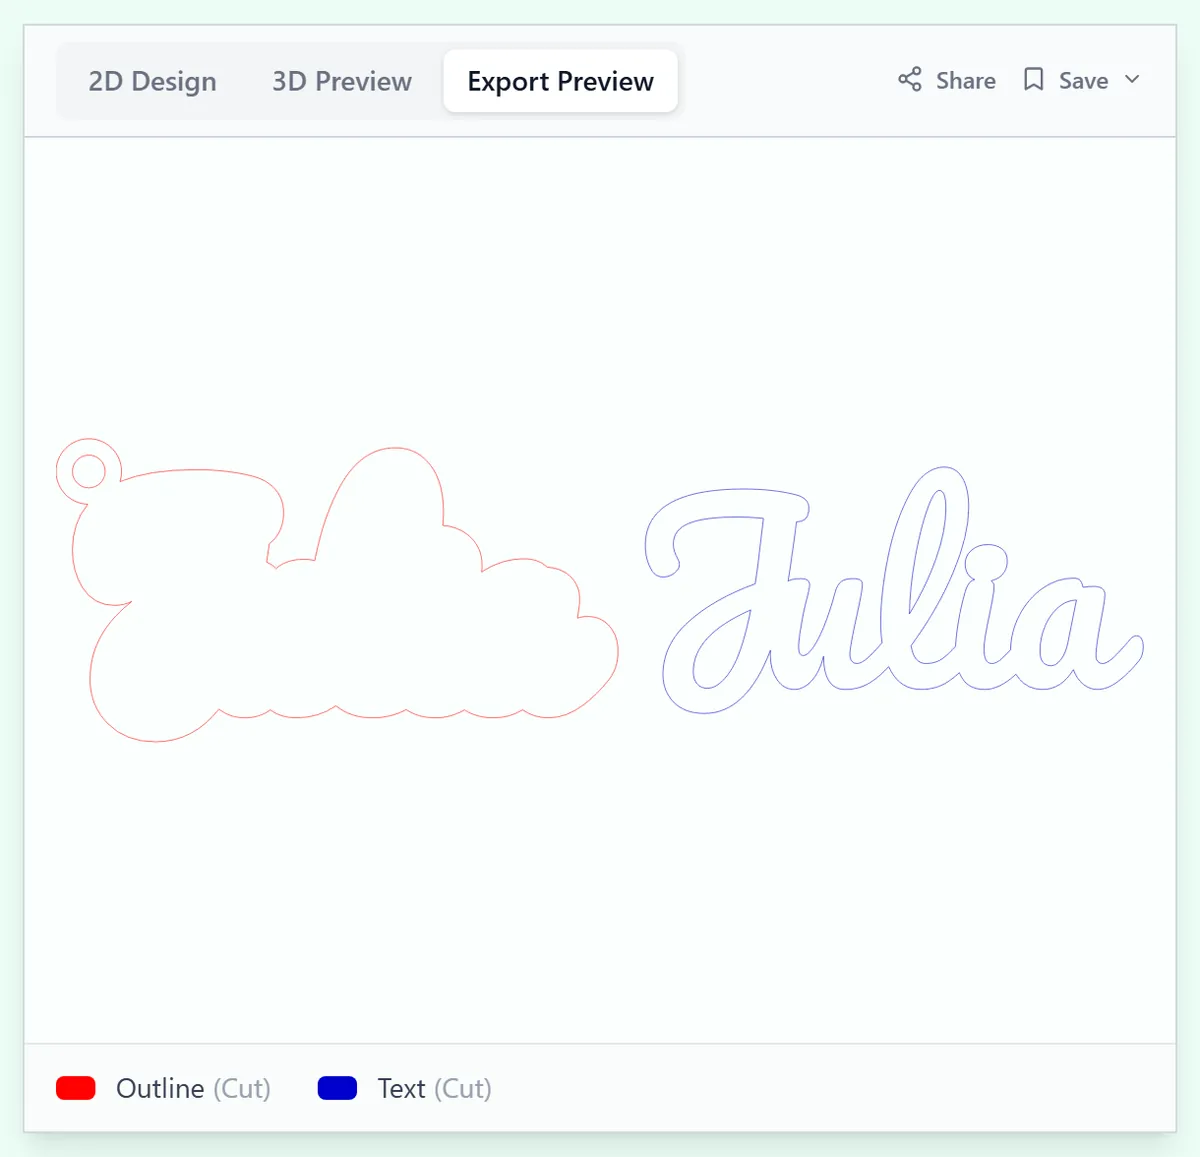
Download SVG for the laser: the layers come out as separate paths so you can cut text and backing from different colors. For 3D printing, set a thickness and download STL or 3MF; the file is a single merged multi-layer model with the text raised above the base.
4. Make a whole batch at once
Making keychains for a team or class? Use the Single / Batch toggle above the text field, switch to Batch, and type one name per line or upload a .txt file. The preview tiles every keychain so you can check the whole set, and one download gives you all of them: the SVG groups every backplate on one sheet and every name on another, so you can cut each layer from its own material, while STL/3MF downloads bundle one model per name in a zip. Batch is available on the layered keychain type.
Choose your build method
Laser Cutting
Laser cutting
- Cut the outline layer from your base color and the text layer from a contrasting color. On plywood, a light engrave pass on the text layer edge adds definition.
- Deburr and peel masking, then bond the text to the backing with a thin bead of CA glue or pre-applied 3M 467 tape: tape is cleaner on glossy acrylic.
- Keep cut speed conservative on the hanger ring; it is the highest-stress area of the whole part.
- Thread a jump ring through the hole and clip on a snap clip or split ring.
3D Printing
3D printing
- Export the 3MF and slice with a 2-3 mm base and 1.5-2 mm raised text.
- Set a filament swap at the layer where the text starts, or assign colors per part on a multi-material printer.
- Print flat on a textured plate, 100% infill: these parts are small and live a rough life in pockets.
- PETG survives keys and weather better than PLA; the truck style looks great with the body in one color and the name in another.
Next steps and project ideas
- Batch a whole classroom or team: same font and width, one name per keychain, cut as a single sheet.
- Two-tone acrylic combos sell: glitter text on matte black, pastel on white, mirror gold on deep green.
- Use the Truck style with a kid's name for backpack tags: bump the width to 90 mm so little hands can grab it.
- Add the heart symbol between first initials for couples' key sets.
- Cut the layered style from clear acrylic and engrave the text layer instead of stacking for a subtle glass-look tag.
- Print a glow-in-the-dark text layer so keys are findable in a dark bag.
- Match the snap clip color to the text layer for a finished retail look.
Take the design into your software
Was this guide helpful?
More in Keychains
Keep up with MyLaserTools.
Email me about new tools, product updates, tutorials, and occasional MyLaserTools offers. Unsubscribe at any time.
© 2026 MyLaserTools.com. All rights reserved.