

Making an earring display stand with the Earring Holder Generator
Difficulty: easy to medium. Time: 15 minutes design, 20-40 minutes making. Best methods: laser-cut plywood or acrylic, 3D printed panel and stand.
This tool builds the whole display, not just a pretty panel. Pick a Shape (Arch, Full Arch, Left or Right Arch, Gothic, Heart, Oval, Octagon, Rectangle, or Scalloped) then lay out a grid of Holes with Rows, Columns, and margins for stud earrings, plus optional Slots for hook-style pairs. The stand section generates a slotted foot sized to your Material Thickness, and a built-in 3D assembly preview shows the finished stand before you cut anything.

What you need
- Laser cutting: 3 mm laser-grade plywood for a warm boutique look, or acrylic for a glossy retail one
- 3D printing: an FDM printer with a bed large enough for the panel, or print it in halves
- Finishing: sandpaper for plywood edges; no glue needed; the stand slots together
1. Shape the panel
Pick a shape and set Width and Height: 120 x 160 mm holds a personal collection, 200+ mm suits market displays. Corner Radius softens rectangular panels. Set Material Thickness to your actual sheet thickness first; the stand slots depend on it.
2. Holes, slots, and stand
- In Holes, set Rows, Columns, and Hole Size (1.5-2 mm for studs), then frame the grid with the Top/Bottom/Side Margin controls.
- Add Slot Rows with Slot Height and Slot Padding if you sell hook earrings: hooks hang through slots much faster than through holes.
- In Stand, set Stand Height and Stand Length for the lean angle, and Tab Width for the joint. Check the 3D assembly preview to confirm the stance looks stable.
3. Export
Download the SVG to cut panel and stand from one sheet, or STL/3MF to print both parts. The slot joint is sized from your material thickness, so double-check that number before exporting.
Choose your build method
Laser Cutting
Laser cutting
- Cut panel and stand together; the small stud holes like a slightly slower speed so they release cleanly.
- Test the slot fit on a scrap first: if it is loose, reduce Material Thickness by 0.1 mm and re-export; laser kerf varies by machine.
- Sand plywood faces before assembly, slide the stand into the panel slot, and it is done.
- For acrylic, peel masking after cutting and flame-polish only the outer edges, not the joint.
3D Printing
3D printing
- Print both parts flat at 0.2 mm layers with 3-4 walls; no supports are needed.
- PETG flexes a touch, which actually makes the slot joint forgiving.
- If the panel exceeds your bed, scale width down or print at 45 degrees on the plate.
- Slide-fit the stand; a drop of CA glue makes it permanent if you prefer.
Next steps and project ideas
- Cut the panel from frosted acrylic so light passes through your earring display at markets.
- Engrave your shop name across the top margin before cutting.
- Make a mini gothic-arch holder as a gift to bundle with a pair of earrings from the Earrings Generator.
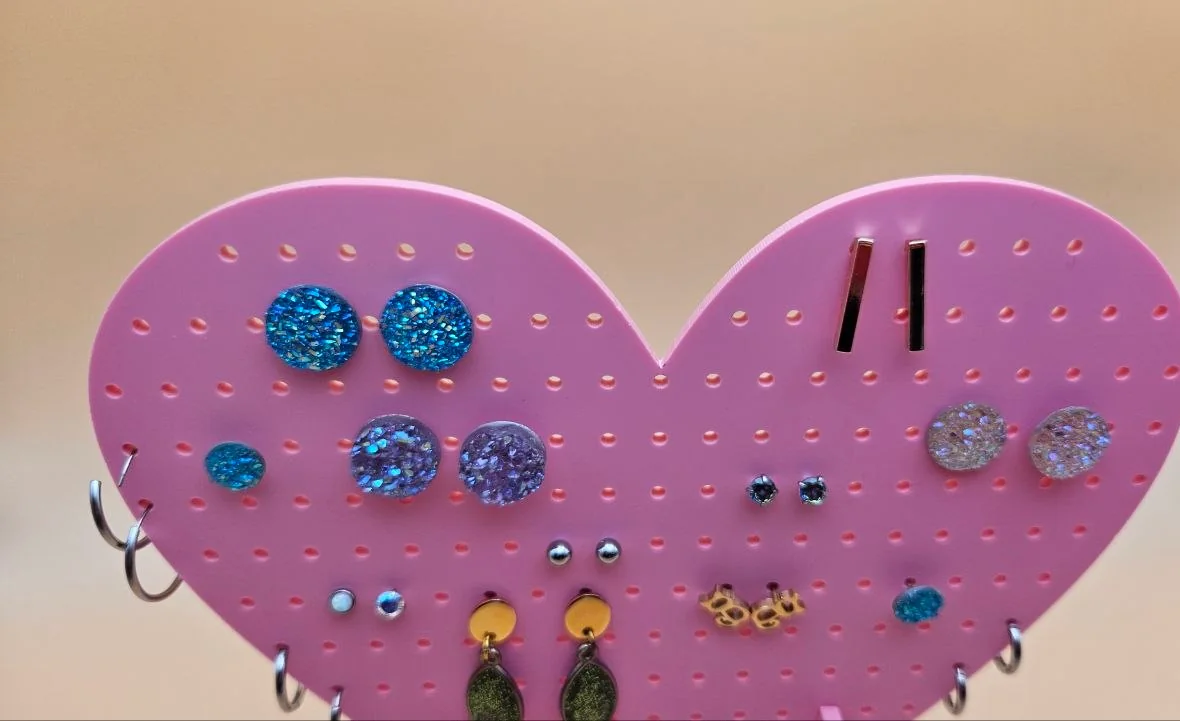
- Use the heart shape in pink acrylic for a Valentine retail display.
- Mix holes and slots on one panel: studs up top, hooks below.
- Stain plywood panels dark and leave the laser-cut edges raw for contrast.
- Scale the rectangle shape wide and short for a necklace bar instead.
Take the design into your software
Was this guide helpful?
More in Accessories


Keep up with MyLaserTools.
Email me about new tools, product updates, tutorials, and occasional MyLaserTools offers. Unsubscribe at any time.
© 2026 MyLaserTools.com. All rights reserved.