
Making layered charms with the Symbol Charm Generator
Difficulty: easy. Time: 10 minutes design, 5-15 minutes per charm. Best methods: laser cutting acrylic or plywood, multi-color 3D printing.
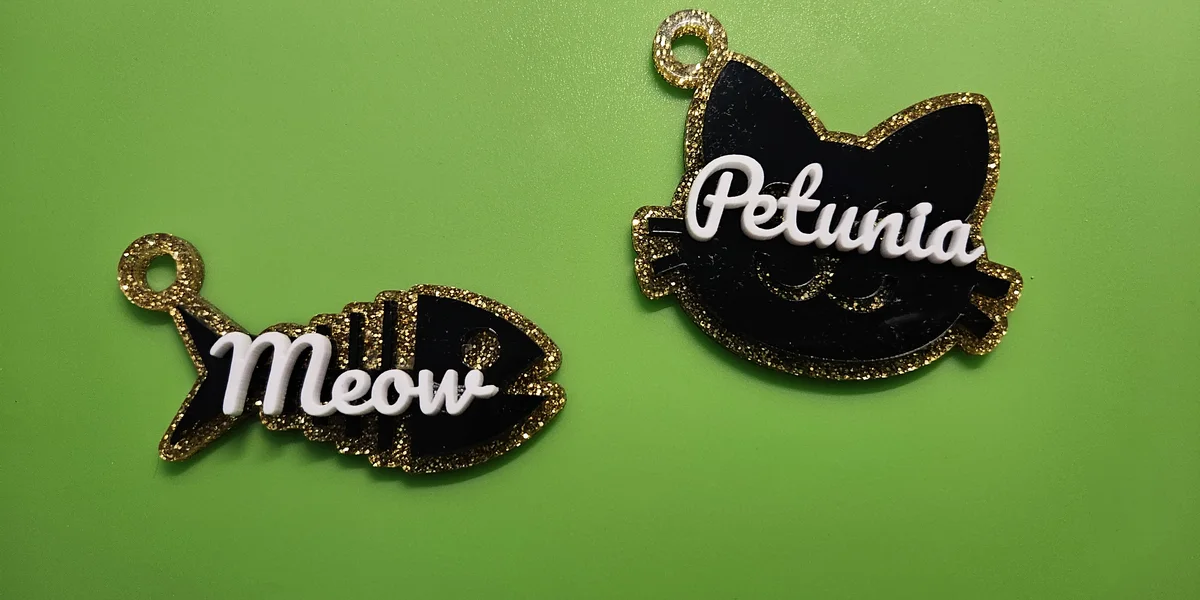
Pick a symbol - a dolphin, a paw, a flower, a heart, one of hundreds in the library - and the generator builds it into a finished charm. The icon becomes the top detail layer, and a slightly larger silhouette of the same shape sits underneath as a solid backplate, so the two colors read as one clean layered piece. Every charm gets a proper hanger hole with a reinforced ring, and you can switch on a name in the script font of your choice to hang beside it. Everything exports as SVG for laser cutting or STL/3MF for 3D printing.
What You'll Need
- Laser cutting: 3 mm acrylic in two contrasting colors for the layered look, or laser-grade plywood for a warm wood version
- Laser assembly: CA glue or 3M 467/468 tape to bond the detail layer to the backplate
- 3D printing: any FDM printer; a multi-color setup makes the two-layer contrast automatic
- Hardware: keychain snap clips or split rings and jump rings
Step 1 - Choose a symbol
Browse the symbol gallery by category or use the search box to find a shape by name. Click any symbol and it drops straight onto the canvas as a layered charm. Simple, bold icons make the strongest charms; very thin or highly detailed icons can get fragile at small sizes.
Step 2 - Tune the charm, backplate, and hanger hole
- Charm Size sets the finished width - 50-70 mm is the sweet spot for a bag charm or key ring.
- Backplate Size controls how far the solid backing extends past the icon. A small amount reads as a clean halo; more gives a chunky, bold outline.
- Detail Thickness fattens the icon strokes so fine lines survive the cut and hold up in use.
- Open Hanger Hole Settings and adjust Hole Size, Inner Hole Size, and Hole Offset so the ring of material around the hole stays at least 2 mm wide.
Step 3 - Add an optional name
Turn on Add a Name to personalize the charm. Type the name, pick a font, and it renders as its own cut piece sized to match the charm. Bold, rounded script fonts connect cleanly and survive small sizes. Leave it off for a clean symbol-only charm.
Step 4 - Export
Download SVG for the laser - the backplate, symbol, and name come out as separate paths laid side by side, so you can cut each from its own color of material. For 3D printing, set a thickness and download STL or 3MF; the file is a single merged multi-layer model with the icon raised above the backplate.
Choose Your Build Method
Laser cutting
- Cut the backplate from your base color and the symbol detail from a contrasting color. On plywood, a light engrave pass on the detail edges adds definition.
- Deburr and peel masking, then bond the detail layer onto the backplate with a thin bead of CA glue or pre-applied 3M 467 tape - tape is cleaner on glossy acrylic.
- Keep cut speed conservative on the hanger ring; it is the highest-stress area of the whole part.
- If you added a name, cut it from a third color and glue it beside the charm, then thread a jump ring through the hole and clip on a snap clip or split ring.
Make It Yours
- Match the symbol to the person: a paw for the dog walker, a music note for the band kid, a plane for the traveler.
- Two-tone acrylic combos sell: glitter icon on matte black, pastel on white, mirror gold on deep green.
- Turn on a name to make gift tags and party favors that are personal at a glance.
- Cut the charm from clear acrylic and engrave the detail instead of stacking for a subtle glass-look tag.
- Print a glow-in-the-dark detail layer so keys are findable in a dark bag.
- Make a matching set: the same symbol at a few sizes for a keyring, a zipper pull, and a bag charm.
- Match the snap clip color to the detail layer for a finished retail look.
New free tools, every month.
New laser cutting tools, what's coming next, and features we're building right now. Only MyLaserTools.com news. No spam, ever.
© 2026 MyLaserTools.com. All rights reserved.