Making thread portraits with the String Art Generator
Difficulty: easy to generate, patient to thread. Time: 15 minutes of design; real threading takes a relaxed afternoon, faux versions take minutes. Best methods, in order: laser, printing. Photos stay in your browser.
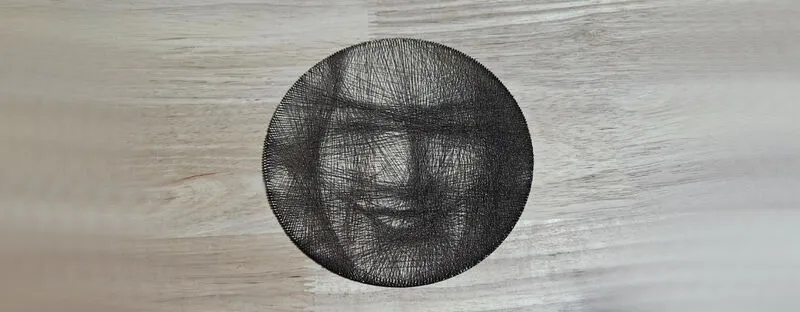
String art turns a portrait into thousands of straight chords: a single dark thread zig-zags between pegs around a ring, and where the chords pile up, the image darkens. This tool solves the hard part, computing which peg to visit next, and gives you everything physical: an SVG peg ring for the laser, a numbered thread sequence as a text file, plus faux options that score or print the finished thread pattern directly onto a panel.
Choose your adventure: thread the real thing for a meditative heirloom, or let the laser score the computed pattern in minutes for the look without the labour. Processing is local; your photo never uploads.
What You'll Need
- Real string art (laser): laser cutter, 3 mm laser-grade plywood for the peg ring, a spool of dark sewing thread or fine crochet cotton
- Faux scored version (laser): laser cutter and a light-toned panel, plywood or pale acrylic
- Printed version: any printer (or a print shop for large formats) and a frame
Step 1 - Upload and adjust
Open the tool and upload a photo; high-contrast portraits on plain backgrounds convert best. Shape the tones with Gamma, Brightness, and Contrast; string art only renders darkness, so push the midtones until the subject dominates the preview.
Step 2 - Tune the threading
- Ring Diameter (150 to 600 mm) sets the physical size; bigger rings resolve more facial detail.
- Number of Pegs controls angular resolution; around 200 to 300 suits portraits.
- Thread Count is how many chords get drawn; watch the preview build and stop where the likeness peaks before shadows clog.
- Thread Darkness models how much each pass darkens, tuning the simulation to your actual thread.
- Min Peg Separation forbids short hops along the rim that waste thread on the edge.
- Thread Colour sets the export color for the faux versions.
Step 3 - Export
Four downloads cover every route: the peg ring SVG (cut file with numbered peg positions), the thread sequence TXT (the peg-by-peg instructions), the thread SVG (every chord as vector lines for scoring), and a high-res PNG of the simulated result for printing.
Choose Your Build Method
Real thread on a laser-cut ring
- Cut the peg ring SVG from 3 mm plywood; the file includes the peg holes and numbering.
- Fit the pegs (cocktail sticks, brads, or laser-cut pins) and anchor the thread at peg zero.
- Open the sequence TXT and follow it peg by peg; a highlighter and an hour-long playlist are the real tools here.
- Keep tension light and even; the image emerges in the final third of the sequence.
- Tie off, dab the knot with glue, and frame in a shadow box.
For the faux version, import the thread SVG instead and score every chord onto a light panel at low power; the laser draws the full pattern in minutes and the result reads as ink-drawn string art. Cut the ring outline in the same job.
Make It Yours
- Thread a wedding portrait as a first-anniversary (cotton) gift, sequence file included in the card.
- Pet portrait in the faux scored style for a one-evening memorial piece.
- Kit gift: cut the ring, coil the thread, print the sequence, and let them thread their own.
- White thread on black panel: set Thread Colour light and print on dark stock.
- Score the chords and engrave a name plate into the same panel in one job.
- Giant 600 mm ring above the fireplace, threaded over a family movie marathon.
- Heart-photo string art for Valentine's using a tight square crop.
- Print a mini version as the card that accompanies the real threaded gift.
New free tools, every month.
New laser cutting tools, what's coming next, and features we're building right now. Only MyLaserTools.com news. No spam, ever.
© 2026 MyLaserTools.com. All rights reserved.