
Making sound wave art with the Sound Wave Art Generator
Difficulty: easy. Time: about 5 minutes. Best methods: printing, plus laser engraving or cutting from the SVG.
The waveform of a wedding vow, a child's first words, a favourite song, or a voice message becomes a deeply personal piece of art. Upload the audio and the tool reads its real amplitude and draws it in the style you choose. Style it as glowing art for a print, or switch to laser mode for a layered SVG where the waveform engraves, the baseline scores, and the board cuts.
What You'll Need
- Audio: a WAV, MP3, M4A, OGG, or FLAC file, or nothing at all to start from the sample waveform
- Printing: any home printer or a print shop, plus paper or card and a frame
- Laser engraving / cutting: a wood, acrylic, or leather blank and the layered SVG
- Extras: nothing to install, your audio never leaves your device
Step 1 - Add your audio
Upload an audio file and the tool decodes it in your browser and reads its amplitude envelope. Nothing is uploaded to a server. You can also start from the built-in sample and swap the audio later.
Step 2 - Choose a style
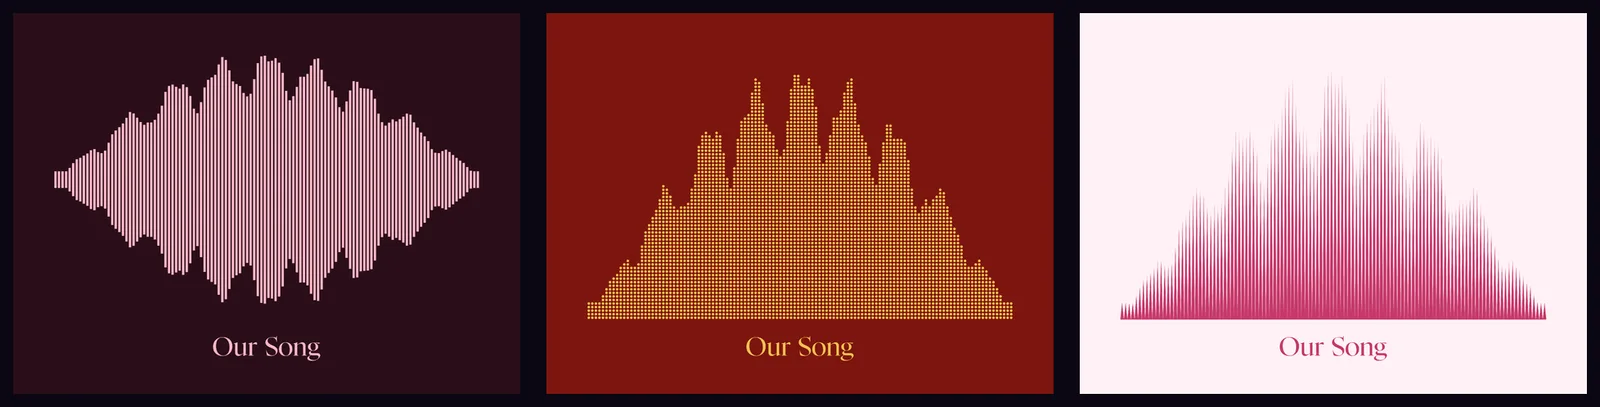
- Bars, Rounded bars, Pills: classic equalizer columns from the centre or a baseline.
- Dots: a stacked dot-matrix column per beat.
- Needles / Spikes: thin lines or sharp peaks for a seismograph look.
- Solid line / Outline: a filled envelope or a single hollow waveform line.
- Ellipse bars: a vertical lens per column.
Step 3 - Shape and tune it
Pick a shape: horizontal board, vertical board, ring, or pendant. Adjust the bar count, smoothing, amplitude, gap, and baseline, and set the length and height of the piece in millimetres.
Step 4 - Style and caption
Choose a palette or set your own background and wave colours, toggle the glow, and add a title, subtitle, date, or a short dedication in your choice of fonts.
Step 5 - Export
Download a PNG or a print SVG, or a laser SVG where the waveform, baseline, frame, and text export as separate coloured groups. Open it in the Design Editor for further edits.
Choose Your Build Method
Home and print-shop printing
- Match the size to your paper or frame, or set a custom size in millimetres.
- Keep the glow on for a vivid print, or use a light palette for a minimalist look.
- Print the PNG at home, or send the SVG or PNG to a print shop.
- Add the date or a lyric as the caption to anchor the memory.
Make It Yours
- Wedding-vow waveform on a wood plaque with the date engraved below.
- A child's 'I love you' voice note as a framed print for a grandparent.
- Favourite song's chorus as a ring pendant keepsake.
- Podcast or band logo waveform in a neon palette for a studio wall.
- Engrave a voice message onto a leather tag using the Outline style.
- Vertical waveform board for a narrow shelf or doorway.
New free tools, every month.
New laser cutting tools, what's coming next, and features we're building right now. Only MyLaserTools.com news. No spam, ever.
© 2026 MyLaserTools.com. All rights reserved.