Making reading guide strips with the Reading Guide Generator
Difficulty: easy. Time: 10 minutes design, 5 minutes on the laser. Best method: laser cutting plywood or tinted acrylic.
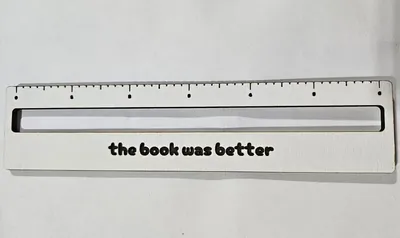
Reading guides - the strips teachers and reading specialists use to help kids track lines of text - are a perfect laser project because personalization is what makes a child actually use one. Type the reader's name in Your Text, choose a fun Font for it and a separate Digit Font for the ruler numbers, then tune the functional parts: Guide Size for overall length, Line Gap for the height of the tracking window (match it to the line spacing of the books your reader uses), Underline Height, Tick Mark Height, Digit Size, and the Ruler Position. One tool, a reading aid and a real ruler in the same object.
What You'll Need
- Laser cutting: 3 mm laser-grade plywood, or tinted transparent acrylic - colored overlays are genuinely helpful for many readers with visual stress
- Finishing: a quick edge sand for wood; nothing for acrylic
Step 1 - Personalize
Enter the name and pick its font - this is the part that makes a seven-year-old proud to pull the guide out at school. Choose a clean Digit Font for the ruler scale; legibility beats charm for the numbers.
Step 2 - Fit the window to real books
- Set Guide Size - 15 cm spans a paperback page nicely and still fits a pencil case.
- Tune Line Gap to the text the reader uses: early-reader books have tall lines, chapter books tighter ones. Measure a line in their current book and match it.
- Adjust Underline Height and Tick Mark Height so the ruler edge stays functional without crowding the window.
- Use Letter Spacing Adjustment if a long name needs to relax or tighten to fit.
Step 3 - Export the SVG
Download the SVG: name, digits, and ticks engrave; the outline and the tracking window cut.
Choose Your Build Method
Laser cutting
- Engrave the name, ruler digits, and tick marks first - ticks need crisp, fine settings since they are measurement marks.
- Cut the tracking window before the outer outline so the strip stays held by the surrounding sheet.
- Sand wooden edges well; this object gets dragged across pages daily.
- On tinted acrylic, the window can stay solid (no cut) so the strip works as a color overlay instead - skip the window cut in your laser software.
Make It Yours
- Make a classroom set - 25 names, one sheet of plywood, one prep period.
- Yellow or blue tinted acrylic versions double as visual-stress overlays; ask the reading specialist which tint helps.
- Engrave a growth-mindset phrase along the back: Every page makes you stronger.
- Tutoring centers: add the center logo beside the child's name.
- Make an adult version with a serif font for low-vision readers - bigger Line Gap, longer guide.
- Pair with the Bookmark Generator for a personalized reading gift set.
- Drill no holes, add no parts: this is a one-piece project, perfect for laser beginners.
New free tools, every month.
New laser cutting tools, what's coming next, and features we're building right now. Only MyLaserTools.com news. No spam, ever.
© 2026 MyLaserTools.com. All rights reserved.