

Building a sloped sticky-note holder
Difficulty: easy. Time: 10 minutes design, 25 minutes making. Best method: laser-cut plywood.
A notes holder keeps a pad of sticky notes or memo slips upright and angled toward you on a desk. This generator builds a finger-jointed tray with a tall back to lean the pad against, a low front lip to keep it from sliding out, and two trapezoid side walls that slope from the back height down to the front. The slope makes the notes easy to read and pull one at a time. The Assembled 3D tab lets you check the angle before you cut.
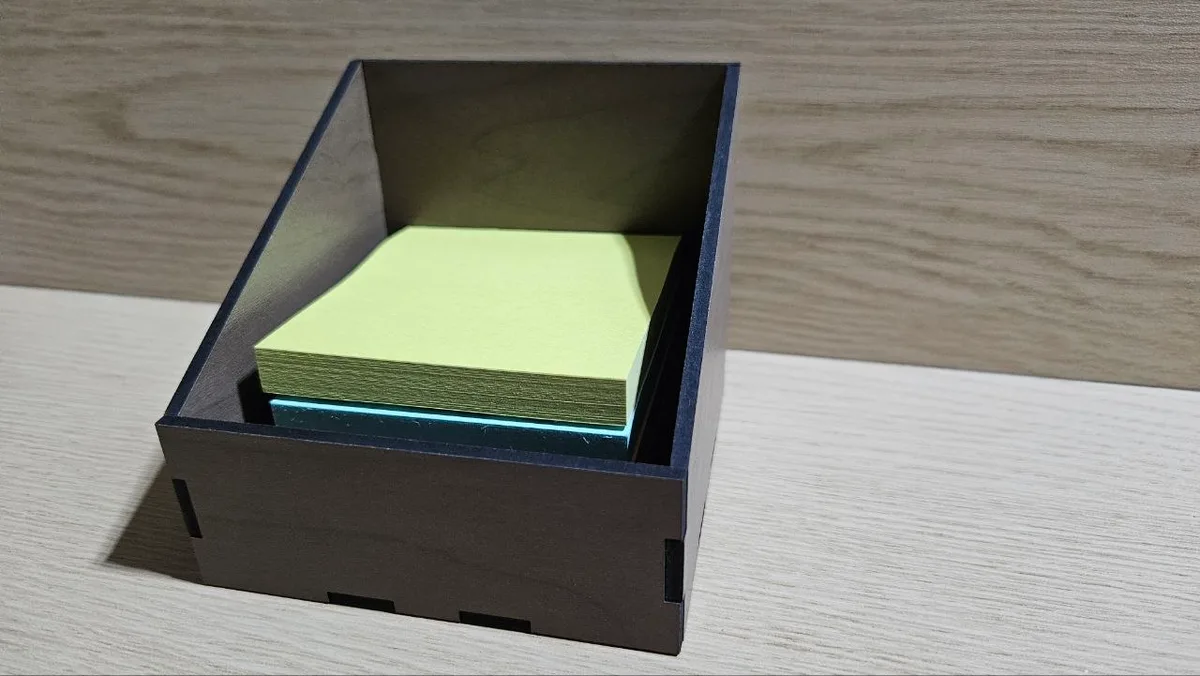
What You'll Need
- Laser cutting: 3 to 6 mm plywood or MDF. Measure the actual sheet thickness with calipers before setting the tool.
- 3D printing: any rigid filament. 3 to 5 mm panels print clean finger joints.
- Glue: PVA wood glue and a couple of clamps or elastic bands.
- A pad to fit: measure your sticky-note stack so the interior width and depth suit it.
Step 1 - Footprint and heights
Width and Depth are the outside footprint, so subtract two thicknesses to get the interior your pad sits in. Back height sets the tall panel the notes lean against, and Front height sets the low lip. The gap between them is the slope on the side walls. Thickness must match your sheet because every finger joint is derived from it.
Step 2 - The slope
- A big difference between Back height and Front height gives a steep, easy-to-read slope.
- A small difference gives a shallow tray that holds taller pads more upright.
- The front height is automatically kept below the back height so the trapezoid sides always slope forward.
- Finger width controls the joint tab size where the panels meet.
Step 3 - Check the assembly
Switch to the Assembled 3D tab and orbit the holder to judge the slope and make sure the front lip is low enough to grab a note but tall enough to hold the stack. The flat SVG view shows the back, front, floor, and both sloped sides laid out for cutting.
Choose Your Build Method
Before you cut
- Measure your sheet with calipers and set Thickness to what you measured, not the label value.
- Confirm the interior width and depth suit your pad before cutting a full sheet.
- Run a quick joint test on the floor and one side wall so the sloped edge seats cleanly.
Glue up
- Dry fit everything first. The two side walls are mirror trapezoids, so check you have one of each orientation.
- Glue the back, front, and sides to the floor, keeping the back panel square while the glue grabs.
- Clamp gently and let it cure before loading a pad.
Make It Yours
- Engrave a name or a to-do heading on the tall back panel before cutting.
- Widen the footprint to hold two pads side by side.
- Lower the back height for a flat business-card or coaster tray instead of a note holder.
New free tools, every month.
New laser cutting tools, what's coming next, and features we're building right now. Only MyLaserTools.com news. No spam, ever.
© 2026 MyLaserTools.com. All rights reserved.