Wide two-layer toppers with the Layered Cake Topper (Two Stakes)
Difficulty: intermediate. Time: 20 to 30 minutes of design and cutting, plus assembly. Best methods, in order: laser cutting, 3D printing.
Past about 160 mm wide, a single-stake topper becomes a seesaw: one bump and the whole phrase tilts into the frosting. The two-stake layout plants a support under each end, which is how wide "happy birthday Alexandra" toppers stay parade-straight all party long.
Like its single-stake sibling, this tool generates a connected text layer plus a contrasting outline backer in perfect registration; the two stakes grow from the backer. Cut the layers from different materials and bond, or print the multi-layer 3MF in two colors.
What You'll Need
- Laser cutting: laser cutter, two contrasting 3 mm sheets (acrylic glitter plus solid, or two laser-grade plywood tones), 3M tape for fog-free layer bonding
- 3D printing: an FDM printer with two colors (multi-material or manual swap)
Step 1 - Type your phrase
Open the tool and enter the phrase; this layout earns its keep on longer text, so spell the whole name out. Pick a script font, set Font Size, and add a symbol with Symbol size if the composition wants one.
Step 2 - Place the stakes
- Text Width sets the span; two stakes comfortably carry 180 to 250 mm phrases.
- Left Stake Offset X and Right Stake Offset X slide each stake independently; land each one under a solid stretch of the outline, roughly a quarter in from each end.
- Stakes Offset Y raises or lowers both stakes together; Stake Width and Stake Height size the picks.
- Text Offset X/Y fine-tunes the text within its backer outline.
Step 3 - Export
Download the color-coded two-layer SVG, or the multi-layer STL/3MF for two-color printing.
Choose Your Build Method
Cutting and assembly
- Split the SVG layers by color into two cut jobs.
- Cut the outline layer with both stakes from the statement sheet, the text layer from the contrast sheet.
- Bond with 3M 467 tape applied to the text layer, then registered onto the backer; the matching silhouettes self-locate.
- Check both stakes are coplanar on a flat table before the tape grabs for good.
- Insert both stakes into the cake simultaneously with even pressure so the span does not rack.
Make It Yours
- "happy birthday" plus a long name across a sheet cake, the use case this layout was born for.
- Wedding: both first names joined by an ampersand, spanning the top tier.
- Mirror gold backer under matte black text for a New Year's Eve cake.
- Baby shower phrase in pastel glitter with a moon symbol between words.
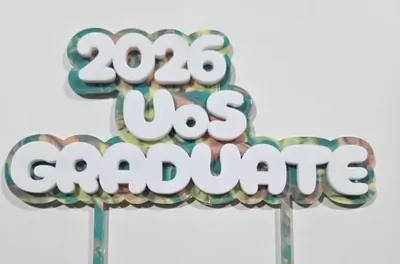
- Graduation: name over the year, stakes hidden under the gown-colored backer.
- Cut a third accent layer for one hero word and stack it proud of the rest.
- Reuse the design minus stakes as a wall phrase by exporting after zeroing stake height.
- For short single names, switch to the single-stake layered tool and save material.
New free tools, every month.
New laser cutting tools, what's coming next, and features we're building right now. Only MyLaserTools.com news. No spam, ever.
© 2026 MyLaserTools.com. All rights reserved.