3D printing a raised lake relief with the Raised Lake Relief preset
Difficulty: Easy. Time: about a 2–4 hour print plus a filament swap or two. Intended method: 3D printing (FDM) - export 3MF for multicolor or STL for a single color. It also laser-cuts if you want a flat version.
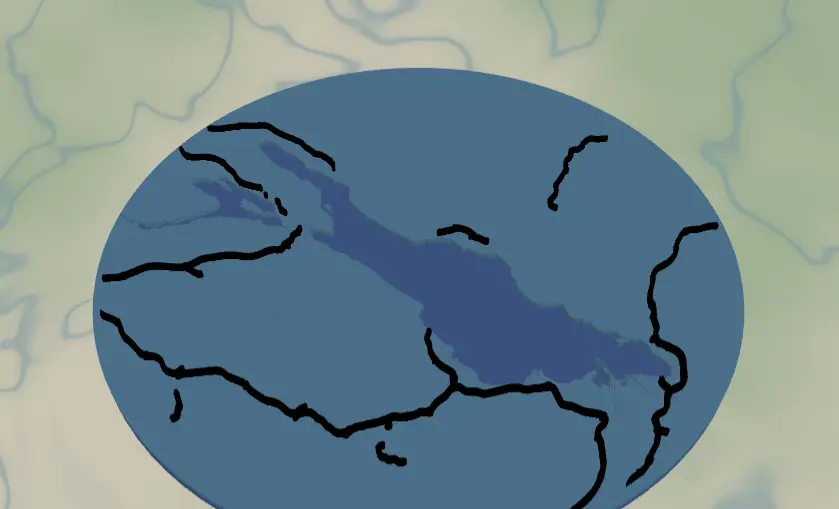
This is the 3D-print sibling of the Lake Map. Instead of gluing up flat plates on a laser, you print a single stacked relief: a solid backplate, the land plate with the lake cut out as a recessed pool, and the road network standing proud on top as raised ridges. It ships framed on Lake Constance and works for any lake with a recognizable shoreline.
Because these layers print as real solid bodies, the roads are deliberately fat (width 6–7) so they survive as printable ridges rather than the hairline strokes a laser would score. Score/line layers do not 3D-print well - a centerline has no width and nothing for the nozzle to lay down - so everything here is built as Solid bodies stacked on a Cut outline.
What You'll Need
3D printing (intended)
- Any FDM printer; PLA or PETG
- Filament in 3 colors for the full multicolor look: blue (lake/recess), a land color (natural/white/wood-tone), and black (roads) - or a single color if you'll paint
- A slicer that accepts 3MF (Bambu Studio, PrusaSlicer, OrcaSlicer)
- Optional: clear or silk blue filament to pour-fill the lake recess for a glassy water look
Optional flat laser version
- 3 mm laser-grade plywood for the land plate and roads
- 3 mm blue acrylic for the backplate, glue, weights
Step 1 - Start from the preset
Open the Raised Lake Relief preset. It loads on Lake Constance at zoom ~9 - a regional view, wide enough to fit a whole large lake plus the towns around it. Search your lake and adjust: zoom 9–10 for big lakes (Tahoe, Constance, Michigan bays), 11–12 for small cottage lakes. The circle crop uses 90% of the frame, so keep the whole shoreline comfortably inside the circle preview.
Step 2 - Tune the layers
Three layers, top to bottom:
- Roads - Solid bodies. Motorways (width 7), motorway links and primary roads (width 6), all black. On a 3D print these become raised ridges sitting proud of the land, so the widths are bumped up from the laser preset to keep them printable. If the area around your lake is sparse, that's fine - the lake is the hero.
- Water - Solid mode with the lake (fill
#4EA8DEin preview) subtracted from the land plate, so the lake prints as a recessed pool below the land surface. This is the piece that defines the project. - Backplate - a solid base body,
#2d70cdblue, the physical bottom of the print. In a multicolor 3MF this color shows through the lake recess as your water.
A 10-unit global border insets everything from the circle edge so roads don't run off the rim, and gives the print a clean raised lip.
Step 3 - Export
- 3D printing (multicolor): export the 3MF - the layers arrive pre-stacked with their colors (blue plate, land, black roads), ready to assign filaments in the slicer.
- 3D printing (single color): export the STL if you'll print in one filament and paint, or do a manual filament swap at a layer height for a two-tone look.
- Turn on small-polygon cleanup - regional zoom produces tiny island and pond slivers that are too small to print and just add stringing.
Choose Your Build Method
Print as a stacked relief
- Export the 3MF and open it in your slicer - the blue backplate, the land plate with the lake hole, and the black roads come through pre-stacked as separate objects.
- Assign filaments: blue for the backplate (it shows through the lake recess), a land color for the middle plate, black for the raised roads. With an STL you slice in a single color - either paint afterward or set a manual filament-change at the land-layer height.
- Print flat on the bed with the backplate down - no supports needed, since every body steps upward off the plate.
- 0.2 mm layer height is plenty; drop to 0.12–0.16 mm if you want crisper road edges. The roads stand proud as ridges and the lake reads as a recessed blue pool.
- Scale: 150–200 mm diameter prints cleanly. Below ~120 mm the raised roads start to merge and lose definition, so keep it generous.
- Optional finish: pour a little tinted epoxy or clear/silk blue resin into the lake recess for an instant glassy-water surface.
Make It Yours
- Any lake with personality works: Tahoe, Como, Garda, Lake of the Ozarks' dragon sprawl, your family's cottage lake.
- Pour tinted epoxy into the lake recess instead of relying on the backplate color - instant glassy water in the 3D print.
- Single-color print in natural PLA, then dry-brush the raised roads with paint to pop them.
- Palette swap in the slicer: walnut-tone land, deep navy
#0E4C66plate, roads in white. - Shrink to ~90 mm, add a hanger hole, and you have a lake-house ornament you can batch-print.
- Add a heart icon on the family dock location before exporting so it prints as its own little raised marker.
- Make a set: the same lake at zoom 9, 11, and 13, printed as a triptych zooming into the cabin.
New free tools, every month.
New laser cutting tools, what's coming next, and features we're building right now. Only MyLaserTools.com news. No spam, ever.
© 2026 MyLaserTools.com. All rights reserved.