Making a lake depth chart with the Lake Depth Chart preset
Difficulty: Medium. Time: 2–3 hours including glue-up. Best methods, in order: laser cutting (the classic), 3D printing, UV print.
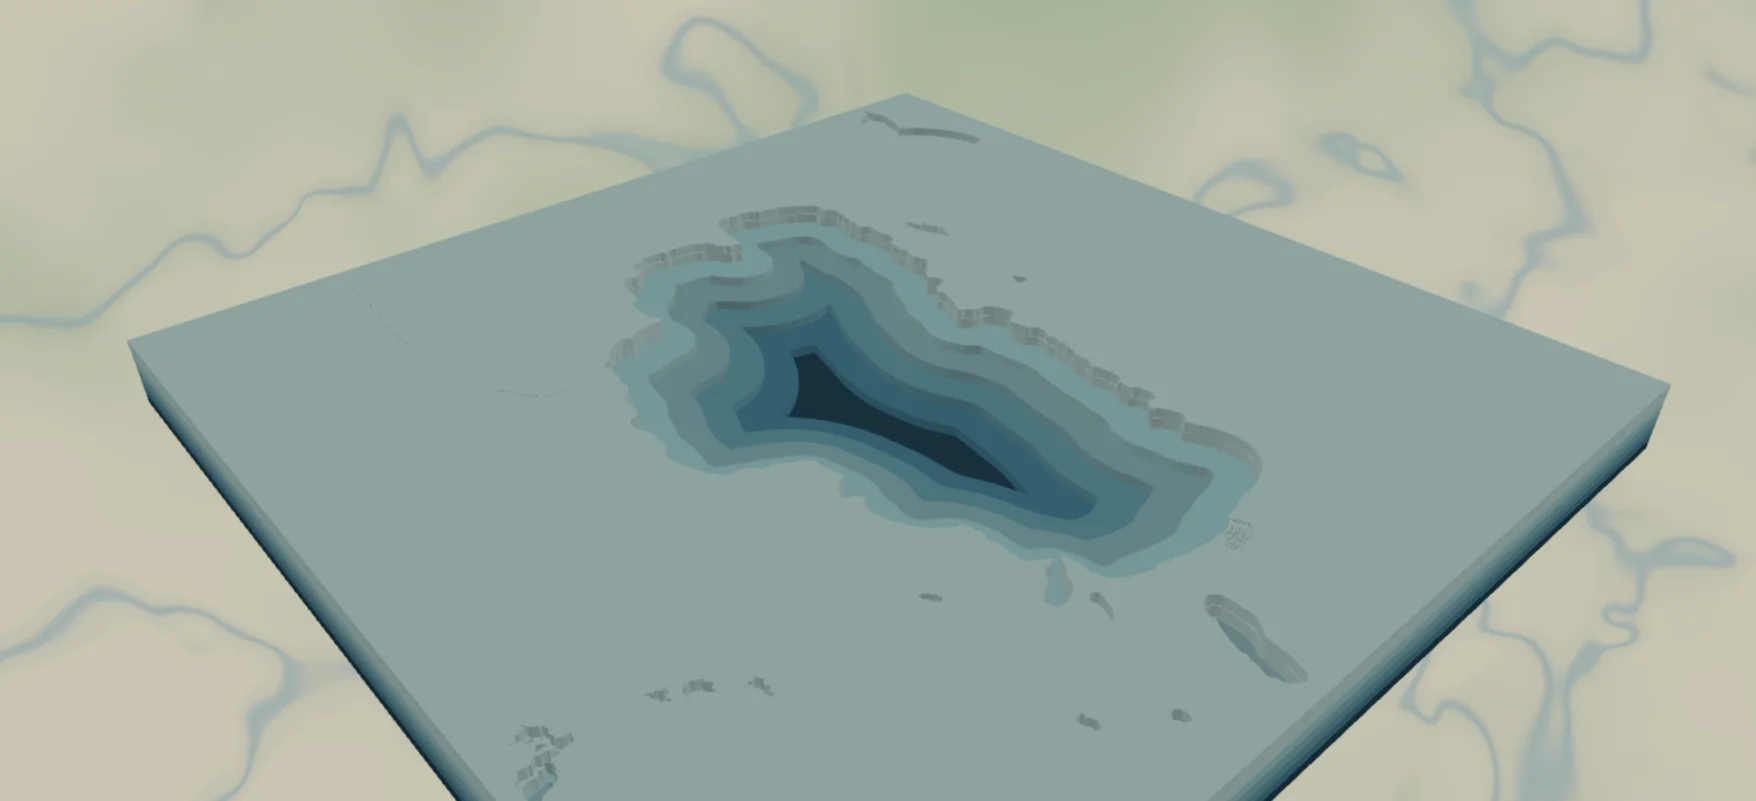
This is the layered bathymetric chart you see in lake houses: a shore plate on top, five depth bands stepping down through teals, and a deep navy floor at the bottom. The preset loads on Lake Tahoe and adapts to any lake with depth data. It's one of the most giftable projects in the tool.
What You'll Need
Laser cutting
- 6 sheets of 3 mm laser-grade plywood (shore plate + 5 depth bands) - or 5 shades of blue acrylic for the bands if you're feeling fancy
- 1 backplate sheet, painted or stained dark (
#0E4C66deep navy in the preset) - Laser cutter, glue, weights, masking tape
3D printing
- FDM printer; multicolor (3MF) strongly recommended for the depth ramp, or single color + paint
- 3MF-capable slicer
UV print / sublimation
- High-res PNG, flat blank - flat it reads as a vintage NOAA-style chart
Step 1 - Start from the preset
Open the Lake Depth Chart preset. It loads on Lake Tahoe at zoom 9.8 - the whole lake fills the square frame. Search your lake and zoom so the entire shoreline fits with a margin of land around it (zoom 9–10 for big lakes, 11–13 for small ones). Note: depth comes from a modeled approximation for most lakes, and from real charted surveys for a growing set of major lakes, so when you add the layer you can pick Simplified or Advanced. Major lakes are well covered; tiny ponds may show no bands. If the preview shows a flat lake with no rings, there's no data there, so pick a better-surveyed lake.
Step 2 - Tune the layers
Three groups, top to bottom:
- Shore plate - the water layer with invert as holes: a full plate with the lake cut out, the land around your lake. Preview color
#DDF3F1. This is the top layer and the face of the piece. - Lake depth - bathymetry with invert as holes, five bands from
bathymetryBand1(#DDF3F1, shallow) through#B7E3E4,#8CCFD7,#5DB7CCtobathymetryBand5(#2F96B6, deep). Each is a plate with the deeper water removed, so the lake bed steps down. Heads-up: band 1 shares its color with the shore plate - fine for layered builds, but recolor one of them (try#CFEAE6for band 1) if you're doing a flat print. - Backplate -
#0E4C66deep navy, the deepest point of the lake.
Step 3 - Export
- Laser: per-layer SVG ZIP, inversion left on, small-polygon cleanup on (depth contours produce slivers along steep shores). Add a Hanger hole ring if it'll hang from a hook.
- 3D printing: 3MF for the color ramp; STL for single color.
- UV print: high-res PNG; recolor band 1 first (see above) so the shallowest step shows.
Choose Your Build Method
Laser cutting
- Cut the Backplate from your darkest material.
- Cut the five Lake depth plates, deepest (band 5, smallest hole... largest depth) to shallowest. Pencil the band number on each back - they nest and are easy to mix up.
- Cut the Shore plate last - it's the visible face, so use your cleanest sheet.
- Dry-fit: backplate → band 5 → 4 → 3 → 2 → 1 → shore plate. Check against the on-screen chart.
- Glue bottom-up, weight it, then sand the outer edges flush in one pass so the stack looks like a solid block. If you cut the bands from acrylic, 3M tape 467 or 468 bonds them cleanly; 300LSE suits harder materials.
- Finish with matte clear; paint or stain band edges before assembly if you cut everything from one wood.
Make It Yours
- Famous deep lakes shine: Tahoe, Crater Lake (nearly concentric rings!), Superior bays, Loch Ness.
- Swap the teal ramp for navy-to-ice:
#0B2E4F,#15507E,#2E78A6,#6FA8C9,#B8D8E8. - Stain the shore plate walnut and leave the bands natural for the classic lake-house look.
- Engrave the lake name, max depth, and elevation on the shore plate before assembly.
- Add a heart icon over the family beach or marina.
- Ornament version: 100 mm circle export shape + Hanger hole ring.
- Pour clear epoxy over the assembled basin for a glassy, bar-top finish.
New free tools, every month.
New laser cutting tools, what's coming next, and features we're building right now. Only MyLaserTools.com news. No spam, ever.
© 2026 MyLaserTools.com. All rights reserved.