

Making funny door signs with the Door Knob Hanger Generator
Difficulty: easy. Time: 5 minutes design, minutes to cut or print. Best method: laser cutting acrylic or 3D printing.
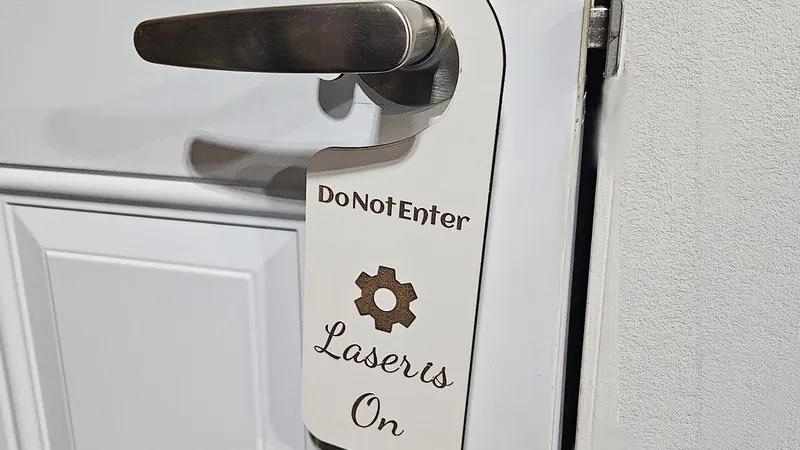
Every workshop, bedroom, and gaming den needs a sign for the door. This tool starts from a classic knob-hanger silhouette with a circular knob notch at the top, and drops in a set of ready-made funny presets - DO NOT ENTER / Laser Is On, GAMING ZONE / enter at your own risk, SHHH / nap in progress, and more - each with a matching symbol. Every preset is just a starting point: edit the top line and bottom line, give each its own font, size, and vertical position, and swap the centre symbol from the icon library. The text and symbol export as an engrave layer over the cut outline, so the sign reads cleanly whether you cut it, print it flat, or print it in two colours.
What You'll Need
- Material: 3 mm acrylic, plywood, or leatherette for laser cutting; PLA or PETG for 3D printing
- Laser or 3D printer: any diode or CO2 laser, or any FDM or resin printer
- Hanging: nothing extra - the knob notch drops straight over a door handle
Step 1 - Start from a funny sign
Pick one of the Funny Signs presets to load both lines of text and a matching symbol, then set the panel width and height. The knob notch stays sized to a standard door handle at any panel size.
Step 2 - Make it your own
- Edit the Top Text and Bottom Text - each has its own font picker, size, and vertical offset, and both are centred automatically.
- Toggle the Symbol and size it to sit between the two lines.
- Keep the top line short and bold and the bottom line as the punchline for the best sign look.
- Set the thickness on the 3D Preview tab for STL and 3MF export.
Step 3 - Export
Download the SVG for laser cutting (cut the outline and knob notch, engrave the text and symbol), or export STL / 3MF for 3D printing. The 3MF keeps the panel and raised text as two coloured parts so a multi-material printer prints the lettering in a contrasting colour.
Choose Your Build Method
Laser on acrylic or wood
- Engrave the text and symbol first, then cut the outline and knob notch last.
- On two-tone acrylic or leatherette the engrave reveals the core colour for instant contrast.
- Round the notch cut so it slips over the handle without a sharp edge.
- Cut a few at once - funny signs make quick, popular craft-fair sellers.
Make It Yours
- Write an inside joke for a specific door - a sibling's name, a pet's room, a home office.
- Make a matching pair: DO NOT DISTURB on one side, COME IN on a flip sign.
- Swap the symbol per room - a controller for the gaming den, a coffee cup for the kitchen.
- Print in glow-in-the-dark filament for a bedroom door sign kids love.
- Size it up for a nursery welcome sign or down for a locker tag.
- Cut a batch of the funniest presets as ready-to-sell stock for markets.
New free tools, every month.
New laser cutting tools, what's coming next, and features we're building right now. Only MyLaserTools.com news. No spam, ever.
© 2026 MyLaserTools.com. All rights reserved.