
Making a name emblem with the Custom Car Badge Generator
Difficulty: easy. Time: 10 minutes. Methods: laser cutting or 3D printing.
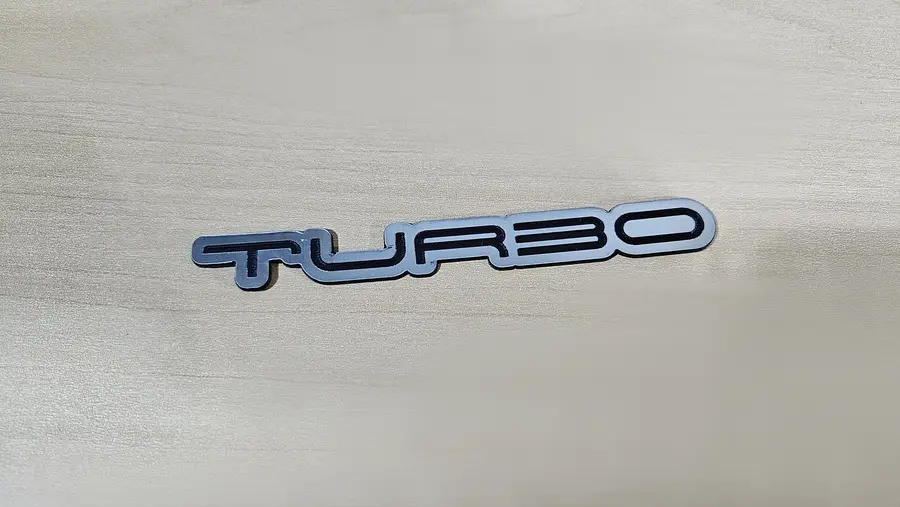
Custom car badges are the little emblems you see on trunks, bikes, and toolboxes. This tool builds one from your text: the word becomes the top layer and an outlined backing grows automatically behind it, so the finished piece reads as a proper two-tone badge.
Turn Connect Letters on for a flowing script that cuts as one connected piece, or off for separate block letters held together by the backing.
What You'll Need
- Two contrasting sheets, for example double-color acrylic, brushed gold engraves black
- A laser, or an FDM printer with two filament colours
- Adhesive (VHB tape or acrylic glue) to mount the finished badge
Step 1 - Type the word
Set your Units and type the text. Pick a font; bold condensed and script fonts both look the part. Toggle Connect Letters for a joined script look or leave it off for separate letters.
Step 2 - Backing, symbol, and colours
Use Outline Size to grow the backing layer behind the letters, add a symbol if you want, then set the backing colour and text colour so the two layers contrast.
Choose Your Build Method
Cut and stack
Download the SVG. The backing and the letters are separate colour-coded layers: cut each from its own material, then glue the letters onto the backing.
Make It Yours
- Car names, nicknames, or trim badges like TURBO, GT, or 4x4
- Brushed gold or chrome acrylic reads like a real metal emblem
- Shrink it for a keyring or scale it up for a wall sign
Keep up with MyLaserTools.
Email me about new tools, product updates, tutorials, and occasional MyLaserTools offers. Unsubscribe at any time.
© 2026 MyLaserTools.com. All rights reserved.