Building a miniature scene with the Coffee Shop Diorama Generator
Difficulty: medium. Time: 1-2 hours plus decorating. Best methods: laser cutting in 3 mm plywood, or 3D printing the whole frame.
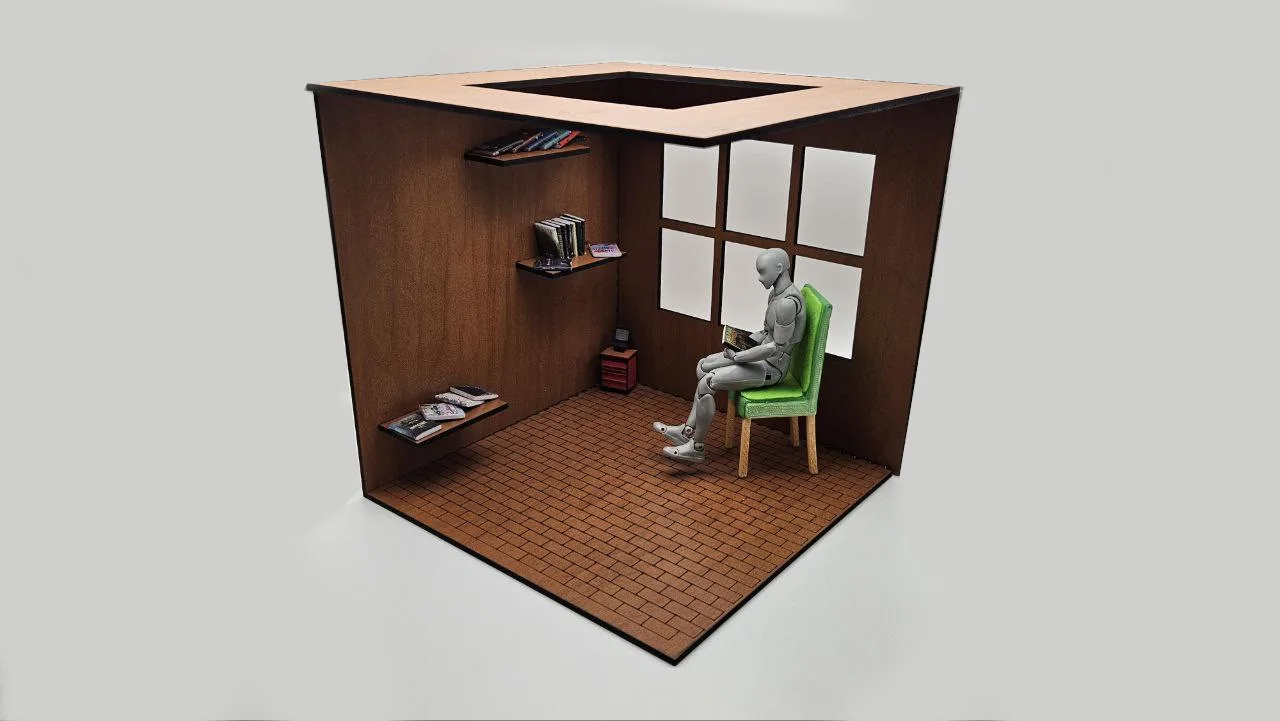
A diorama frame is the stage for a miniature world: a coffee shop, a bookstore, a plant nursery, a tiny bakery. This generator builds the architecture so you can focus on the fun part. You get an open-front room with two walls, a floor, and an optional skylit ceiling, all joined with finger joints, plus built-in openings for windows and slots for real shelves that lock into the walls.
The texture system is what sells the scene. Floors, walls, and ceiling can each carry an engraved pattern like bricks, parquet, fish scales, or hexagons, so the room looks finished the moment it comes off the laser.
What You'll Need
- Laser: 3 mm laser-grade plywood for the structure; scrap clear acrylic if you want glazed windows or a skylight pane
- 3D printing: any FDM printer with a bed that fits your scene footprint, one or two filament colors
- Wood glue for the laser version
- Miniatures, LED fairy lights, and scale-model props for set dressing
Step 1 - Frame the scene
Open the tool, set your Units, and dial in the Scene Dimensions (Width, Depth, Height). A 150-200 mm wide room is a comfortable size for standard dollhouse-adjacent props. Under Material, enter your measured sheet thickness and tune Finger Width and Finger Spacing the same way you would for a box. Under Roof, toggle the Ceiling on or off, and enable the Skylight with its own width and depth if you want light pouring in from above.
Step 2 - Add the architecture
- Windows: toggle Add Windows, choose the wall (Left, Back, or Both), pick a style (Square, 2x2, or 3x2 panes), then size and position them with Window Width, Window Height, and the horizontal and vertical position sliders.
- Shelves: set the Number of Shelves, the wall they mount on, and their width and depth. Shelves get real slots in the wall, so they carry actual weight: tiny cups, books, plants.
- Name Plaque: toggle it on, type your Store Name, pick a font and an optional symbol, and size the plaque. This becomes the storefront sign.
- Textures: assign a pattern to the Floor, Back Wall, Left Wall, and Ceiling independently. Choices include Bricks, Hexagons, Fish Scales, Triangles, Chevrons, Parquet, Maze, and Running Bond, each with a scale slider. Brick walls plus parquet floor is the classic cafe combination.
Step 3 - Export
For the laser, download the SVG: textures export as engrave layers and the part outlines, joints, window openings, and shelf slots as cut lines. Face Spacing controls the gap between parts in the layout. For 3D printing, download STL or 3MF instead and the whole frame exports as printable geometry.
Choose Your Build Method
Cut, engrave, assemble
- Run the engrave pass first for all textures and the plaque lettering, then the cut pass.
- Dry-fit the floor, back wall, and left wall. The finger joints hold the right angle on their own while you check alignment.
- Slide the shelves into their wall slots before final glue-up if the shelf ends are captive.
- Glue the corner joints sparingly and add the ceiling last so you can still reach inside.
- Optional: cut a clear acrylic pane slightly larger than the skylight opening and glue it inside the ceiling for a glazed roof window.
Make It Yours
- Swap the plaque to a family name and build a tiny replica of someone's real favorite cafe as a gift.
- Run warm-white LED fairy lights through the skylight opening for a cozy evening-shop glow.
- Make a bookstore: maximum shelves on both walls, Running Bond floor, and a serif plaque font.
- Build a seasonal scene per quarter: a flower shop in spring, ice cream bar in summer, haunted apothecary in October.
- Use Fish Scales on the back wall at small scale for a mermaid-themed bath shop.
- Pair it with the Book Nook Case Generator and build the diorama as the insert for a shelf-sized nook.
- Print or cut props with the Shape Generator (tiny hearts, stars, trees) to dress the shelves.
New free tools, every month.
New laser cutting tools, what's coming next, and features we're building right now. Only MyLaserTools.com news. No spam, ever.
© 2026 MyLaserTools.com. All rights reserved.