Making an ocean depth chart with the Coastal Depth Chart preset
Difficulty: Medium. Time: 2–3 hours including glue-up. Best methods, in order: laser cutting (the classic), 3D printing, UV print.
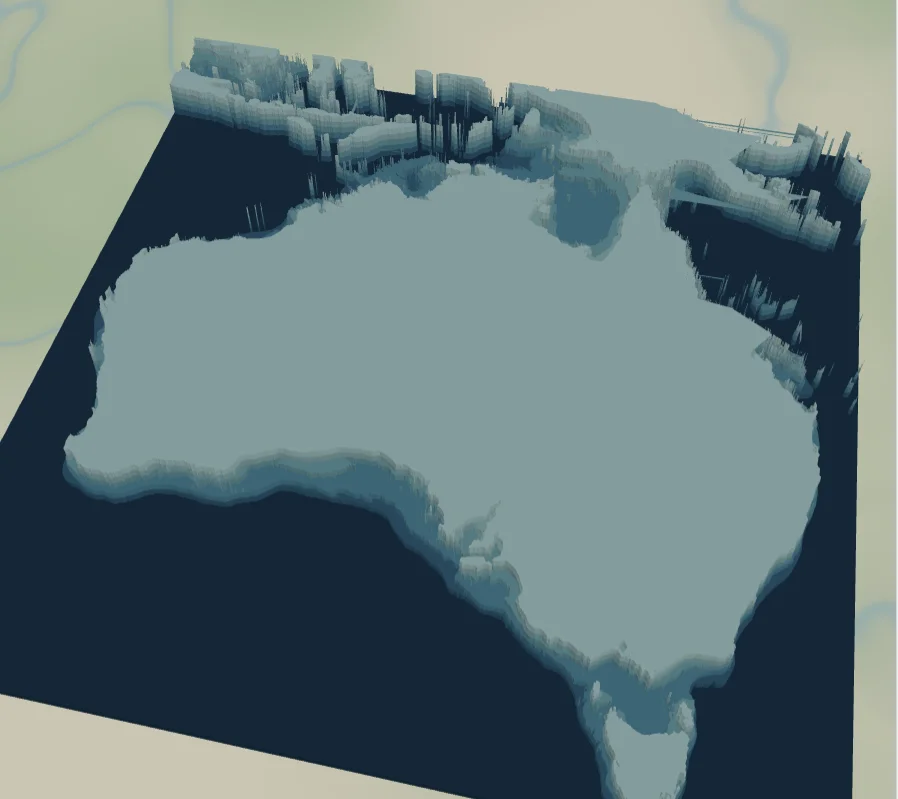
This is the bathymetric depth chart, pointed at the sea instead of a lake: five ocean depth bands stepping down through teals to a deep navy floor at the bottom. The preset loads on Australia and its surrounding seas, where the continental shelf and ocean depth bands ring the whole coast, and it adapts to any island or coastline with depth data.
What You'll Need
Laser cutting
- 5 sheets of 3 mm laser-grade plywood (the 5 depth bands) - or 5 shades of blue acrylic for the bands
- 1 backplate sheet, painted or stained dark (
#0A3F5Edeep navy in the preset) - Laser cutter, glue, weights, masking tape
3D printing
- FDM printer; multicolor (3MF) strongly recommended for the depth ramp, or single color + paint
- 3MF-capable slicer
UV print / sublimation
- High-res PNG, flat blank - it reads as a vintage nautical chart
Step 1 - Start from the preset
Open the Coastal Depth Chart preset. It loads on Australia at zoom 4.2 - the continent and its surrounding seas fill the square frame. Search your coast and zoom so the shoreline and the surrounding water fit with a margin. Ocean depth comes from real public bathymetry, so coverage is global, but the bands are coarse very close to shore - pick a spot with a real drop-off (an island, a bay, a reef) so the rings read. If the preview shows flat water with no bands, the depth is too uniform there; nudge to a steeper coast.
Step 2 - Tune the layers
Two groups, top to bottom:
- Ocean depth - bathymetry on the Ocean source with invert as holes, five bands from
bathymetryBand1(#CDEBEA, shallow) through#9FD6DB,#6FBFCD,#3F9FBEtobathymetryBand5(#1E6F96, deep). Each is a plate with the deeper water removed, so the sea floor steps down. Band 1 is the visible top face - the shallowest water at the shoreline. - Backplate -
#0A3F5Edeep navy, the deepest water.
Step 3 - Export
- Laser: per-layer SVG ZIP, inversion left on, small-polygon cleanup on (depth contours produce slivers along steep shores). Add a Hanger hole ring if it'll hang.
- 3D printing: 3MF for the color ramp; STL for single color.
- UV print: high-res PNG; recolor band 1 first so the shallowest step shows.
Choose Your Build Method
Laser cutting
- Cut the Backplate from your darkest material.
- Cut the five Ocean depth plates, deepest (band 5) to shallowest. Pencil the band number on each back - they nest and are easy to mix up. Band 1 is the visible face, so use your cleanest sheet for it.
- Dry-fit: backplate → band 5 → 4 → 3 → 2 → 1. Check against the on-screen chart.
- Glue bottom-up, weight it, then sand the outer edges flush so the stack looks like a solid block. For acrylic bands, 3M tape 467 or 468 bonds them cleanly.
- Finish with matte clear; paint or stain band edges before assembly if you cut everything from one wood.
Make It Yours
- Atolls and reef islands shine: Bora Bora, Maupiti, Aitutaki - the lagoon-to-deep drop makes near-concentric rings.
- Swap the teal ramp for navy-to-ice:
#0B2E4F,#15507E,#2E78A6,#6FA8C9,#B8D8E8. - Stain the island plate walnut and leave the bands natural for the classic chart-house look.
- Engrave the island name, coordinates, and a compass rose on the island plate before assembly.
- Ornament version: 100 mm circle export shape + Hanger hole ring.
- Pour clear epoxy over the assembled basin for a glassy, bar-top finish.
New free tools, every month.
New laser cutting tools, what's coming next, and features we're building right now. Only MyLaserTools.com news. No spam, ever.
© 2026 MyLaserTools.com. All rights reserved.