

Building a laser cut moving gear wall clock
Difficulty: easy. Time: 20 minutes design, an afternoon making. Best methods: laser-cut plywood or acrylic.
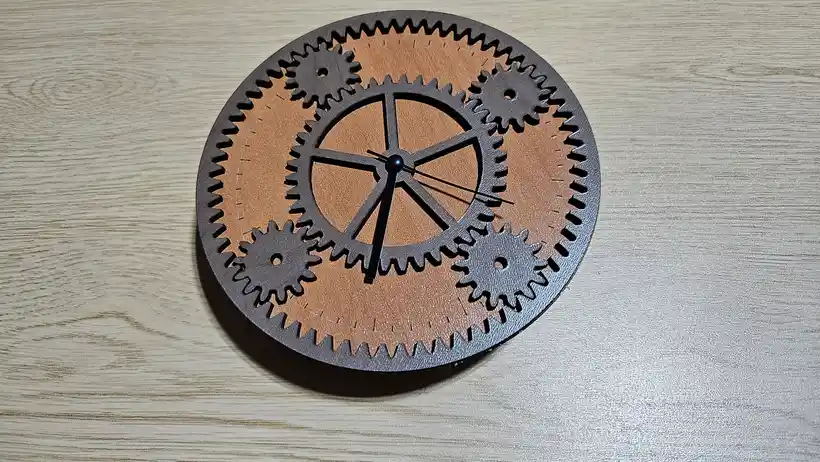
A moving gear wall clock keeps time with an ordinary quartz movement and adds a face full of exposed cog wheels that mesh and turn for the look. There are two ways to power the wheels, and picking one first decides what you cut and how you assemble it.
Planetary uses one movement. A centre sun wheel sits on the movement shaft, planets orbit it, and an outer ring gear rims the backplate. When the shaft turns, the sun spins, the planets orbit and the hands sweep, all from the single movement. The backplate has no holes except the centre bore.
Turning gear cluster uses two independent drives, and it exists because of load. Hanging wooden or acrylic wheels on the timekeeping shaft adds weight and friction that can slow, stall or drain a single quartz movement once the gears get big. So here fixed wheels surround a free centre wheel whose bore is oversized, the main movement's shaft passes through to the hands without ever turning the gears, and a second quartz movement or a small motor behind one wheel drives the whole cluster through extra holes in the backplate. The two drives never load each other.
What You'll Need
Materials
- Wheels: 3 mm birch plywood or 3 mm acrylic, so they stay light and turn freely. Acrylic holds a crisp tooth edge, plywood reads warmer.
- Backplate and ring gear: 3 to 6 mm plywood or acrylic. Thicker reads more solid on a wall.
- Turning cluster only: one pin or short standoff per fixed wheel, to pin each wheel through its backplate hole.
- Fixings: a little glue for the ring gear, and thin washers to space the wheels a hair off the backplate.
Movements
- Planetary: one standard quartz clock movement with a shaft long enough for the backplate plus the wheel stack, and its hand set.
- Turning cluster: the same movement for the hands, plus a second quartz movement or a small geared motor to drive the wheels.
Step 1 - Pick the gear style, then a preset
Set Gear style first. Choose Planetary for one movement that turns everything, or Static gears for a cluster driven by a second movement. Then start from a preset: Steampunk wall clock or Minimal display clock are planetary, and Turning gear cluster or Simple turning gears are static with the second movement already switched on. Turn the Dial on for hour and minute marks, which land on the score layer to engrave rather than cut.
Step 2 - Size the wheels
- Planet wheels / Outer wheels sets how many wheels ring the centre. More reads busy and steampunk, fewer reads clean and modern.
- Sun / Centre wheel teeth and Planet / Outer wheel teeth size the two wheels. In planetary the ring gear is worked out for you as the sun plus twice the planet teeth, so it always meshes.
- Module is the tooth size in millimetres and it sets how big the whole clock is, because the wheels and backplate grow with the teeth.
- In planetary, the sun plus the ring teeth must divide by the planet count for the planets to sit evenly. The generator warns you when they do not.
Step 3 - Set the bore, and the second movement
Set the arbor bore to the threaded shaft on your quartz movement. In planetary this bore carries the shaft that turns the sun and the hands together. In static the centre wheel is drawn with an oversized bore so the shaft passes through to the hands only, and the free-standing Power gears with second clock mechanism toggle adds the extra shaft hole and an engraved footprint behind one wheel where the second movement or motor mounts.
Step 4 - Style the wheels and hands
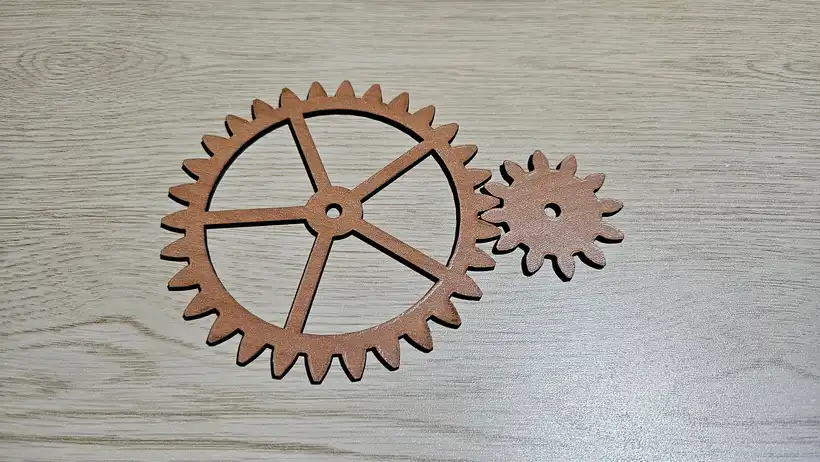
Wheel centres cut the crossings out of each wheel: solid reads heavy and industrial, spokes and lightening holes read lighter, filigree reads ornate, and a lighter wheel turns more easily. Then pick a hand style, spade, baton or pointer, to match the face.
Step 5 - Check it in 3D, then export
Open the 3D tab and press play. In planetary the planets orbit the sun; in static the powered wheel and the cluster spin in place. When it runs cleanly, download the SVG from the Cut sheet layout, which packs the backplate, the ring gear (planetary), the centre wheel, the outer wheels, the hands and a setting gauge side by side.
Choose Your Build Method
What to cut and engrave
- Cut every part outline and every hole: the backplate and its centre bore, the wheels and their centres, the ring gear (planetary), the hands, and the setting gauge.
- Engrave the score layer only: the dial hour and minute marks, and in static mode the round movement footprints that show where each movement mounts. Do not cut these.
- Cut the wheels from 3 mm stock so they are light. The backplate can be 3 to 6 mm.
- Cut wheels one at a time rather than nesting them tightly, since heat build up widens the kerf on later parts, and sand the char off every tooth face so they mesh cleanly.
Assemble a planetary clock (one movement)
- Engrave the dial marks on the backplate, then glue the ring gear onto the rim of the backplate, lining the two circles up.
- Mount the quartz movement behind the backplate with its shaft through the centre bore.
- Fix the sun wheel onto the shaft so it turns with the movement, sitting a washer's thickness off the backplate.
- Drop the planets into the gap between the sun and the ring so their teeth mesh both. They are captured with no pins; for a smoother orbit you can pin them to a thin clear carrier disc.
- Fit the hands on the shaft and set the time. One movement now turns the hands, the sun and the planets together.
Assemble a turning gear cluster (two drives)
- Engrave the dial marks and the two movement footprints on the backplate.
- Mount the main quartz movement at the centre. Its shaft passes through the oversized bore of the free centre wheel to the hands, so it never drives the gears.
- Pin every outer wheel through its matching backplate hole on a pin or short standoff, a hair off the backplate, and check the whole cluster meshes without binding.
- Behind the wheel marked by the second footprint, mount a second quartz movement or a small motor and connect its shaft to that wheel through the extra hole. That wheel drives the rest of the cluster.
- Fit the hands on the main shaft and set the time. The hands and the gears now run on their own movements and never load each other.
Cut settings and fit
Because nothing is load bearing, a light friction fit is all you need. Ream any hole that grips and add a thin washer where a wheel rubs the backplate. Use the setting gauge to mark the wheel spacing rather than measuring, and run the movement for a few minutes to confirm nothing catches before you hang it.
Make It Yours
- Cut the backplate and ring in dark walnut ply and the wheels in birch so the cogs stand out on a wall.
- Cut the wheels in three layers of acrylic in a contrasting colour for a modern look.
- Swap the tick marks for numerals in the design editor once you have the backplate exported.
- In the turning cluster, swap the second quartz movement for a slow geared motor so the wheels turn continuously.
- For gears on their own, including planetary sets and non-circular pairs, use the Gear Generator.
Keep up with MyLaserTools.
Email me about new tools, product updates, tutorials, and occasional MyLaserTools offers. Unsubscribe at any time.
© 2026 MyLaserTools.com. All rights reserved.