

Removing photo backgrounds in your browser with the Background Remover
Difficulty: easy. Time: under a minute per photo. Best for: product photos, print, stickers, and digital use. Your photo stays in your browser.
The Background Remover isolates the subject of any photo and drops the background, giving you a clean cutout you can use anywhere. It runs entirely in your browser, so your image never uploads to a server, and there is no watermark. The first time you use it the tool prepares itself once, then it is cached for instant reuse.
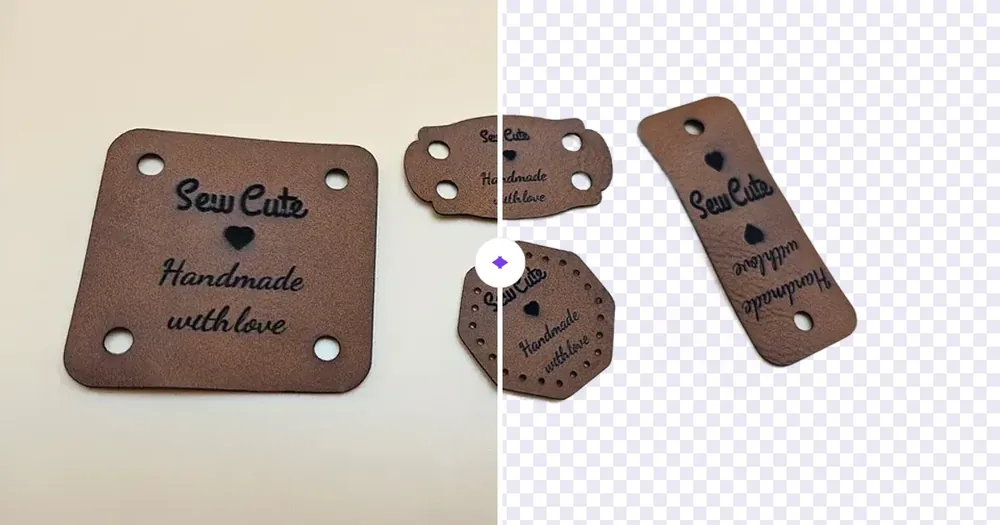
Once the subject is isolated you can keep the background transparent or replace it with a solid colour, a gradient, a repeating pattern, a blurred version of your original photo for a portrait-mode look, or a solid die-cut sticker border. Download a transparent PNG, or send the cutout straight to the Design Editor to keep working on it.
What You'll Need
- A photo you own or have permission to use
- Any modern browser, Chrome or Edge run fastest
- Nothing to install
Step 1 - Upload a photo
Open the tool and drag in a photo, or click to browse. Clear subjects like people, pets, and products on any background work best. The subject is detected automatically and the background disappears in a second or two.
Step 2 - Choose a background
- Transparent keeps the background empty, ideal for logos, stickers, and layering.
- Solid colour drops in any colour for headshots and product shots.
- Gradient blends two colours in a vertical, horizontal, or diagonal sweep.
- Pattern fills behind the subject with dots, stripes, a grid, or a checker in your chosen colours.
- Blur photo keeps your original photo behind the subject and blurs it, like portrait mode.
- Sticker adds a solid die-cut border that hugs the subject, like a printed sticker.
Step 3 - Compare and download
Drag the divider on the preview to compare before and after. When it looks right, click Download PNG for a file that keeps full transparency, or Open in Design Editor to place the cutout on a sheet and keep designing.
Choose Your Build Method
Using the cutout
- For marketplace and store photos, use Solid colour or Blur photo to get a clean, consistent product shot.
- For stickers, use Transparent or the Sticker border, then print and cut, or send it to a print-and-cut machine.
- For sublimation, UV printing, and iron-on transfers, a transparent PNG drops straight into your design software.
- For social posts and thumbnails, try a Gradient or Pattern background to make the subject pop.
- Send the cutout to the Design Editor to combine it with text and shapes from the other tools.
Make It Yours
- Turn a product photo into a clean packshot on a solid brand colour.
- Make a die-cut sticker of a pet or mascot with the sticker border.
- Create a portrait-mode headshot by blurring the original background.
- Build a transparent logo cutout for watermarks and overlays.
- Drop the subject onto a gradient for an eye-catching social banner.
- Cut out multiple products and arrange them on one sheet in the Design Editor.
- Prep a photo for sublimation or UV printing with a clean transparent edge.
Keep up with MyLaserTools.
Email me about new tools, product updates, tutorials, and occasional MyLaserTools offers. Unsubscribe at any time.
© 2026 MyLaserTools.com. All rights reserved.