Printing an organizer with the 3D Print Grid Box Generator
Difficulty: easy. Time: 5 minutes to design, a few hours to print. Method: 3D printing only.
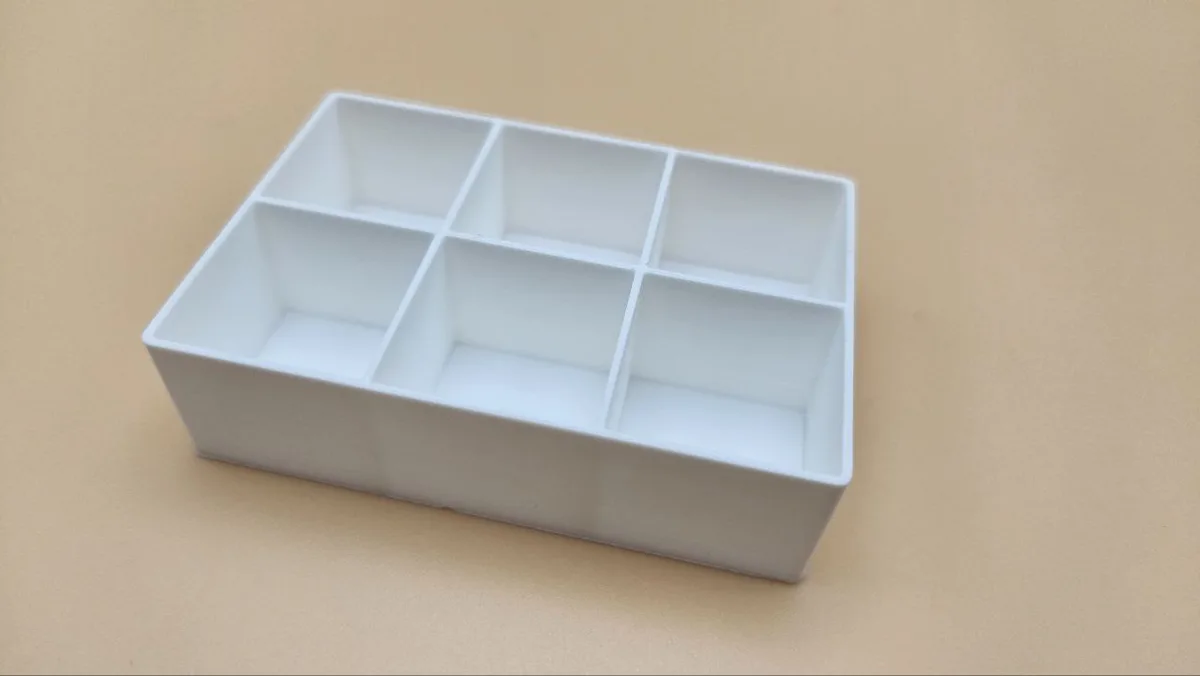
Every workshop, craft desk, and kitchen drawer eventually needs a divided box, and the off-the-shelf ones never have the right cells. This generator builds the exact organizer you need: pick the internal footprint, choose how many rows and columns of compartments, and the dividers are built in as solid geometry, printed in one piece with no assembly.
The killer feature is the live cell size readout. As you change rows, columns, or divider thickness, the tool tells you exactly how big each compartment will be, so you can verify your hex bits, beads, or tea bags will actually fit before you print.
What You'll Need
- Any FDM 3D printer with a bed larger than your organizer footprint
- PLA or PETG filament; one spool prints several small organizers
- Calipers to measure the items the cells must hold
Step 1 - Set the footprint
Open the tool and set Width, Depth, and Height as internal dimensions. If the box must fit a specific drawer, measure the drawer interior and subtract twice the wall thickness to get your numbers. Set Wall Thickness (2 mm is plenty for an organizer) and round the footprint with Corner Radius if you like softer bins.
Step 2 - Design the grid
Set Columns and Rows, then tune Divider Thickness; 1.2-1.6 mm dividers are rigid enough for almost anything and print fast. Watch the cell size readout under the grid controls: it shows the exact width and depth of each compartment after dividers are accounted for. Adjust the grid until the cells match what they need to hold, with a millimeter or two of finger room for picking small parts out.
Step 3 - Export
Download STL or 3MF. The whole organizer is a single watertight mesh, dividers included, oriented flat for printing.
Choose Your Build Method
Slice and print
- Slice at 0.2-0.28 mm layers; organizers are utility prints and coarse layers cut hours off the job.
- Use 2 perimeters and 10 percent infill. The dividers act as internal ribs, so the box is stiffer than it looks.
- No supports needed at any setting; everything is vertical walls on a flat base.
- For deep boxes, enable a brim if your printer struggles with tall thin dividers near the bed edge.
- Print a small 2x2 test grid first if the fit of a specific item matters; ten minutes of test print saves a four-hour reprint.
Make It Yours
- Build a screw-and-bolt sorter with a fine grid (5x4) and a coarse companion box (2x2) for larger hardware.
- Make a tea bag organizer sized to your kitchen drawer: 4 columns, shallow height, sleeves stand on edge.
- Print a jewelry tray with small front cells for rings and long back cells for bracelets by combining two boxes.
- Match the footprint to a popular storage cube and stack several grid heights as drawer inserts.
- Use one organizer per tabletop game inside the original game box; measure the box interior and size to fit.
- Print in bright colors per category: red for resistors, blue for capacitors, and label the edge with a paint pen.
- Need a lid or engraved label on the front? The 3D Print Box Generator is the sibling tool with lids and text.
New free tools, every month.
New laser cutting tools, what's coming next, and features we're building right now. Only MyLaserTools.com news. No spam, ever.
© 2026 MyLaserTools.com. All rights reserved.